How Migrating from Vanilla Redux to Redux Toolkit Improved State Management in Shopify POS
A look at Shopify’s experience improving state management in the Shopify POS app by migrating from a Vanilla Redux codebase to Redux Toolkit one.
In 2015, Shopify began a journey to put mobile-first. Today our mobile apps, powered by next generation APIs, offer the same seamless experience as our web apps.
With the latest advances in the React Native architecture, allowing direct communication between the JavaScript and native sides, we saw an opportunity to provide an integration for Skia, arguably the most versatile 2D graphic engine. We wondered: How should these two pieces of technology play together? Last December, we published the first alpha release of React Native Skia and eighty nine more releases over the past twelve months. We went from offering a model that decently fit React Native and Skia together to a fully-tailored declarative architecture that’s highly performant. We’re going on what kept Christian Falch, Colin Gray, and I busy and a look at what's ahead for the library.
React Native Skia relies on a custom React Renderer to express Skia drawings declaratively. This allows us to use the same renderer on iOS and Android, the Web, and even Node.js. Because this renderer has no coupling with DOM nor Native API, it provides a straightforward path for the library to be integrated onto new platforms where React is available and provided that the Skia host API is available as well.
On React Native, the Skia host API is available via the JavaScript Interface (JSI), exposing the C++ Skia API to JavaScript. On the Web, the Skia API is available via CanvasKit, a WebAssembly build of Skia. We liked the CanvasKit API from the get-go: the Skia team did a great job of conciseness and completeness with this API. It is also based on the Flutter drawing API, showing great relevance to our use-cases. We immediately decided to make our host API fully compatible with it. An interesting side-effect of this compatibility is that we could use our renderer on the Web immediately; in fact, the graphic motions we built for the original project announcement were written using React Native Skia itself via Remotion, a tool to make videos in React.

After the first release we received a great response from the community and we had at heart to ship the library to as many people as possible. The main tool to have Web like development and release agility for React Native is Expo. We coordinated with the team at Expo to have the library working out of the box with Expo dev clients and integrate it as part of the Expo GO client. Part of this integration with Expo, it was important to ship full React Native Web support.

On each platform, different GPU APIs are available. We integrated with Metal on iOS, and OpenGL on Android and the Web. Finally, we found our original declarative API to be quite productive; it closely follows the Skia imperative API and augments it with a couple of sensible concepts. We added a paint (an object describing the colors and effects applied to a drawing) to the original Skia drawing context to enable cascading effects such as opacity and some utilities that would feel familiar to React Native developers. The React Native transform syntax can be used directly instead of matrices, and images can be resized in a way that should also feel familiar.
While the original alpha release was able to run some compelling demos, we quickly identified two significant bottlenecks:
Based on this analysis, it was clear that we needed a model to
That led us to design an API called Skia DOM. While we couldn't come up with a cool name for it, what's inside is super cool.
The Skia DOM API allows us to express any Skia drawing declaratively. Skia DOM is platform agnostic. In fact, we use a C++ implementation of that API on iOS and Android and a JS implementation on React Native Web. This API is also framework agnostic. It doesn’t rely on concepts from React, making it quite versatile, especially for animations.
Behind the scenes, Skia DOM keeps a source of truth of the drawing. Any change to the drawing recomputes the necessary parts of the drawing state and only these necessary parts, allowing for incredible performance levels.

Interestingly enough, when we started with this project, we took a lot of inspiration from existing projects in the Skia ecosystem such as CanvasKit. With Skia DOM, we have created a declarative model for Skia drawing that can be extremely useful for projects outside the React ecosystem.
For React Native Skia to be a healthy open-source project, we focused on extensibility and quality assurance. React Native Skia provides extension points allowing developers to build their own libraries on top of it. And the community is already taking advantage of it. Two projects, in particular, have caught our attention.
The first one extends React Native Skia with the Skottie module. Skottie is a Lottie player implemented in Skia. While we don’t ship the Skottie module part of React Native Skia, we made sure that library developers can use our C++ API to extend it with any module they wish. That means we can keep the size of the core library small while letting developers opt-in for the extra modules they wish to use.

Of all our great open-source partners, none has taken the library on such a crazy ride as the Margelo agency did. The React Native Vision Camera is a project that allows React Native developers to write JavaScript plugins to process camera frames on the UI frame. The team has worked hard to enable Skia image filters and effects to be applied in real time onto camera frames.

React Native Skia is written in TypeScript and C++. As part of the project quality assurance, we heavily rely on static code analysis for both languages. We also built an end-to-end test suite that draws each example on iOS, Android, and Web. Then we check that the drawings are correct and identical on each platform. We can also use it to test for Skia code executions where the result is not necessarily a drawing but can be a Skia object such as a path for instance. By comparing results across platforms, we gained tons of insights on Skia (for instance, we realized how each platform displays fonts slightly differently). And while the idea of building reliable end-to-end testing in React Native can seem daunting, we worked our way up (by starting from node testing only and then incrementally adding iOS and Android) to a test environment that is really fun and has substantially helped improve the quality of the library.

We also worked on documentation. Docusaurus appears to be the gold standard for documenting open-source project and it hasn’t disappointed. Thanks to Shiki Twoslash, we could add TypeScript compiler checking to our documentation examples. Allowing us to statically check that all of our documentation examples compile against the current version, and that the example results are part of the test suite.

Now that we have a robust model for UI thread rendering with Skia DOM, we’re looking to use it for animations. This means butter smooth animation even when the JavaScript thread is not available. We have already prototyped Skia animations via JavaScript worklets and we are looking to deliver this feature to the community. For animations, we are also looking at UI-thread-level integration between Skia and Reanimated. As mentioned in a Reanimated/Skia tutorial, we believe that a deep integration between these two libraries is key.
We’re also looking to provide advanced text layouts using the Skia paragraph module. Advanced text layouts will enable a new range of use cases such as advanced text animations which are currently not available in React Native as well as having complex text layouts available alongside existing Skia drawings.
Can Skia take your React Native App to the next level in 2023? Let us know your thoughts on the project discussion board, and until then: Happy Hacking!
William Candillon is the host of the “Can it be done in React Native?” YouTube series, where he explores advanced user-experiences and animations in the perspective of React Native development. While working on this series, William partnered with Christian to build the next-generation of React Native UIs using Skia.
We all get shit done, ship fast, and learn. We operate on low process and high trust, and trade on impact. You have to care deeply about what you’re doing, and commit to continuously developing your craft, to keep pace here. If you’re seeking hypergrowth, can solve complex problems, and can thrive on change (and a bit of chaos), you’ve found the right place. Visit our Engineering careers page to find your role.
By Matt Bowen, James Lockhart, Cecilia Hunka, and Carlos Pereira
When the new widget announcement was made for iOS 14, our iOS team went right to work designing an experience to leverage the new platform. However, widgets aren’t new to Android and have been around for over a decade. Shopify cares deeply about its mobile experience and for as long as we’ve had the Shopify mobile app, both our Android and iOS teams ship every feature one-to-one in unison. With the spotlight now on iOS 14, this was a perfect time to revisit our offering on Android.
Since our contribution was the same across both platforms, just like our iOS counterparts at the time, we knew merchants were using our widgets, but they needed more.
Table of Contents
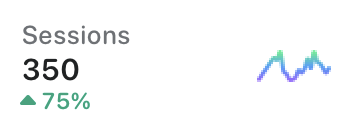
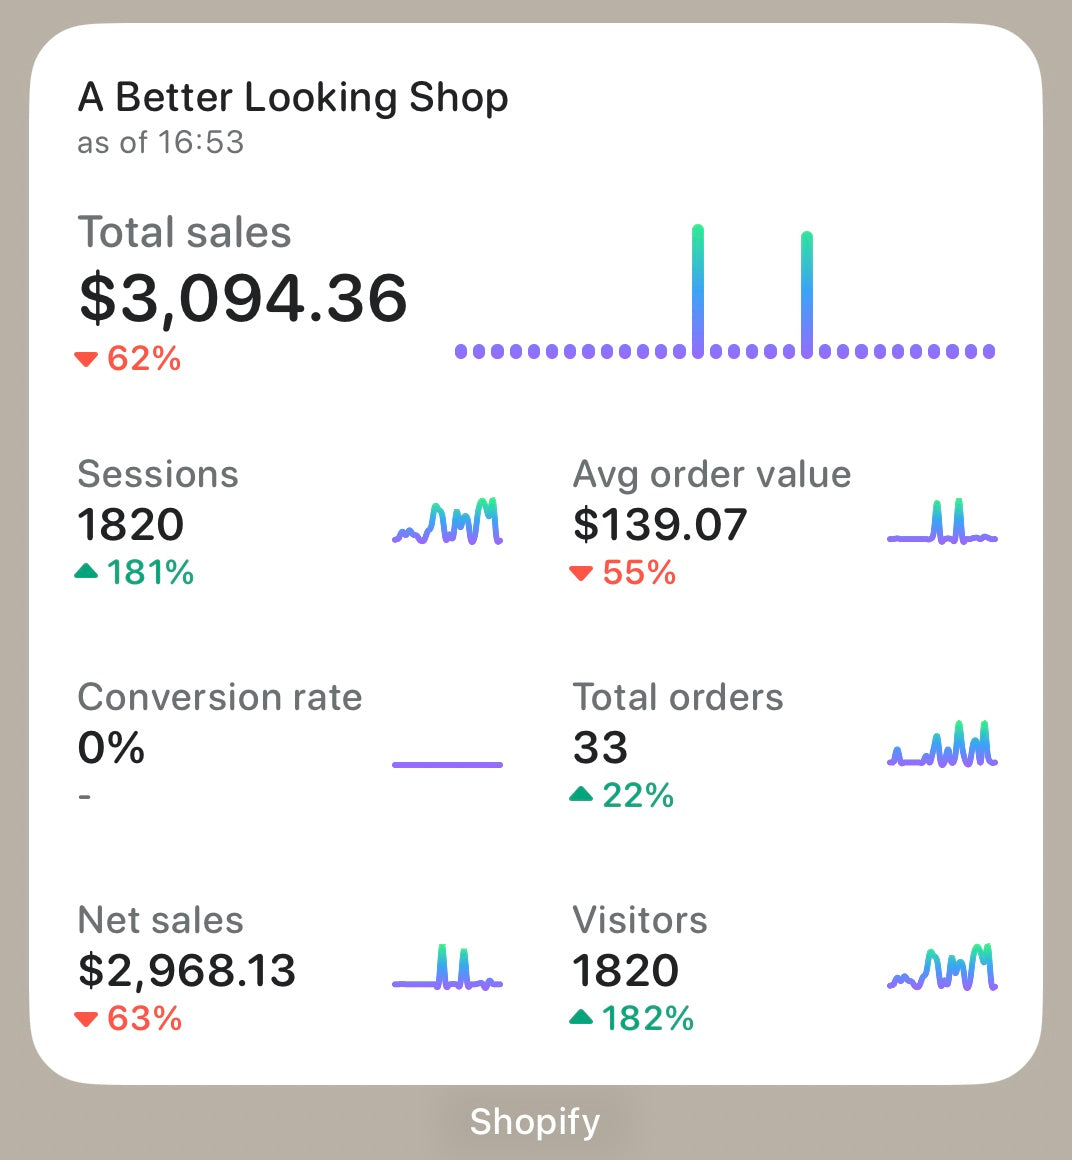
Our widgets mainly focus on analytics that help merchants understand how they’re doing and gain insights to make better decisions quickly about their business. Monitoring metrics is a daily activity for a lot of our merchants, and on mobile, we have the opportunity to give merchants a faster way to access this data through widgets. They provide merchants a unique avenue to quickly get a pulse on their shops that isn’t available on the web.

After gathering feedback and continuously looking for opportunities to enhance our widget capabilities, we’re at our third iteration, and we’ll share with you the challenges we faced and how we solved them.
A couple of years ago Shopify decided to go full on React Native. New development should be done in React Native, and we’re also migrating some apps to the technology. This includes the flagship admin app, which is the companion app to the widgets.
Then why not write the widgets in React Native?
After doing some initial investigation, we quickly hit some roadblocks (like the fact that RemoteViews are the only way to create widgets). There’s currently no official support in the React Native community for RemoteViews, which is needed to support widgets. This felt very akin to a square peg in a round hole. Our iOS app also ran into issues supporting React Native, and we were running down the same path. Shopify believes in using the right tool for the job, we believe that native development was the right call in this case.
When building out our architecture for widgets, we wanted to create a consistent experience on both Android and iOS while preserving platform idioms where it made sense. In the sections below, we want to give you a view of our experiences building widgets. Pointing out some of the more difficult challenges we faced. Our aim is to shed some light around these less used surfaces, hopefully give some inspiration, and save time when it comes to implementing widgets in your applications.
Some types of widgets have data that change less frequently (for example, reminders) and some that can be forecasted for the entire day (for example, calendar and weather). In our case, the merchants need up-to-date metrics about their business, so we need to show data as fresh as possible. Delays in data can cause confusion, or even worse, delay information that could change an action. Say you follow the stock market, you expect the stock app and widget data to be as up to date as possible. If the data is multiple hours stale, you may have missed something important! For our widgets to be valuable, we need information to be fresh while considering network usage.
Widgets can be kept up to date with relevant and timely information by using data available locally or fetching it from a server. The server fetching can be initiated by the widget itself or by the host app. In our case, since the app doesn’t need the same information the widget needed, we decided it would make more sense to fetch it from the widget.
One benefit to how widgets are managed in the Android ecosystem over iOS is the flexibility. On iOS you have limited communication between the app and widget, whereas on Android there doesn’t seem to be the same restrictions. This becomes clear when we think about how we configure a widget. The widget configuration screen has access to all of the libraries and classes that our main app does. It’s no different than any other screen in the app. This is mostly true with the widget as well. We can access the resources contained in our main application, so we don’t need to duplicate any code. The only restrictions in a widget come with building views, which we’ll explore later.
When we save our configuration, we use shared preferences to persist data between the configuration screen and the widget. When a widget update is triggered, the shared preferences data for a given widget is used to build our request, and the results are displayed within the widget. We can read that data from anywhere in our app, allowing us to reuse this data in other parts of our app if desired.
The widget architecture is built in a way that updates are mindful of battery usage, where updates are controlled by the system. In the same way, our widgets must also be mindful of saving bandwidth when fetching data over a network. While developing our second iteration, we came across a peculiar problem that was exacerbated by our specific use case. Since we need data to be fresh, we always pull new data from our backend on every update. Each update is approximately 15 minutes apart to avoid having our widgets stop updating. What we found is that widgets call their update method onUpdate(), more than once in an update cycle. In widgets like calendar, these extra calls come without much extra cost as the data is stored locally. However, in our app, this was triggering two to five extra network calls for the same widget with the same data in quick succession.
In order to correct the unnecessary roundtrips, we built a simple short-lived cache:

With this solution, we reduced unused network calls and system load and avoided collecting incorrect analytics.
We follow a similar approach as we have on iOS. We create a dynamic set of queries based on what the merchant has configured.
For each metric we have a corresponding definition implementation. This approach allows each metric the ability to have complete flexibility around what data it needs, and how it decodes the data from the response.
When Android asks us to update our widgets, we pull the merchants selection from our configuration object. Since each of the metric IDs has a definition, we map over them to create a dynamic set of queries.
We include an extension on our response object that binds the definitions to a decoder. Our service sends back an array of the response data corresponding to the queries made. We map over the original definitions, decoding each chunk to the expected return type.
Similar to iOS, we support three widget sizes for versions prior to Android 12 and follow the same rules for cell layout, except for the small widget. The small widget on Android supports a single metric (compared to the two on iOS) and the smallest widget size on Android is a 2x1 grid. We quickly found that only a single metric would fit in this space, so this design differs slightly between the platforms.
Unlike iOS with swift previews, we were limited to XML previews and running the widget on the emulator or device. We’re also building widgets dynamically, so even XML previews were relatively useless if we wanted to see an entire widget preview. Widgets are currently on the 2022 Jetpack Compose roadmap, so this is likely to change soon with Jetpack composable previews.
With the addition of dynamic layouts in Android 12, we created five additional sizes to support each size in between the original three. These new sizes are unique to Android. This also led to using grid sizes as part of our naming convention as you can see in our WidgetLayout enum below.
For the structure of our widget, we used an enum that acts as a blueprint to map the appropriate layout file to an area of our widget. This is particularly useful when we want to add a new widget because we simply need to add a new enum configuration.
To build the widgets dynamically, we read our configuration from shared preferences and provide that information to the RemoteViews API.
If you’re familiar with the RemoteViews API, you may notice the updateView() method, which is not a default RemoteViews method. We created this extension method as a result of an issue we ran into while building our widget layout in this dynamic manner. When a widget updates, the new remote views get appended to the existing ones. As you can probably guess, the widget didn’t look so great. Even worse, more remote views get appended on each subsequent update. We found that combining the two RemoteViews API methods removeAllViews() and addView() solved this problem.
Once we build our remote views, we then pass the parent remote view to the AppWidgetProvider updateAppWidget() method to display the desired layout.
It’s worth noting that we attempted to use partiallyUpdateAppWidget() to stop our remote views from appending to each other, but encountered the same issue.
One important piece of information on our widget is the last updated timestamp. It helps remove confusion by allowing the merchants to quickly know how fresh the data is they are looking at. If the data is quite stale (say you went to the cottage for the weekend and missed a few updates) and there wasn’t a displayed timestamp, you would assume the data you’re looking at is up to the second. This can cause unnecessary confusion for our merchants. The solution here was to ensure there’s some communication to our merchant when the last update was made.
In our previous design, we only had small widgets, and they were able to display only one metric. This information resulted in a long piece of text that, on smaller devices, would sometimes wrap and show over two lines. This was fine when space was abundant in our older design but not in our new data rich designs. We explored how we could best work with timestamps on widgets, and the most promising solution was to use relative time. Instead of having a static value such as “as of 3:30pm” like our previous iteration. We would have a dynamic date that would look like: “1 min, 3 sec ago.”
One thing to remember is that even though the widget is visible, we have a limited number of updates we can trigger. Otherwise, it would be consuming a lot of unnecessary resources on the device. We knew we couldn’t keep triggering updates on the widget as often as we wanted. Android has a strategy for solving this with TextClock. However, there’s no support for relative time, which wouldn’t be useful in our use case. We also explored using Alarms, but potentially updating every minute would consume too much battery.
One big takeaway we had from these explorations was to always test your widgets under different conditions. Especially low battery or poor network. These surfaces are much more restrictive than general applications and the OS is much more likely to ignore updates.
We eventually decided that we wouldn’t use relative time and kept the widget’s refresh time as a timestamp. This way we have full control over things like date formatting and styling.
Our new widgets have a great deal of configuration options, allowing our merchants to choose exactly what they care about. For each widget size, the merchant can select the store, a certain number of metrics and a date range. This is the only part of the widget that doesn’t use RemoteViews, so there aren’t any restrictions on what type of View you may want to use. We share information between the configuration and the widget via shared preferences.

Android widgets are limited to RemoteViews as their building blocks and are very restrictive in terms of the view types supported. If you need to support anything outside of basic text and images, you need to be a bit creative.
Our widgets support both a sparkline and spark bar chart built using the MPAndroidCharts library. We have these charts already configured and styled in our main application, so the reuse here was perfect; except, we can’t use any custom Views in our widgets. Luckily, this library is creating the charts via drawing to the canvas, and we simply export the charts as a bitmap to an image view.
Once we were able to measure the widget, we constructed a chart of the required size, create a bitmap, and set it to a RemoteView.ImageView. One small thing to remember with this approach, is that if you want to have transparent backgrounds, you’ll have to use ARGB_8888 as the Bitmap Config. This simple bitmap to ImageView approach allowed us to handle any custom drawing we needed to do.
One minor, but annoying issue we encountered throughout the duration of the project is what we like to call “widget flickering.” Flickering is a side-effect of the widget updating its data. Between updates, Android uses the initialLayout from the widget’s configuration as a placeholder while the widget fetches its data and builds its new RemoteViews. We found that it wasn’t possible to eliminate this behavior, so we implemented a couple of strategies to reduce the frequency and duration of the flicker.
The first strategy is used when a merchant first places a widget on the home screen. This is where we can reduce the frequency of flickering. In an earlier section “Making the Widgets Antifragile,” we shared our short-lived cache. The cache comes into play because the OS will trigger multiple updates for a widget as soon as it’s placed on the home screen. We’d sometimes see a quick three or four flickers, caused by updates of the widget. After the widget gets its data for the first time, we prevent any additional updates from happening for the first 60 seconds, reducing the frequency of flickering.
The second strategy reduces the duration of a flicker (or how long the initialLayout is displayed). We store the widgets configuration as part of shared preferences each time it’s updated. We always have a snapshot of what widget information is currently displayed. When the onUpdate() method is called, we invoke a renderEarlyFromCache() method as early as possible. The purpose of this method is to build the widget via shared preferences. We provide this cached widget as a placeholder until the new data has arrived.

Since our first widgets were developed, we added strategic analytics in key areas so that we could understand how merchants were using the functionality. This allowed us to learn from the usage so we could improve on them. The data team built dashboards displaying detailed views of how many widgets were installed, the most popular metrics, and sizes.
Most of the data used to build the dashboards came from analytics events fired through the widgets and the Shopify app.
For these new widgets, we wanted to better understand adoption and retention of widgets, so we needed to capture how users are configuring their widgets over time and which ones are being added or removed.
Unlike iOS, capturing this data in Android is straight-forward. To capture when a merchant adds a widget, we send our analytical event when the configuration is saved. When removing a widget, the widgets built-in onDeleted method gives us the widget ID of the removed widget. We can then look up our widget information in shared preferences and send our event prior permanently deleting the widget information from the device.
When we started development of our new widgets, our application was targeting Android 11. We knew we’d be targeting Android 12 eventually, but we didn’t want the upgrade to block the release. We decided to implement Android 12 specific features once our application targeted the newer version, leading to an unforeseen issue during the upgrade process with widget selection.
Our approach to widget selection in previous versions was to display each available size as an option. With the introduction of responsive layouts, we no longer needed to display each size as its own option. Merchants can now pick a single widget and resize to their desired layout. In previous versions, merchants can select a small, medium, and large widget. In versions 12 and up, merchants can only select a single widget that can be resized to the same layouts as small, medium, large, and several other layouts that fall in between. This pattern follows what Google does with their large weather widget included on devices, as well as an example in their documentation. We disabled the medium and small widgets in Android 12 by adding a flag to our AndroidManifest and setting that value in attrs.xml for each version:
The approach above behaves as expected, the medium and small widgets were now unavailable from the picker. However, if a merchant was already on Android 12 and had added a medium or large widget before our widget update, those widgets were removed from their home screen. This could easily be seen as a bug and reduce confidence in the feature. In retrospect, we could have prototyped what the upgrade would have looked like to a merchant who was already on Android 12.
Allowing only the large widget to be available was a data-driven decision. By tracking widget usage at launch, we saw that the large widget was the most popular and removing the other two would have the least impact on current widget merchants.
We encountered an error when building the new layouts that fit between the original small, medium and large widgets.
After researching the error, we were exceeding the Binder transaction buffer. However, the buffer’s size is 1mb and the error displayed .66mb, which wasn’t exceeding the documented buffer size. The error has appeared to stump a lot of developers. After experimenting with ways to get the size down, we found that we could either drop a couple of entire layouts or remove support for a fourth and fifth row of the small metric. We decided on the latter, which is why our 2x3 widget only has three rows of data when it has room for five.
Now that we have one widget to choose from, we had to rethink what our configuration screen would look like to a merchant. Without our three fixed sizes, we could no longer display a fixed number of metrics in our configuration.
Our only choice was to display the maximum number of metrics available for the largest size (which is seven at the time of this writing). Not only did this make the most sense to us from a UX perspective, but we also had to do it this way because of how the new responsive layouts work. Android has to know all of the possible layouts ahead of time. Even if a user shrinks their widget to a size that displays a single metric, Android has to know what the other six are, so it can be resized to our largest layout without any hiccups.
We also updated the description that’s displayed at the top of the configuration screen that explains this behavior.
On iOS, we capture analytical data when a merchant reconfigures a widget to gain insights into usage patterns. Reconfiguration for Android was only possible in version 12 and due to the limitations of the AppWidgetProvider’s onAppWidgetOptionsChanged() method, we were unable to capture this data on Android.
I’ll share more information about building our layouts in order to give context to our problem. Setting breakpoints for new dynamic layouts works very well across all devices. Google recommends creating a mapping of your breakpoints to the desired remote view layout. To build on a previous example where we showed the buildWidgetRemoteView() method, we used this method again as part of our breakpoint mapping. This approach allows us to reliably map our breakpoints to the desired widget layout.
When reconfiguring or resizing a widget, the onAppWidgetOptionsChanged() method is called. This is where we’d want to capture our analytical data about what had changed. Unfortunately, this view mapping doesn’t exist here. We have access to width and height values that are measured in dp, initially appearing to be useful. At first, we felt that we could discern these measurements into something meaningful and map these values back to our layout sizes. After testing on a couple of devices, we realized that the approach was unreliable and would lead to a large volume of bad analytical data. Without confidently knowing what size we are coming from, or going to, we decided to omit this particular analytics event from Android. We hope to bring this to Google’s attention, and get it included in a future release.
Already having a pair of existing widgets, we had to decide how to transition to the new widgets as they would be replacing the existing implementation.
We didn’t find much documentation around migrating widgets. The docs only provided a way to enhance your widget, which means adding the new features of Android 12 to something you already had. This wasn’t applicable to us since our existing widgets were so different from the ones we were building.
The major issue that we couldn’t get around was related to the sizing strategies of our existing and new widgets. The existing widgets used a fixed width and height so they’d always be square. Our new widgets take whatever space is available. There wasn’t a way to guarantee that the new widget would fit in the available space that the existing widget had occupied. If the existing widget was the same size as the new one, it would have been worth exploring further.
The initial plan we had hoped for, was to make one of our widgets transform into the new widget while removing the other one. Given the above, this strategy would not work.
The compromise we came to, so as to not completely remove all of a merchant’s widgets overnight, was to deprecate the old widgets at the same time we release the new one. To deprecate, we updated our old widget’s UI to display a message informing that the widget is no longer supported and the merchant must add the new ones.

There’s no way to add a new widget programmatically or to bring the merchant to the widget picker by tapping on the old widget. We added some communication to help ease the transition by updating our help center docs, including information around how to use widgets, pointing our old widgets to open the help center docs, and just giving lots of time before removing the deprecation message. In the end, it wasn’t the most ideal situation and we came away learning about the pitfalls within the two ecosystems.
As we continue to learn about how merchants use our new generation of widgets and Android 12 features, we’ll continue to hone in on the best experience across both our platforms. This also opens the way for other teams at Shopify to build on what we’ve started and create more widgets to help Merchants.
On the topic of mobile only platforms, this leads us into getting up to speed on WearOS. Our WatchOS app is about to get a refresh with the addition of Widgetkit; it feels like a great time to finally give our Android Merchants watch support too!
Matt Bowen is a mobile developer on the Core Admin Experience team. Located in West Warwick, RI. Personal hobbies include exercising and watching the Boston Celtics and New England Patriots.
James Lockhart is a Staff Developer based in Ottawa, Canada. Experiencing mobile development over the past 10+ years: from Phonegap to native iOS/Android and now React native. He is an avid baker and cook when not contributing to the Shopify admin app.
Cecilia Hunka is a developer on the Core Admin Experience team at Shopify. Based in Toronto, Canada, she loves live music and jigsaw puzzles.
Carlos Pereira is a Senior Developer based in Montreal, Canada, with more than a decade of experience building native iOS applications in Objective-C, Swift and now React Native. Currently contributing to the Shopify admin app.
Wherever you are, your next journey starts here! If building systems from the ground up to solve real-world problems interests you, our Engineering blog has stories about other challenges we have encountered. Intrigued? Visit our Engineering career page to find out about our open positions and learn about Digital by Design.
By Carlos Pereira, James Lockhart, and Cecilia Hunka
When the iOS 14 beta was originally announced, we knew we needed to take advantage of the new widget features and get something to our merchants. The new widgets looked awesome and could really give merchants a way to see their shop’s data at a glance without needing to open our app.
Fast forward a couple of years, and we now have lots of feedback from the new design. We knew merchants were using them, but they needed more. The current design was lacking and only provided two metrics—also, they took up a lot of space. This experience prompted us to start a new project. To upgrade our original design to better fit our merchant’s needs.
Table of Contents
Our widgets mainly focus on analytics. Analytics can help merchants understand how they’re doing and gain insights to make better decisions quickly about their business. Monitoring metrics is a daily activity for a lot of our merchants, and on mobile, we have the opportunity to give merchants a faster way to access this data through widgets. As widgets provide access to “at a glance” information about your shop and allow merchants a unique avenue to quickly get a pulse on their shops that they wouldn’t find on desktop.

After gathering feedback and continuously looking for opportunities to enhance our widget capabilities, we’re at our third iteration, and we’ll share with you how we approached building widgets and some of the challenges we faced.
A couple years ago Shopify decided to go all in on React Native. New development was done in React Native and we began migrating some apps to the new stack. Including our flagship admin app, where we were building our widgets. Which posed the question, should we write the widgets in React Native?
After doing some investigation we quickly hit some roadblocks: app extensions are limited in terms of memory, WidgetKit’s architecture is highly optimized to work with SwiftUI as the view hierarchy is serialized to disk, there’s also, at this time, no official support in the React Native community for widgets.
Shopify believes in using the right tool for the job, we believe that native development with SwiftUI was the best choice in this case.
When building out our architecture for widgets, we wanted to create a consistent experience on both iOS and Android while preserving platform idioms where it made sense. Below we’ll go over our experience and strategies building the widgets, pointing out some of the more difficult challenges we faced. Our aim is to shed some light around these less talked about surfaces, give some inspiration for your projects, and hopefully, save time when it comes to implementing your widgets.
Some types of widgets have data that change less frequently (for example, reminders) and some that can be forecasted for the entire day (for example, Calendar and weather). In our case, the merchants need up-to-date metrics about their business, so we need to show data as fresh as possible. Time for our widget is crucial. Delays in data can cause confusion, or even worse, delay information that could inform a business decision. For example, let’s say you watch the stocks app. You would expect the stock app and its corresponding widget data to be as up to date as possible. If the data is multiple hours stale, you could miss valuable information for making decisions or you could miss an important drop or rise in price. With our product, our merchants need as up to date information as we can provide them to run their business.
Widgets can be kept up to date with relevant and timely information by using data available locally or fetching it from a server. The server fetching can be initiated by the widget itself or by the host app. In our case, since the app doesn’t share the same information as the widget, we decided it made more sense to fetch it from the widget.
We still consider moving data fetching to the app once we start sharing similar data between widgets and the app. This architecture could simplify the handling of authentication, state management, updating data, and caching in our widget since only one process will have this job rather than two separate processes. It’s worth noting that the widget can access code from the main app, but they can only communicate data through keychain and shared user defaults as widgets run on separate processes. Sharing the data fetching, however, comes with an added complexity of having a background process pushing or making data available to the widgets, since widgets must remain functional even if the app isn’t in the foreground or background. For now, we’re happy with the current solution: the widgets fetch data independently from the app while sharing the session management code and tokens.

The business data and visualizations displayed in the widgets are powered by Reportify, an in-house service that exposes data through a set of schemas queried via ShopifyQL, Shopify’s Commerce data querying language. It looks very similar to SQL but is designed around data for commerce. For example, to fetch a shops total sales for the day:
iOS Widgets' architecture is built in a way that updates are mindful of battery usage and are budgeted by the system. In the same way, our widgets must also be mindful of saving bandwidth when fetching data over a network. While developing our second iteration we came across a peculiar problem that was exacerbated by our specific use case.
Since we need data to be fresh, we always pull new data from our backend on every update. Each update is approximately 15 minutes apart to avoid having our widgets stop updating (which you can read about why on Apple’s Developer site). We found that iOS calls the update methods, getTimeline() and getSnapshot(), more than once in an update cycle. In widgets like calendar, these extra calls come without much extra cost as the data is stored locally. However, in our app, this was triggering two to five extra network calls for the same widget with the same data in quick succession.
We also noticed these calls were causing a seemingly unrelated kick out issue affecting the app. Each widget runs on a different process than the main application, and all widgets share the keychain. Once the app requests data from the API, it checks to see if it has an authenticated token in the keychain. If that token is stale, our system pauses updates, refreshes the token, and continues network requests. In the case of our widgets, each widget call to update was creating another workflow that could need a token refresh. When we only had a single widget or update flow, it worked great! Even four to five updates would usually work pretty well. However, eventually one of these network calls would come out of order and an invalid token would get saved. On our next update, we have no way to retrieve data or request a new token resulting in a session kick out. This was a great find as it was causing a lot of frustration for our affected merchants and ourselves, who could never really put our finger on why these things would, every now and again, just log us out.
In order to correct the unnecessary roundtrips, we built a simple short-lived cache:
With this solution, we reduced unused network calls and system load, avoided collecting incorrect analytics, and fixed a long running bug with our app kick outs!
When fetching the data from the Analytics REST service, each widget can be configured with two to seven metrics from a total of 12. This set should grow in the future as new metrics are available too! Our current set of metrics are all time-based and have a similar structure.
But that doesn’t mean the structure of future metrics will not change. For example, what about a metric that contains data that isn’t mapped over a time range? (like orders to fulfill, which does not contain any historical information).
The merchant is also able to configure the order the metrics appear, which shop (if they have more than one shop), and which date range represents the data: today, last 7 days, and last 30 days.
We had to implement a data fetching and decoding mechanism that:
A simplified version of the solution is shown below. First, we create a struct to represent the query to the analytics service (Reportify).
Then, we create a class to represent the decodable response. Right now it has a fixed structure (value, comparison, and chart values), but in the future we can use an enum or different subclasses to decode different shapes.
Next, we create a response wrapper that attempts to decode the metrics based on a list of metric types passed to it. Each metric has its configuration, so we know which class is used to read the values.
Finally, when the widget Timeline Provider asks for new data, we fetch the data from the current metrics and decode the response.
We wanted to support the three widget sizes: small, medium, and large. From the start we wanted to have a single View to support all sizes as an attempt to minimize UI discrepancies and make the code easy to maintain.
We started by identifying the common structure and creating components. We ended up with a Metric Cell component that has three variations:


All three variations consist of a metric name and value, chart, and a comparison. As the widget containers become bigger, we show the merchant more data. Each view size contains more metrics, and the largest widget contains a full width chart on the first chosen metric. The comparison indicator also gets shifted from bottom to right on this variation.
The first chosen metric, on the large widget, is shown as a full width cell with a bar chart showing the data more clearly; we call it the Primary cell. We added a structure to indicate if a cell is going to be used as primary or not. Besides the primary flag, our component doesn’t have any context about the widget size, so we use chart data as an indicator to render a cell primary or not. This paradigm fits very well with SwiftUI.
A simplified version of the actual Cell View:
After building our cells, we need to create a structure to render them in a grid according to the size and metrics chosen by the merchant. This component also has no context of the widget size, so our layout decisions are mainly based on how many metrics we are receiving. In this example, we’ll refer to the View as a WidgetView.
The WidgetView is initialized with a WidgetState, a struct that holds most of the widget data such as shop information, the chosen metrics and their data, and a last updated string (which represents the last time the widget was updated).
To be able to make decisions on layout based on the widget characteristics, we created an OptionSet called LayoutOption. This is passed as an array to the WidgetView.
Layout options:
That helped us not to tie this component to Widget families, rather to layout characteristics that makes this component very reusable in other contexts.
The WidgetView layout is built using mainly a LazyVGrid component:
A simplified version of the actual View:
One important piece of information on our widget is the last updated timestamp. It helps remove confusion by allowing merchants too quickly know how fresh the data is they’re looking at. Since iOS has an approximate update time with many variables, coupled with data connectivity, it’s very possible the data could be over 15 minutes old. If the data is quite stale (say you went to the cottage for the weekend and missed a few updates) and there was no update string, you would assume the data you’re looking at is up to the second. This can cause unnecessary confusion for our merchants. The solution here was to ensure there’s some communication to our merchant when the last update was.
In our previous design, we only had small widgets, and they were able to display only one metric. This information resulted in a long string, that on smaller devices, would sometimes wrap and show over two lines. This was fine when space was abundant in our older design but not in our new data rich designs. We explored how we could best work with timestamps on widgets, and the most promising solution was to use relative time. Instead of having a static value such as “as of 3:30pm” like our previous iteration, we would have a dynamic date that would look like: “1 min, 3 sec ago.”
One thing to remember is that even though the widget is visible, we have a limited number of updates we can trigger. Otherwise, it would be consuming a lot of unnecessary resources on the merchant’s device. We knew we couldn’t keep triggering updates on the widget as often as we wanted (nor would it be allowed), but iOS has ways to deal with this. Apple did release support for dynamic text on widgets during our development that allowed using timers on your widgets without requiring updates. We simply need to pass a style to a Text component and it automatically keeps everything up to date:
Text("\(now, style: .relative) ago")
It was good, but we have no options to customize the relative style. Being able to customize the relative style was an important point for us, as the current supported style does not fit well with our widget layout. One of our biggest constraints with widgets is space as we always need to think about the smallest widget possible. In the end we decided not to move forward with the relative time approach, and kept a reduced version of our previous timestamp.
Our new widgets have a great amount of configuration, allowing for merchants to choose exactly what they care about. For each widget size, the merchant can select the store, a certain number of metrics, and a date range. On iOS, widgets are configured through the SiriKit Intents API. We faced some challenges with the WidgetConfiguration, but fortunately, all had workarounds that fit our use cases.

When defining a field that has multiple values provided dynamically, we can limit the number of options per widget family. This was important for us, since each widget size has a different number of metrics it can support. However, the current UI on iOS for widget configuration only allows selecting a value but not deselecting it. So, once we selected a metric we couldn’t remove it, only update the selection. But what if the merchant were only interested in one metric on the small widget? We solved this with a small design change, by providing “None” as an option. If the merchant were to choose this option, it would be ignored and shown as an empty state.
With the addition of “None” and the way intents are designed, it was possible to select all “None” and have a widget with no metrics. In addition, it was possible to select the same metric twice.. We would like to be able to validate the user selection, but the Intents API didn't support it. The solution was to embrace the fact that a widget can be empty and show as an empty state. Duplicates were filtered out so any more than a single metric choice was changed to “None” before we sent any network requests.
For intent configurations provided dynamically, we must provide default values in the IntentHandler. In our case, the metrics list varies per widget family. In the IntentHandler, it’s not possible to query which widget family is being used. So we had to return at least as many metrics as the largest widget (seven).
However, even if we limit the number of metrics per family, the first getTimeline and getSnapshot calls in the Timeline Provider were filling the configuration object with all default metrics, so a small widget would have seven metrics instead of two!
We ended up adding some cleanup code in the beginning of the Timeline Provider methods that trims the list depending on the expected number of metrics.
Automated tests are a fundamental part of Shopify’s development process. In the Shopify app, we have a good amount of unit and snapshot tests. The old widgets on Android had good test coverage already, and we built on the existing infrastructure. On iOS, however, there were no tests since it’s currently not possible to add test targets against a widget extension on Xcode.
Given this would be a complex project and we didn’t want to compromise on quality, we investigated possible solutions for it.
The simplest solution would be to add each file on both the app and in the widget extension targets, then we could unit test it in the app side in our standard test target. We decided not to do this since we would always need to add a file to both targets, and it would bloat the Shopify app unnecessarily.
We chose to create a separate module (a framework in our case) and move all testable code there. Then we could create unit and snapshot tests for this module.
We ended up moving most of the code, like views and business logic, to this new module (WidgetCore), while the extension only had WidgetKit specific code and configuration like Timeline provider, widget bundle, and intent definition generated files.
Given our code in the Shopify app is based on UIKit, we did have to update our in-house snapshot testing framework to support SwiftUI views. We were very happy with the results. We ended up achieving a high test coverage, and the tests flagged many regressions during development.
The Shopify app is a big application, and it takes a while to build. Given the widget extension is based on our main app target, it took a long time to prepare the SwiftUI previews. This caused frustration during development. It also removed one of the biggest benefits of SwiftUI—our ability to iterate quickly with Previews and the fast feedback cycle during UI development.
One idea we had was to create a module that didn’t rely on our main app target. We created one called WidgetCore where we put a lot of our reusable Views and business logic. It was fast to build and could also render SwiftUI previews. The one caveat is, since it wasn’t a widget extension target, we couldn’t leverage the WidgetPreviewContext API to render views on a device. It meant we needed to load up the extension to ensure the designs and changes were always working as expected on all sizes and modes (light and dark).
To solve this problem, we created a PreviewLayout extension. This had all the widget sizes based on the Apple documentation, and we were able to use it in a similar way:
Our PreviewLayout extension would be used on all of our widget related views in our WidgetCore module to emulate the sizes in previews:
Since our first widgets were developed, we wanted to understand how merchants are using the functionality, so we can always improve it. The data team built some dashboards showing things like a detailed view of how many widgets installed, the most popular metrics, and sizes.
Most of the data used to build the dashboards come from analytics events fired through the widgets and the Shopify app.
For the new widgets, we wanted to better understand adoption and retention of widgets, so we needed to capture how users are configuring their widgets over time and which ones are being added or removed.
WidgetKit has the WidgetCenter struct that allows requesting information about the widgets currently configured in the device through the getCurrentConfigurations method. However, the list of metadata returned (WidgetInfo) doesn’t have a stable unique identifier. Its identifier is the object itself, since it’s hashable. Given this constraint, if two identical widgets are added, they’ll both have the same identifier. Also, given the intent configuration is part of the id, if something changes (for example, date range) it’ll look like it’s a totally different widget.
Given this limitation, we had to adjust the way we calculate the number of unique widgets. It also made it harder to distinguish between different life-cycle events (adding, removing, and configuring). Hopefully there will be a way to get unique ids for widgets in future versions of iOS. For now we created a single value derived from the most important parts of the widget configuration.
Currently there’s no WidgetKit life cycle method that tells us when a widget was added, configured, or removed. We needed it so we can better understand how widgets are being used.
After some exploration, we noticed that the only methods we could count on were getTimeline and getSnapshot. We then decided to build something that could simulate these missing life cycle methods by using the ones we had available. getSnapshot is usually called on state transitions and also on the widget Gallery, so we discarded it as an option.
We built a solution that did the following
getTimeline is called, we call WidgetKit’s getCurrentConfigurations to see what are the current widgets installed.didAddWidgets(), didRemoveWidgets().Due to identifiers not being stable, we couldn’t find a reliable approach to detect configuration changes, so we ended up not supporting it.
We also noticed that WidgetKit.getCurrentConfigurations’s results can have some delay. If we remove a widget, it may take a couple getTimeline calls for it to be reflected. We adjusted our analytics scheme to take that into account.

Our approach to widgets made supporting iOS 16 out of the gate really simple with a few changes. Since our lock screen complications will surface the same information as our home screen widgets, we can actually reuse the Intent configuration, Timeline Provider, and most of the views! The only change we need to make is to adjust the supported families to include .accessoryInline, .accessoryCircular, and .accessoryRectangular, and, of course, draw those views.
Our Main View would also just need a slight adjustment to work with our existing home screen widgets.
WidgetKit was introduced for watchOS complications in iOS 16. This update comes with a foreboding message from Apple:
Important

As soon as you offer a widget-based complication, the system stops calling ClockKit APIs. For example, it no longer calls your CLKComplicationDataSource object’s methods to request timeline entries. The system may still wake your data source for migration requests.
We really care about our apps at Shopify, so we really needed to unpack what this meant, and how does this affect our merchants running older devices? With some testing on devices, we were able to find out, everything is fine.
If you’re currently running WidgetKit complications and add support for lock screen complications, your ClockKit app and complications will continue to function as you’d expect.
What we had assumed was that WidgetKit itself was taking the place of WatchOS complications; however, to use Widgetkit on WatchOS, you need to create a new target for the Watch. This makes sense, although the APIs are so similar we had assumed it was a one and done approach. One WidgetKit extension for both platforms.
One thing to watch out for, if you do implement the new WidgetKit on WatchOS, if your users are on WatchOS 9 and above will lose all of their complications from ClockKit. Apple did provide a migration API to support the change that’s called instead of your old complications.
If you don’t have the luxury of just setting your target to iOS 16, your complications will continue to load up for those on WatchOS 8 and below from our testing.
We already had a set of widgets running on both platforms, now we had to decide how to transition to the new update as they would be replacing the existing implementation. On iOS we had two different widget kinds each with their own small widget (you can think of kinds as a widget group). With the new implementation, we wanted to provide a single widget kind that offered all three sizes. We didn’t find much documentation around the migration, so we simulated what happens to the widgets under different scenarios.
If the merchant has a widget on their home screen and the app updates, one of two things would happen:
The initial plan (we had hoped for) was to make one of our widgets transform into the new widget while removing the other one. Given the above, this strategy wouldn’t work. This also includes some annoying tech debt since all of our Intent files would continue to mention the name of the old widget.
The compromise we came to, so as to not completely remove all of a merchant’s widgets overnight, was to deprecate the old widgets at the same time we release the new ones. To deprecate, we updated our old widget’s UI to display a message informing that the widget is no longer supported, and the merchant must add the new ones. The lesson here is you have to be careful when you make decisions around widget grouping as it’s not easy to change.
There’s no way to add a new widget programmatically or to bring the merchant to the widget gallery by tapping on the old widget. We also added some communication to help ease the transition by:
In the end, it wasn’t the most ideal situation, and we came away learning about the pitfalls within the two ecosystems. One piece of advice is to really reflect on current and future needs when defining which widgets to offer and how to split them, since a future modification may not be straightforward.

As we continue to learn about how merchants use our new generation of widgets, we’ll continue to hone in on the best experience across both our platforms. Our widgets were made to be flexible, and we’ll be able to continually grow the list of metrics we offer through our customization. This work opens the way for other teams at Shopify to build on what we’ve started and create more widgets to help Merchants too.
2022 is a busy year with iOS 16 coming out. We’ve got a new WidgetKit experience to integrate to our watch complications, lock screen complications, and live activities hopefully later this year!
Carlos Pereira is a Senior Developer based in Montreal, Canada, with more than a decade of experience building native iOS applications in Objective-C, Swift and now React Native. Currently contributing to the Shopify admin app.
James Lockhart is a Staff Developer based in Ottawa, Canada. Experiencing mobile development over the past 10+ years: from Phonegap to native iOS/Android and now React native. He is an avid baker and cook when not contributing to the Shopify admin app.
Cecilia Hunka is a developer on the Core Admin Experience team at Shopify. Based in Toronto, Canada, she loves live music and jigsaw puzzles.
Wherever you are, your next journey starts here! If building systems from the ground up to solve real-world problems interests you, our Engineering blog has stories about other challenges we have encountered. Intrigued? Visit our Engineering career page to find out about our open positions and learn about Digital by Design.
When was the last time you scrolled through a list? Odds are it was today, maybe even seconds ago. Iterating over a list of items is a feature common to many frameworks, and React Native’s FlatList is no different. The FlatList component renders items in a scrollable view without you having to worry about memory consumption and layout management (sort of, we’ll explain later).
The challenge, as many developers can attest to, is getting FlatList to perform on a range of devices without display artifacts like drops in UI frames per second (FPS) and blank items while scrolling fast.
Our React Native Foundations team solved this challenge by creating FlashList, a fast and performant list component that can be swapped into your project with minimal effort. The requirements for FlashList included
The FlashList API is five stars. I've been recommending all my friends try FlashList once we open source.
FlatList vs FlashList. This is from the exact same sample. Almost 7.5x better JS FPS!
— Talha Naqvi (@naqvitalha) July 13, 2022
When items are complex or there are more to update per render, the differences become a lot more obvious.
This is on Moto G, scroll speed is as fast as possible. pic.twitter.com/eT7LGOjHGE
Here’s how we approached the FlashList project and its benefits to you.
Evolving FlatList was the perfect match between our mission to continuously create powerful components shared across Shopify and solving a difficult technical challenge for React Native developers everywhere. As more apps move from native to React Native, how could we deliver performance that met the needs of today’s data-hungry users while keeping lists simple and easy to use for developers?
Lists are in heavy use across Shopify, in everything from Shop to POS. For Shopify Mobile in particular, where over 90% of the app uses native lists, there was growing demand for a more performant alternative to FlatList as we moved more of our work to React Native.
RecyclerListView is a third-party package optimized for rendering large amounts of data with very good real-world performance. The difficulty lies in using it, as developers must spend a lot of time understanding how it works, playing with it, and requiring significant amounts of code to manage. For example, RecyclerListView needs predicted size estimates for each item and if they aren’t accurate, the UI performance suffers. It also renders the entire layout in JavaScript, which can lead to visible glitches.
When done right, RecyclerListView works very well! But it’s just too difficult to use most of the time. It’s even harder if you have items with dynamic heights that can’t be measured in advance.
So, we decided to build upon RecyclerListView and solve these problems to give the world a new list library that achieved native-like performance and was easy to use.
Our React Native Foundations team takes a structured approach to solving specific technical challenges and creates components for sharing across Shopify apps. Once we’ve identified an ambitious problem, we develop a practical implementation plan that includes rigorous development and testing, and an assessment of whether something should be open sourced or not.
Getting list performance right is a popular topic in the React Native community, and we’d heard about performance degradations when porting apps from native to React Native within Shopify. This was the perfect opportunity for us to create something better. We kicked off the FlashList project to build a better list component that had a similar API to FlatList and boosted performance for all developers. We also heard some skepticism about its value, as some developers rarely saw issues with their lists on newer iOS devices.
The answer here was simple. Our apps are used on a wide range of devices, so developing a performant solution across devices based on a component that was already there made perfect sense.
“We went with a metrics-based approach for FlashList rather than subjective, perception-based feelings. This meant measuring and improving hard performance numbers like blank cells and FPS to ensure the component worked on low-end devices first, with high-end devices the natural byproduct.” - David Cortés, React Native Foundations team
Just replaced Flatlist for Flashlist and wow, that thing is really fast @ShopifyDevs well done 🎉🥳👏🎊
— João Amadeu (@jmamadeu) July 4, 2022
Our goal was to beat the performance of FlatList by orders of magnitude, measured by UI thread FPS and JavaScript FPS. With FlatList, developers typically see frame drops, even with simple lists. With FlashList, we improved upon the FlatList approach of generating new views from scratch on every update by using an existing, already allocated view and refreshing elements within it (that is, recycling cells). We also moved some of the layout operations to native, helping smooth over some of the UI glitches seen when RecyclerListView is provided with incorrect item sizes.
This streamlined approach boosted performance to 60 FPS or greater—even on low-end devices!
Simple list comparison (Twitter clone) @ShopifyEng FlashList vs @reactnative FlatList
— Alexandre Moureaux (@almouro) July 1, 2022
on a low end Android
On the left, trying my best to scroll the FlatList 😅: the scroll locks because JS is dead! ☠️
Right side: no locking! ✅
Will post #performance metrics next week 📈 pic.twitter.com/IW8Ly5c1jD
We applied a similar strategy to improve memory utilization. Say you have a Twitter feed with 200-300 tweets per page, FlatList starts rendering with a large number of items to ensure they’re available as the user scrolls up or down. FlashList, in comparison, requires a much smaller buffer which reduces memory footprint, improves load times, and keeps the app significantly more responsive. The default buffer is just 250 pixels.
Both these techniques, along with other optimizations, help FlashList achieve its goal of no more blank cells, as the improved render times can keep up with user scrolling on a broader range of devices.
Shopify Mobile is using FlashList as the default and the Shop team moved search to FlashList. Multiple teams have seen major improvements and are confident in moving the rest of their screens.
These performance improvements included extensive testing and benchmarking on Android devices to ensure we met the needs of a range of capabilities. A developer may not see blank items or choppy lists on the latest iPhone but that doesn’t mean it’ll work the same on a lower-end device. Ensuring FlashList was tested and working correctly on more cost-effective devices made sure that it would work on the higher-end ones too.
If you know how FlatList works, you know how FlashList works. It’s easy to learn, as FlashList uses almost the same API as FlatList, and has new features designed to eliminate any worries about layout and performance, so you can focus on your app’s value.
Shotgun's main feature is its feed, so ensuring consistent and high-quality performance has always been crucial. That's why using FlashList was a no brainer. I love that compared to the classic FlatList, you can
scrollToIndexto an index that is not within your view. This allowed us to quickly develop our new event calendar list, where users can jump between dates to see when and where there are events.
The fact that FlashList's API is exactly the same as FlatList is an application that will make it very easy to move your project to FlashList. In addition, they have added a few features, for example: You can see how long it takes to load the list thanks to the onLoad feature. pic.twitter.com/Izkwyte2Xj
— V. Furkan Güner (@vfurkanguner) July 4, 2022
It takes seconds to swap your existing list implementation from FlatList to FlashList. All you need to do is change the component name and optionally add the estimatedItemSize prop, as you can see in this example from our documentation:

Going beyond the standard FlatList props, we added new features based on common scenarios and developer feedback. Here are three examples:
We provide a number of resources to help you get started with FlashList:
Accelerate your React Native list performance by installing FlashList now. It’s already deployed within Shopify Mobile, Shop, and POS and we’re working on known issues and improvements. We recommend starring the FlashList repo and can’t wait to hear your feedback!
Want to read more about the process of launching this open source project? Check out our follow-up post, What We Learned from Open-Sourcing FlashList.
Wherever you are, your next journey starts here! If building systems from the ground up to solve real-world problems interests you, our Engineering blog has stories about other challenges we have encountered. Intrigued? Visit our Engineering career page to find out about our open positions and learn about Digital by Design.
Right now, you are likely reading this content on a Skia surface. It powers Chrome, Android, Flutter, and others. Skia is a cross-platform drawing library that provides a set of drawing primitives that you can trust to run anywhere: iOS, Android, macOS, Windows, Linux, the browser, and now React Native.
Our goal with this project is twofold. First we want to provide React Native, which is notorious for its limited graphical capabilities, with a set of powerful 2D drawing primitives that are consistent across iOS, Android, and the Web. Second is to bridge the gap between graphic designers and React Native: by providing the same UI capabilities as a tool like Figma. Everyone can now speak the same language.

To bring the Skia library to React Native, we needed to rely on the new React Native architecture, JavaScript Interface (JSI). This new API enables direct communication between JavaScript and native modules using C++ instead of asynchronous messages between the two worlds. JSI allows us to expose the Skia API directly in the following way:
We are making this API virtually 100% compatible with the Flutter API allowing us to do two things:
React is all about declarative UIs, so we are also providing a declarative API built on top of the imperative one. The example above can also be written as:
This API allows us to provide an impressive level of composability to express complex drawings, and it allows us to perform declarative optimizations. We leverage the React Reconciler to perform the work of diffing the internal representation states, and we pass the differences through to the Skia engine.
React Native Skia offers a wide range of APIs such as advanced image filters, shaders, SVG, path operations, vertices, and text layouts. The demo below showcases a couple of drawing primitives previously unavailable in the React Native ecosystem. Each button contains a drop and inner shadow, the progress bar is rendered with an angular gradient, and the bottom sheet uses a backdrop filter to blur the content below it.
Gang, please use those shadows responsibly 😉 pic.twitter.com/3TlIXbiMBc
— William Candillon (@wcandillon) March 21, 2022
Below is an example of mesh gradients done using React Native Skia
In last week's tutorial, we looked at two ways of building mesh gradients with React Native Skia. The first one using vertices. pic.twitter.com/tBt2O3lkT3
— William Candillon (@wcandillon) April 7, 2022
Reanimated 2 (a project also supported by Shopify) brought to life the vision of React Native developers writing animations directly in JavaScript code by running it on a dedicated thread. Animations in React native Skia work the same way. Below is an example of animation in Skia:
If your drawing animation depends on an outside view, like a React Native gesture handler, for instance, we also provide a direct connector to Reanimated 2.
With React Native Skia, we expect to be addressing a big pain point of the React Native community. And it is safe to say that we are only getting started. We are working on powerful new features which we cannot wait to share with you in the upcoming months. We also cannot wait to see what you build with it. What are you waiting for!? npm install @shopify/react-native-skia.
Christian Falch has been involved with React Native since 2018, both through open source projects and his Fram X consultancy. He has focused on low-level React Native coding integrating native functionality with JavaScript and has extensive experience writing C++ based native modules.
William Candillon is the host of the “Can it be done in React Native?” YouTube series, where he explores advanced user-experiences and animations in the perspective of React Native development. While working on this series, William partnered with Christian to build the next-generation of React Native UIs using Skia.
Colin Gray is a Principal Developer of Mobile working on Shopify’s Point of Sale application. He has been writing mobile applications since 2010, in Objective-C, RubyMotion, Swift, Kotlin, and now React Native. He focuses on stability, performance, and making witty rejoinders in engineering meetings. Reach out on LinkedIn to discuss mobile opportunities at Shopify!
Wherever you are, your next journey starts here! If building systems from the ground up to solve real-world problems interests you, our Engineering blog has stories about other challenges we have encountered. Intrigued? Visit our Engineering career page to find out about our open positions and learn about Digital by Design.
I just want you to feel it
I use the word feeling a lot when working on animations and gestures. For example, animations or gestures sometimes feel right or wrong. I think about that word a lot because our experiences using software are based on an intuitive understanding of the real world. When you throw something in real life, it influences how you expect something on screen to behave after you drag and release it.
By putting work, love, and care into UI details and designs, we help shape the experience and feeling users have when using an app. All the technical details and work is in service of the user's experiences and feelings. The user may not consciously notice the subtle animations we create, but if we do our job well, the tiniest gesture will feel good to them.

The team working on Shop, our digital shopping assistant, recently released a feature that allows buyers to favorite products and shops. By pressing a heart button on a product, buyers can save those products for later. When they do, the product image drops into the heart icon (containing a list of favorite products) in the navigation tab at the bottom.
In this post, I’ll show you how I approached implementing the Add to Favorite animation in Shopify’s Shop app. Specifically, we can look at the animation of the product image thumbnail appearing, then moving into the favorites tab bar icon:

Together, we'll learn:
When I start working on an animation from a video provided by a designer, I like to slow it down so I can see what's happening more clearly:

If a slowed video isn’t provided, you can record the animation using Monosnap or Quicktime. This also allows you to slowly scrub through the video. Fortunately, we also have this great motion spec to work with as well:

As you can see, the motion spec defines the sequence of animations. Based on the spec, we can determine:
Firstly, we should recognize that there are two elements being animated:
The product thumbnail is being animated first, then the Favorites tab bar icon is being animated second. Let's break it down step by step:
Each of the above steps is an animation that has a duration and easing curve, as specified in the motion spec provided by the motion designer. Our motion specs define these easing curves that define how a property changes over time:

Let's write code! The Shop app is a React Native application and we use the Reanimated library to implement animations.
For this animation sequence, there are multiple properties being animated at times. However, these animations happen together, driven by the same timings and curves. Therefore we can use only one shared value for the whole sequence. That shared progress value can drive animations for each step by moving from values 1 to 2 to 3 etc.
So the progress value tells us which step of the animation we are in, and we can set the animated properties accordingly. As you can see, this sequence of steps match the steps we wrote down above, along with each step's duration and easing curves, including a delay at step 3:
We can now start mapping the progress value to the animated properties!
First let's start with the product thumbnail fading in:
What does interpolate mean?
Interpolating maps a value from an input range to an output range. For example, if the input range is [0, 1] and the output range is [0, 10], then as the input increases from 0 to 1, the output increases correspondingly from 0 to 10. In this case, we're mapping the progress value from [0, 1] to [0, 1] (so no change in value).
In the first step of the animation, the progress value changes from 0 to 1 and we want the opacity to go from 0 to 1 during that time so that it fades in. “Clamping” means that when the input value is greater than 1, the output value stays at 1 (it restricts the output to the maximum and minimum of the output range). So the thumbnail will fade in during step 1, then stay at full opacity for the next steps because of the clamping.
However, we also want the thumbnail to disappear instantly at step 3. In this case, we don't use interpolate because we don't want it to animate a fade-out. Instead, we want an instant disappearance:
Now the item is fading in, but it also has to grow in scale and then shrink back a bit:
This interpolation is saying that from step 0 to 1, we want scale to go from 0 to 1.2. From step 1 to 2, we want the scale to go from 1.2 to 1. After step 2, it stays at 1 (clamping).
Let's do the final property, translating it vertically:
So we're moving from position -60 to -34 (half way behind the tab bar) between steps 2 and 3. After step 3, the opacity becomes 0 and it disappears! Let's test the above code:

Nice, it fades in while scaling up, then scales back down, then slides down halfway under the tab bar, and then disappears.
Now we just need to write the Favorite tab bar icon styles!
First, let's handle the heart becoming filled (turning purple), then unfilled (turning white). I did this by positioning the filled heart icon over the unfilled one, then fading in the filled one over the unfilled one. Therefore, we can use a simple opacity animation where we move from 0 to 1 and back to 0 over steps 3, 4 and 5:
For the heart bouncing up and down we have:
From steps 3 to 7, this makes the icon move up and down, creating a bouncing effect. Let's see how it looks!

Nice, we now see the tab bar icon react to having a product move into it.
By using a single shared value, we ensured that the heart icon moves down immediately when the thumbnail disappears, creating a match cut. A “match cut” is a cinematic technique where the movement of an item immediately cuts to the movement of another item during a scene transition. The movement that the users’ eye expects as the product thumbnail moves down cuts to a matching downward movement of the heart icon. This creates an association of the item and the Favorites section in the user's mind.
In another approach, I tried using setTimeout to start the tab bar icon animation after the thumbnail one. I found that when the JS thread was busy, this would delay the second animation, which ruined the match cut transition! It felt wrong when seeing it with that delay. Therefore, I did not use this approach. Using withDelay from Reanimated would have avoided this issue by keeping the timer on the UI thread.
When I started learning React Native, the animation code was intimidating. I hope this post helps make implementing animations in React Native more fun and approachable. When done right, they can make user interactions feel great!
You can see this animation by favoriting a product in the Shop app!

Special thanks to Amber Xu for designing these animations, providing me with great specs and videos to implement them, and answering my many questions.
Andrew Lo is a Staff Front End Developer on the Shop's Design Systems team. He works remotely from Toronto, Canada.
Wherever you are, your next journey starts here! If building systems from the ground up to solve real-world problems interests you, our Engineering blog has stories about other challenges we have encountered. Intrigued? Visit our Engineering career page to find out about our open positions and learn about Digital by Design.
When the App Clip was introduced in iOS 14, we immediately realized that it was something that could be a big opportunity for the Shop app. Due to the App Clip design, being a lightweight version of an app that you can download on the fly, we wanted to investigate what it could mean for us. Being able to instantly show users the power of the Shop app, without having to download it from the App Store and go through the onboarding was something we thought could have a huge growth potential.
One of the key features, and restrictions, for an App Clip is the size limitation. To make things even more interesting, we wanted to build it in React Native. Something that, to our knowledge, has never been done at this scale before.
Being the first to build an App Clip in React Native that was going to be surfaced to millions of users each day proved to be a challenging task.
App Clips are a miniature version of an app that’s meant to be lightweight and downloadable “on the go.” To provide a smooth download experience, the App Clip can’t exceed 10MB in size. For comparison, the iOS Shop app is 51MB.
An App Clip can’t be downloaded from the App Store—it can only be “invoked”. An invocation means that a user performs an action that opens the App Clip on their phone: scanning a QR code or an NFC tag, clicking a link in the Messages app, or tapping a Smart App Banner on a webpage. After the invocation is made, iOS displays a prompt asking the user to open the App Clip, meanwhile the binary of the App Clip is downloaded in the background that causes it to launch instantly. The invocation URL is passed on to the App Clip which enables you to provide a contextual experience for the user.
The Shop app helps users to track all of their packages in one place with ease. When the buyer installs the app that order is automatically imported and the buyer is kept up to date about its status without having to ask the seller.
However, we noticed a big drop-off of users in the funnel between the “Thank you” page and opening the app. Despite the Shop app having a 4.8 star rating, the few added steps of going through an App Store meant some buyers chose not to complete the process. The App Clip would solve all of this.
When the user landed on the “Thank you” page on their computer and invoked the App Clip by scanning a QR code, or for mobile checkouts by simply tapping the Open button, they would instantly see their order tracked. No App Store, no onboarding, just straight into the order details with the option to receive push notifications for the whole package journey.
React Native apps aren’t famous for being small in size, so we knew building an App Clip that was below 10MB in size would pose some interesting challenges. However, being one of the most popular apps on the app stores, and champions of React Native, we really wanted to see if it was possible.
Since the Shop app is built in React Native, all our developers could contribute to the App Clip—not just Swift developers—and we would potentially be able to maintain code sharing and feature parity with the AppClip as we do across Android and iOS.
In short, it was an interesting challenge that aligned with our technology choices and our values about building reusable systems designed for the long-term.
Since the App Clip was a very new piece of technology, there was a huge list of unknowns. We weren’t sure if it was going to be possible to build it with React Native and go below the 10MB limit. So we decided to set up a technical plan where if we failed, we would fail fast.
The plan looked something like this:
We also wanted to fail fast product wise. App Clips is a brand new technology that few people have been exposed to. We weren’t sure if our App Clip would benefit our users, so our goal was to get an App Clip out for testing, and get it out fast. If it would prove to be successful we would go back and re-iterate.
When we started building the App Clip, there were a lot of unknowns. So to determine if this was even possible, we started off by creating a “Hello World” App Clip using just React Native’s <View /> and <Text /> components.
The “Hello World” App Clip weighed in at a staggering 28MB. How could a barebone App Clip be this big in size? We investigated and realized that the App Clip was including all the native dependencies that the Shop app used, even though it only needed a subset of the React Native ones. We realized that we had to explicitly define exactly which native dependencies the App Clip needed in the Podfile:
Defining dependencies was done by looking through React Natives node_modules/react-native/scripts/react_native_pods to determine the bare minimum native dependencies that React Native needed. After determining the list, we calculated the App Clip size. The result was 4.3MB. This was good news, but we still didn’t know if adding all the features we wanted would make us go beyond the 10MB limit.
Building an App Clip with React Native is almost identical to building a React Native app with one big difference. We need to explicitly define the App Clip dependencies in the Podfile. Auto linking wouldn’t work in this case since it would scan all the installed packages for the ones compatible with auto linking and add them, we needed to cherry-pick pods only used by the App Clip.
The process was pretty straightforward; add a dependency in a React component, and if it had a native dependency, we’d added it to the “Shop App Clip” target in the Podfile. But the consequence of this would be quite substantial later on.
So the baseline size was 4.3MB, now it was time to start adding the functionality we needed. Since we were still exploring the design in this phase, we didn’t know exactly what the end result would be (other than displaying information about the user's order), but we could make some assumptions. For one, we wanted to share as much code with the app as possible. The Shop app has a very robust UI library that we wanted to leverage as well as a lot of business logic that handles user and order creation. Secondly we knew that we needed basic functionality like:
Since we only wanted to determine the build size, and in the spirit of failing fast, we implemented these features without them even working. The code was added, as well as the dependencies, but the App Clip wasn’t functional at all.
We calculated the App Clip size once again, and the result was 6.5MB. Even though it was a scrappy implementation to say the least, and there were still quite a few unknowns regarding the functionality, we knew that building it in React Native was theoretically possible and something we wanted to pursue.
We knew that building our App Clip with React Native was possible, our proof of concept was 6.5MB, giving us some leeway for unknowns. And with a React Native App Clip there sure were a lot of unknowns. Will sharing code between the app and the App Clip affect its size or cause any other issues? What do we do if the App Clip requires a dependency that pushes us over the 10MB limit?
Given the very rigid constraints, we decided that unlike most projects where the design leads the technology, we would approach this from the opposite direction. While developing the App Clip, the technology would drive the design. If something caused us to go over, or close to, the 10MB limit we would go back to the drawing board and find alternative solutions.
With the App Clip, we wanted to give the user a quick overview of their order and the ability to receive shipping updates through push notifications. We were heavily inspired by the order view in Shop app, and the final App Clip design was a reorganized version of that.

The Shop app is structured to share as much code as possible, and we wanted to incorporate that in the App Clip. Sharing code between the two makes sense, especially when the App Clip had similar functionality as the order view in the app.
Our first exploration was to see if it was viable to share all the code in the order view between the app and the App Clip, and modify the layout with props passed from the App Clip.

We quickly realized this wasn’t viable. For one, it would add too much complexity to the order view, but mainly, any change to the order view would affect the App Clip. If a developer adds a feature to the order view, with a big dependency, the 10MB App Clip limit could be at risk.
For a small development team, it might have been a valid approach, but at our scale we couldn’t. The added responsibility that every developer would have for the App Clip’s size limit while doing changes to the app’s main order view would be against our values around autonomy.
We then considered building our own version of the order view in the App Clip, but sharing its sub components. This could be a viable compromise where all the logic heavy code would live in the <OrderView /> but the simple presentational components could still be shared.

The first component we wanted to import to the App Clip was <ProductRow />, its job is to display the product title, price and image:

The code for this component looks like this (simplified):
But when we imported this component into the App Clip it crashed. After some digging, we realized that our <Image /> component uses a library called react-native-fast-image. It’s a library, built with native Swift code, we use to be able to display large lists of images in a very performant way. And as mentioned previously, to keep the App Clip size down we need to explicitly define all its native dependencies in the Podfile. We hadn’t defined the native dependency for react-native-fast-image and therefore it crashed. The fix was easy though, adding the dependency enabled us to use the <ProductRow /> component:
However, our proof of concept App Clip weighed in at 6.5MB meaning we only had 3.5MB to spare. So we knew we only wanted to add the absolute necessary dependencies, and since the App Clip would only display a handful of images we didn’t deem this library an absolute necessity.
With this in mind, we briefly went through all the components we wanted to share with the order view, maybe this was just a one time thing we could create a workaround for? We discovered that the majority of the sub components of the <OrderView /> somewhere down the line had a native dependency. Upon analyzing how they would affect the App Clip size, we discovered that they would push the App Clip far north of 10MB with one single dependency weighing in at a staggering 2.5MB.
We now realized sharing components between the order view in the app and the App Clip was not possible, was that true for all code? At this stage we were standing at a crossroad. Do we want to duplicate everything? Some things? Nothing?
To answer this question we decided to base the decision on the following principles:
With this in mind, we decided that the similarities between the order view in the app and the App Clip are purely coincidental. This change of mindset helped us move forwards very quickly.
Building the App Clip was very similar to building any other React Native app, the only real difference was that we constantly needed to keep track of its size. Since checking the size of the App Clip was very time consuming, around 25 minutes each time on our local machines, we decided to only do this when any new dependencies were added as well as doing some ad-hoc checks from time to time.
All the components for the App Clip were created from scratch with the exception of the usage of our shared components and functions within the Shop app. Inside our shared/ directory there are a lot of powerful foundational tools we wanted to use in the App Clip; <Box /> and <Text /> and a few others that we rely on heavily to structure our UI in the Shop app with the help of our Restyle library. We also wanted to reuse the shared hooks for setting up push notifications, creating a user, etc. As mentioned earlier, sharing code between the app and the App Clip could potentially cause issues. If a developer decides to add a new native dependency to the <Box /> or <Text /> they would, often unknowingly, affect the App Clip as well.
However, we deemed these shared components mature enough to not have any large changes made to them. To catch any new dependencies being added to these shared components, we wrote a CI script to detect and notify the pull request author of this.
The script did three things:
A few times we stumbled upon some issues with dependencies, either our shared one or external ones, adding some weight to the App Clip. This could be a third-party library for animations, async storage, or getting information about the device. With our “technology drives design” principle in mind, we often removed the dependencies for non-critical features, as with the animation library.
We now felt more confident on how to think while building an App Clip and we moved fast, continuously creating and merging pull requests.
The app always has precedence over the App Clip. Meaning if you invoke the App Clip by scanning a QR code, but you already have the app installed, the app opens and not the App Clip. We had to build support for invocations in the app as well, so even if the user has the app installed scanning the QR code would automatically import the order.
React Native enables us to do this through the Linking module:
The module allowed us to fetch the invocation URL inside the app and create the order for already existing app users. With this, we now supported importing an order by scanning a QR code both in the App Clip and the app.
The last feature we wanted to implement was a smooth transition to the app. If the user decides to upgrade from the App Clip to the full app experience, we wanted to provide a simpler onboarding experience and also magically have their order ready for them in the app. Apple provides a very nice solution to this with shared data containers which both the App Clip and the app have access to.
Now we can store user data in the App Clip that the app has access to, providing an optimal onboarding experience if the user decides to upgrade.
Throughout the development and launch of the App Clip, testing was difficult. Apple provides a great way to mock an invocation of the App Clip by hard coding the invocation URL in Xcode, but there was no way to test the full end-to-end flow of scanning the QR code, invocating the App Clip, and downloading the app. This wasn’t possible either on our local machines or TestFlight. To verify that the flow would work as expected we decided to release a first version of the App Clip extremely early. With the help of beta flags we made sure the App Clip could only be invoked by the team. This early release had no functionality, it only verified that the App Clip received the invocation URL and passed along the proper data to the app for a great onboarding experience. Once this flow was working, and we could trust that our local mockups worked the same as in production, testing the App Clip got a lot easier.
After extensive testing, we felt ready to release the App Clip. The release process was very similar since the App Clip is bundled into the app, the only thing needed was to provide copy and image assets in App Store Connect for the invocation modal.

We approached this project with a lot of unknowns—the technology was new and new to us. We were trying to build an App Clip with React Native, which isn’t typical! Our approach (to fail fast and iterate) worked well. Having a developer with native iOS development was very helpful because App Clips—even ones written in React Native—involve a lot of Apple’s tooling.
One challenge we didn’t anticipate was how difficult it would be to share code. It turned out that sharing code introduced too much complexity into the main application, and we didn’t want to impact the development process for the entire Shop team. So we copied code where it made sense.
Our final App Clip size was 9.1MB, just shy of the 10MB limit. Having such a hard constraint was a fun challenge. We managed to build most of what we initially had in mind, and there are further optimizations we can still make.
Sebastian Ekström is a Senior Developer based in Stockholm who has been with Shopify since 2018. He’s currently working in the Shop Retention team.
Wherever you are, your next journey starts here! If building systems from the ground up to solve real-world problems interests you, our Engineering blog has stories about other challenges we have encountered. Intrigued? Visit our Engineering career page to find out about our open positions and learn about Digital by Default.
At Shopify, we develop a bunch of different React Native mobile apps: Shop, Inbox, Point of Sale, Shopify Mobile, and Local Delivery. These apps represent different business domains, but they often have shared pieces of functionality like login or foundational blocks they build upon. Wouldn’t it be great to leverage development speed and focus on important product features by reusing code other teams have already written? Sure, but it might be a big and time consuming effort that discourages teams. Usually, contributing to a new repo is more tedious and error prone in comparison to contributing to an existing repository. The developer needs to create a new repository, set up continuous integration (CI) and distribution pipelines, and add configs for Jest, ESint, and Babel. It might be unclear where to start and what to do.
My team, React Native Foundations, decided to invest in simplifying the process for developers at Shopify. In this post, I'll walk you through the process of extracting those shared elements, the setup we adopted, the challenges we encountered, and future lines of improvement.
When we set out to extract elements from the product repositories, we explored two approaches: multi-repo and monorepo. For us, it was important that the solution had low maintenance costs, allowing us to be consistent without much effort. Of the two, monorepo was the one that helped us achieve that.
Having one monorepo to support reduces maintenance costs. The team has one process that can be improved and optimized instead of maintaining and providing support for any number of packages and repositories. For example, imagine updating React Native and React versions across 10 repositories. I don’t even want to!
A monorepo decreases entrance barriers by offering everything you need to start building a package, including a package template to kick off building your package faster. Documentation and tooling provide the foundation to focusing on what’s important—the content of the package—instead of wasting time on configuring CI pipelines or thinking about the structure and configuration of the package.
We want contributing to shared foundational code to be convenient and spark joy. Optimizing once, and for everyone, gives the team time and opportunity to improve the developer experience by offering features like generating automatic documentation and providing a fixture app to test changes during development.
A repository consists of a set of npm packages that might contain native iOS and Android code, a fixture app that allows testing those packages in a real application, and an internal documentation website for users and contributors to learn how to use and contribute to the packages. This repository has an uncommon setup making it possible to hot-reload while editing the packages and references between packages and use them from the fixture app.
First, packages are developed in TypeScript but distributed as JavaScript and definition files. We use TypeScript project references so the TypeScript compiler resolves cross-package references. Since the IDE detects it's a TypeScript project, it resolves the imports on the UI. Dependencies between projects are defined in the tsconfig.json of each package.
When distributing the packages, we use Yarn. It’s language-agnostic and therefore doesn't translate dependencies between TypeScript projects to dependencies between packages. For that, we use Yarn Workspaces. That means besides defining dependencies for TypeScript, we have to define them in the package.json for Yarn and npm. Lerna, the publishing tool we use to push new versions of the packages to the registry, knows how to resolve the dependencies and build them in the right order.
We extract TypeScript, Babel, Jest, and ESLint configs to the root level to ensure consistent configuration across the packages. Consistency makes contributions easier because packages have a similar setup, and it also leads to a more reliable setup.
The fixture app setup is the standard setup of any React Native app using Metro, Babel, CocoaPods, and Gradle. However, it has custom configuration to import and link the packages that live within the same repository:
babel.config.js uses module-resolver plugin to resolve project references. We wouldn't need this if Babel integrated with TypeScript's project references feature.metro.config.js exposes the package directories to Metro so that hot reloading works when modifying the code of the packages.Podfile has logic to locate and include the Pod of the local packages. It’s worth mentioning that we don’t use React Native autolinking for local packages, but install them manually.Developers test features by running the fixture app locally. They also have the option to create Shipit Mobile internal builds (which we call Snapshot builds) that they can share internally. Shared builds can be installed via QR code by any person in the company, allowing them to play with available packages.
CI configuration is one of the things developers get for free when contributing to the monorepo. CI pipelines are auto-generated and therefore standardized across all the packages. Based on the content of the package we define the steps:

Another interesting thing about our setup is that we generate a dependency graph of the package to determine dependencies between packages. Also, the pipelines are triggered based on the file changes, so we only build the package with new changes and those that depend on it.
Even with all the infrastructure in place, it might be confusing to start contributing. Documentation describing the process helped up to a point, but we could do better by involving automation and code generation to leverage bootstrapping new packages further.
The React Native packages monorepo offers a script built with PlopJS for adding a new package based on the package template similar to the React Native community one. We took this template but customized it for Shopify.
A newly created package is a ready-to-use skeleton that extends the monorepo’s default configuration and has auto-generated CI pipelines in place. The script prompts for answers to some questions and generates the package and pipelines as a result.

Code generation ensures consistency across packages since everything is predefined for contributors. For the React Native Foundations team, it means supporting and improving one workflow, which reduces maintenance costs.
Documentation is as important as the code we add to the repository, and having great documentation is crucial to provide a great developer experience. Therefore, it shouldn't be an afterthought. To make it easier for contributors not to overlook writing documentation, the monorepo offers auto-generated documentation available in a statically generated website built with Gatsby.

Each package shows up in the sidebar of the documentation website, and its page contains the following information that’s pre-populated by reading metadata from the package.json file:
Since part of the documentation is auto-generated, it’s also consistent across the packages. Users see the same sections with as much generated content as possible.The website supports extending the documentation with manually written content by creating any of the following files under the documentation/ directory of the package:
I’ve mentioned before that we use Lerna for releasing the packages. During a release, we version independently and only if a package has unreleased changes. Due to how Lerna approaches the release process, all unreleased changes need to be released at the same time.
Our standard release workflow includes updating changelogs with the newest version and calling a release script that prompts you to update all the modules touched since the last change.
When versioning locally, we run two additional npm lifecycle scripts:
preversion ensures that all the changelogs are updated correctly. It gets run before we upgrade the version.version gets run after we've updated the versions but before we make the "Publish" commit. It generates an updated readme and runs pod install considering the bumped versions.After that, we get a new release commit with release tags that we need to push to the main branch. Now, the only thing left is to press “Publish”, and the packages will be released to the internal package registry.
The release process has a few manual steps and can be improved further. We keep the main branch always shippable but plan on introducing automating releases on every merge to reduce friction. To do that we might need to:
main
In hindsight, we achieve our goal. Extracting and reusing code is easy: you get tooling, infrastructure, and maintenance from the React Native Foundations team, plus other nice things for free. Developers can easily share those internal packages, and product teams have a developer-friendly workflow to contribute to Shopify's foundation. As a result, 17 React Native packages have been developed since June 2020, with 10 of them contributed by product teams.
Still, we got some lessons along the way.
We learned that the React Native tooling isn’t optimized for Shopify’s setup, but thanks to the flexibility of their APIs, we achieved a configuration we’re happy with. Still, the team keeps an eye on any occurring inconveniences and works on improving them.
Also, we came up with the idea of having multiple monorepos for thematically-related packages instead of one huge one. Based on the Web Foundation team’s experience and our impression, it makes sense to introduce a few monorepos for coupled packages. Recent talk from Microsoft at React Native EU 2021 conference also confirmed that having multiple monorepos is a natural evolutionary step for massive React Native codebases. Now, we have two monorepos: one main monorepo contains loosely coupled packages with utilities and Shopify-specific features and another contains a few performance related packages. Still, when we end up having a few monorepos, we’ll have to figure out how to reuse pieces across those monorepos to retain the benefits of monorepo.Elvira Burchik is a Production Engineer on the React Native Foundations team. Her mission is to create an environment in which developers are highly productive at creating high-quality React Native applications. She lives in Berlin, Germany, and spends her time outside of work chasing the best kebabs and brewing coffee.
Wherever you are, your next journey starts here! If building systems from the ground up to solve real-world problems interests you, our Engineering blog has stories about other challenges we have encountered. Intrigued? Visit our Engineering career page to find out about our open positions and learn about Digital by Default.
Shop is Shopify’s flagship shopping app. It lets anyone track their packages, find new products, and even plant trees to offset the carbon emissions from their purchases. Since launching in 2019, we’ve quickly grown to serve tens of millions of users. One of the most heavily used features of the app is the home page. It’s the first thing users see when they open Shop. The home page keeps track of people’s orders from the time they click the checkout button to when it’s delivered to their door. This feature brings so much value to our users, but we’ve had some technical challenges scaling this globally. As a result of Shop’s growth, the home feed was taking up a significant amount of our total database load, and was starting to have a user-facing impact.
We prototyped a few solutions to fix this load issue and ended up building a custom write-through cache for the home feed. This was a huge success—after about six weeks of engineering work, we built a custom caching solution that reduced database load by 15% and overall app latency by about 20%.
The main screen of the Shop app is the most used feature. Serving the feed is complex as it requires aggregating orders from millions of Shopify and non-Shopify merchants in addition to handling tracking data from dozens of carriers. Due to a variety of factors, loading and merging this data is both computationally expensive and quite slow. Before we started this project, 30% of Shop’s database load was from the home feed. This load didn’t only affect the home feed, it affected performance on all aspects of the application.
We looked around for simple, straightforward solutions to this problem like introducing IdentityCache, updating our database schema, and adding more database indexes. After some investigation, we learned that we had little database-level optimization left to do and no time to embark on a huge code rewrite. Caching, on the other hand, seemed ideal for this situation. Because users use the home feed every day and the temporal based sort of the home feed, home feed data was usually only read after it was recently written, making it ideal for a cache of some sort.
Because of the structure of the home feed, we couldn't use a plug-and-play caching solution. We think of a given user’s home feed as a sorted list of a user’s purchases, where the list can be large (some people do a lot of shopping!). The list can be updated by a series of concurrent operations that include:
In order to cache the home feed, we’d need a system that maintains a cached version of a user’s feed, while handling arbitrary updates to the orders in the feed and also maintaining the guarantee that the feed order is correct.
Another geeky data point, @shop processed ~1 billion order emails in 24 hours yesterday. That’s 7x more than last year. 99% of them were processed in 40 milliseconds or less. @siavashg and team are the best! pic.twitter.com/HbV65OIOM1
— Jean-Michel Lemieux (@jmwind) November 28, 2020
Due to the quantity of updates that we process, it’s infeasible to use a read-through cache that’s invalidated after every write, as the cache would end up being invalidated so often it would be practically useless. After some research, we didn’t find an existing solution that:
So, we built one ourselves.


After introducing the cache, when a user makes a request to load their home feed, Rails loads their home feed from the cache and makes far fewer (and much faster) database requests.
Rather than querying the database every time a user requests the home feed, we now cache a copy of their home feed in a fast, distributed, horizontally-scaled caching system (we chose Memcached). Then we serve from the cache rather than the database at request time provided certain conditions are met. To keep the cache valid and correct before each database update, we mark the cache as “invalid” to ensure the cached data isn’t used while the cache and database are out of sync. After the write is complete, we update the cache with the new data and mark it as “valid” again.

At Shopify, we use two different technologies for caching: Memcached and Redis. Redis is more powerful than Memcached, supporting more complex operations and storing more complex objects. Memcached is simpler, has less overhead, and is more widely used for caching inside Shop. While we use Redis for managing queues and some caches, we didn’t need Redis’ complexity, so we chose a distributed Memcached.
The primary issue we had to solve was ensuring the cache never contained stale records. We minimize the chance of cache invalidation by building the cache using a write-through invalidation policy that invalidates the cache before a database write and revalidates it after the successful write. That led to the next hard question: how do we actually store the data in Memcached and handle concurrent updates?
The naive approach would be to store a single key for each user in Memcached that maps a user to their home feed. Then, on write, invalidate the cache by evicting the key from the cache, make the database update, and finally revalidate the cache by writing the key again. The issue, unfortunately, is that there’s no support for concurrent writes. At Shop’s scale, multiple worker machines often concurrently process order updates for the same user. Using a delete-then-write strategy introduces race conditions that could lead to an incorrect cache, which is unacceptable.
To support concurrent writes, we store an additional key/value pair (pending writes key) that tracks the validity of the cache for each user. The key stores the number of active writes to a given user’s home feed. Each time a worker machine is about to write to the database, we increment this value. When the update is complete, we decrement the value. This means the cache is valid when the pending writes key is zero.
However, there’s one final case. What happens if a machine makes a database update and fails to decrement the pending writes key due to an interrupt or exception? How can we know if the pending writes key is greater than zero because there's currently a database write in progress or a process was interrupted?
The solution is introducing a key with a short expiry that’s written before any database update. If this key exists, then we know there’s the possibility of a database update, but if it doesn’t and the pending writes key is greater than zero, we know there’s no active database write occurring, so it’s safe to rewarm the cache again.
Another interesting detail is that we needed this code to work with all of our existing code in Shop and interplay seamlessly with that code. We wrote a series of Active Record Concerns that we mixed into the relevant database records. Using Active Record concerns meant that the ORM’s API stayed exactly the same, causing this change to be totally transparent to developers, and ensuring that all of this code was forward compatible. When Shop Pay became available to anyone selling on Google or Facebook, we were able to integrate the caching with minimal overhead.
Another important piece of this project was the rollout. Once we’d built the caching logic and integrated it with the ORM, we had to ship the cache to users. Theoretically sound, unit-tested code is a good first step, but without real world data, we weren’t confident enough in our system to deploy this cache without strict testing. We wanted to validate our hypothesis that it would never serve stale data to users.
So, over the course of the few weeks, we ran an experiment. First, we turned on all the cache writing and updating logic (but not the logic to serve data from the cache) and tested at scale. Once we knew that system was durable and scalable, we tested its correctness. At home feed serve time, our backend loaded from both the cache and the database and compared their data, and would log to a dashboard if there was a discrepancy. After letting this experiment run for a few weeks and fixing the issues that arose, we were able to be confident in our system’s correctness and scalability. We knew that the cache was always going to be valid and would not serve users stale or incorrect data.
After rolling this cache out globally, we saw immediate, impactful results. Our database servers have a lighter load, In addition to the lower database load and faster home feed performance, we also observed a double digit decrease in overall CPU usage and a 20% decrease in our overall GraphQL latency. Our database servers have a lighter load, our users have a faster experience, and our developers don’t need to worry about high database load. It’s a win-win-win.
Ryan Ehrlich is a software engineer living in Palo Alto, California. He focuses on solving problems in large scale, distributed systems, and CV/NLP AI research. Outside of work, he’s an avid rock climber, cyclist, and hiker.
Wherever you are, your next journey starts here! If building systems from the ground up to solve real-world problems interests you, our Engineering blog has stories about other challenges we have encountered. Intrigued? Visit our Engineering career page to find out about our open positions and learn about Digital by Default.
Working in Android using Kotlin, we tend to create classes with immutable fields. This is quite nice when creating state objects, as it prevents parts of the code that interpret state (for rendering purposes, etc) from modifying the state. This lends to better clarity about where values originate from, less bugs, and easier focused testing.
We use Kotlin’s data class to create immutable objects. If we need to overwrite existing field values in one of our immutable objects, we use the data class’s .copy function to set a new value for the desired field while preserving the rest of the values. Then we’d store this new copy of the object as the source of truth.
While trying to bring this immutable object concept to our iOS codebase, I discovered that Swift’s struct isn’t quite as convenient as Kotlin’s data class because Swift’s struct doesn't have a similar copy function. To adopt this immutability pattern in Swift, you’ll have to write quite a lot of boilerplate code.
If you want to change one or more properties for a given struct, but preserve the other property values (as Kotlin’s data class provides), you’ll need an initializer that allows you to specify all the struct’s properties. The default initializer gives you this ability… until you set a default value for a property in the struct or define your own init. Once you do either you lose that default init provided by the compiler.
So the first step is defining an init that captures every field value.
Using the init function above, you take your current struct and set every field to the current value, except the values you want to overwrite. This can get cumbersome, especially when your struct has numerous properties, or contains properties that are also structs.
So the next step is to define a .copy function that accepts new values for its properties, but defaults to using the current values unless specified. The copy function takes optional parameter values and defaults all params to nil unless specified. If the param is non-nil, it sets that value in the new copy of the struct, otherwise it defaults to the current state’s value for the field.
That works pretty well… until you have a struct that has optional fields. Then things don’t work as expected. What about the case when you have a non-nil value set for an optional property, and you want to set it nil. Uh-oh, the .copy function will always default to the current value when it receives nil for a param.
What if rather than make the params in the copy function optional, we just set the default value to the struct’s current value? That’s how Kotlin solves this problem in its data class, in Swift it looks like this:
Unfortunately in Swift you can’t reference self in default parameter values, so that’s not an option. I needed an alternate solution.
I found a good solution on Stack Overflow: using a functional builder pattern to capture the override values for the new copy of the struct, while using the original struct’s values as input for the rest of the properties.
This works a little differently, as instead of a simple copy function that accepts params for our fields, we instead define a closure that receives the builder as the sole argument, and allows you to set overrides for selected properties.
And voilà, it’s not quite as convenient as Kotlin’s data class and its copy function, but it’s pretty close.
Using the Sourcery code generator for Swift, I wrote a stencil template that generates an initializer for the copy function, as well as the builder for a given struct:
Scott Birksted is a Senior Development Manager for the Deliver Mobile team that focuses on Order and Inventory Management features in the Shopify Mobile app for iOS and Android. Scott has worked in mobile development since its infancy (pre-iOS/Android) and is passionate about writing testable extensible mobile code and first class mobile user experiences.
We're always on the lookout for talent and we’d love to hear from you. Visit our Engineering career page to find out about our open positions.
By Ash Furrow, AJ Robidas, and Michelle Fernandez
From the perspective of web developers, React Native expands the possibilities of what a developer can create. Using the familiar React paradigm, a web developer can build user interfaces for iOS and Android apps (among other platforms). With React Native, web developers can use familiar tools to solve unfamiliar problems—what a delight!
From the perspective of native developers, both Android and iOS, React Native (RN) helps them build user interfaces much faster. And since native developers typically focus on either Android or iOS (but usually not both), React Native also offers a wider audience for developers to reach with less effort.
As we can see, React Native offers benefits to both web and native mobile developers. Another benefit is that developers get to work together with programmers from other backgrounds. Web, Android, and iOS developers can work together using React Native in a way that they couldn’t before. We know that teams staffed with a variety of backgrounds perform better than monocultures, so the result of using React Native can be better apps, built faster, and for a wider audience. Great!
Even as we see the benefits of React Native, we also need to acknowledge the challenges and concerns from developers of web and native backgrounds. It’s our hope that this blog post (written by a web developer, an Android developer, and an iOS developer) can help contextualize the React Native technology. We hope that by sharing our experiences learning React Native, we can help soothe your anxieties and empower you to explore this exciting technology.
AJ: Yes definitely. Coming from a web dev background, I was always interested in mobile development, but had no interest in going back to Java just to make android apps. I had been using React for a while already so when I heard there was a way to write mobile apps using React I was immediately interested, though I struggled to get into it on my own because I learn better with others. When I was offered a job working with React Native, I jumped at the opportunity
Michelle: I was hesitant and thought that all that I knew about native android development was going to be thrown out the window! The easier choice would have been to branch off and stay close to my native development roots doing iOS development, but I’m always up for a challenge and saying YES to new things.
Ash: I wasn’t! My previous team started using it in 2015 and I resisted. I kind of stuck my head in the sand about it because I wanted to use Swift instead. But since the company didn’t need a lot of Swift to be written, I started working on web back-ends and front-ends. That’s when I learned React and got really excited. I finally understood the value in React Native: you get to use React.
AJ: The simplicity of the building blocks. Now I know that sounds a little crazy, but in the web world there are just so many base semantic elements. <button>, <a>, <h1> to <h6>, <p>, <input>, <footer>, <img>, <ol>, etc. So when I started learning React Native, I was looking for the RN equivalents for all of these, but it just isn’t structured the same way. RN doesn’t have heading levels and paragraphs, all text is handled by the <Text> component. Buttons, links, tabs, checkboxes, and more can all be handled with <Touchable> components. Even though the structure of writing a custom component is almost exactly the same as React, it feels very different because the number of semantic building blocks goes from more than 100 down to a little more than 20.
Michelle: I was surprised at how quick it was to build an app! The instant feedback when updating the UI is incomparable to the delay you get with native development, and the data that informs that UI is easy to retrieve using tools like GraphQL and Apollo. I was also very surprised at how painless it was to create the native bridge module and integrate existing SDKs into the app and then using those methods from the JavaScript side. The outcome of it all is a solid cross-platform app that still allows you to use the native layer when you need it! (And it’s especially needed for our Point of Sale app)
Ash: I was surprised by how good a React Native app could be. Previous attempts at cross-platform frameworks, like PhoneGap, always felt like PhoneGap apps. They never felt like they really belonged on the OS. Software written in React Native is hard to distinguish from software written in Swift or Objective-C. I thought that the value proposition of React Native was the ability to write cross-platform apps with a single codebase, but it was only used on iOS during the five years I used it at Artsy. React Native’s declarative model is just a better way to create user interfaces, and I think we’ve seen the industry come to this consensus as SwiftUI and Jetpack Compose play catch-up.
Let’s start by exploring React Native from a web developer’s perspective. React Native uses a lot of the tooling that you, as a web developer, are already familiar with. But it also uses some brand new tools. In some ways, you might feel like you’re starting from scratch. You might struggle with the new tools to accomplish simple tasks, and that’s normal. The discomfort that comes from feeling like a beginner is normal, and it’s mitigated with help from your peers.
Android Studio and Xcode can both be intimidating, even for experienced developers who use them day-to-day. Ideally, your team has enough Android and iOS developers to build solid tooling foundations and to help you when you get stuck. At Shopify, we rarely use the Android Studio and Xcode IDEs to write React Native apps. Instead, we use Visual Studio Code for most of our work. Our mobile tooling teams created command line abstractions for tools like adb, xcodebuild, and xcrun. So you could clone a React Native repository and get a simulator running with the code without ever opening Android Studio or Xcode.
AJ: For me it was the uncertainty. I came in confident in my React skills, but I found myself never knowing what mobile specific concerns existed, and when they might come into play. Since everything needs to be run over the RN Bridge, some aspects of web development, like CSS animations for example, just don’t really translate in a way that’s performant enough. So with no mobile development background any of those mobile specific concerns were an blind spot for me. This is an area where having coworkers from a mobile background has been a huge benefit.
Michelle: Understanding the framework and metro server and node and packages and hooks and state management and and and, so... everything?! Although if you create analogies to native development, you’ll find something similar. One quote I like is: “You’re not starting from scratch, you’re starting from experience.” This helps me to put in perspective that although it’s a new language and framework and the syntax may be different—the semantics are the same, meaning that if I wanted to create something like I would using native android development, I just had to figure out how I could achieve the same thing using a bit of JavaScript (TypeScript) and if needed, leverage my native development skills and the React bridge to do it.
Ash: I was really sceptical about the node ecosystem, it felt like a house of cards. Having over a thousand dependencies in a fresh React Native project feels… almost irresponsible? At least from a native background in Swift and Objective-C. It’s a different approach to be sure, to work around the unique constraints of JavaScript. I’ve come to appreciate it, but I don’t blame anyone for feeling overwhelmed by the massive amount of tools that your work sits atop of.
Your experience as a web developer offers a perspective on how to build user interfaces that’s new to native developers. While you may be familiar with tools like node and yarn, these are very different from the tools that native developers are used to. Your familiarity, from the basics of JSX and React components to your intuition of React best practices and software patterns, will be a huge help to your native developer colleagues.
Offer your guidance and support, and ask questions. Android and iOS developers will tend to use tools they are already familiar with, even if a better cross-platform solution exists. Challenge your teammates to come up with cross-platform abstractions instead of platform-specific implementations.
AJ: That's a difficult question for me, I didn’t really have anything in particular that I expected to be painful. I can say that the little bit I tried to learn RN on my own before I started at Shopify, I personally found getting the simulators and emulators set up to be painful. I was grateful when I got started here to find that the onboarding documentation and RN tutorial helped me breeze through the setup way faster than expected. I was up and running with a test app in the simulator within minutes that let me actually start learning RN right away instead of struggling with the tech.
Michelle: Coming from a native background using a powerhouse of an IDE, I thought the development process would slow me down. Thankfully, I’ve got my IDE (IntelliJ IDEA) now set up so that I can write code in React and at the same time write and inspect native kotlin code. You’d never think that a good search and replace and refactoring system would speed up your dev process by 10x but it really does.
Ash: I was worried that writing JavaScript would be painful, because no one I knew really liked JavaScript. At the time, CoffeeScript was still around, so no one really liked JavaScript, especially iOS developers. But instead, I found that JavaScript had grown a lot since I’d last used it. Furthermore, TypeScript provided a lot of the compile-time advantages of Swift but with a much more humane approach to compilers. I can’t think of a reason I would ever use React Native without TypeScript, it makes the whole experience so much more friendly.
Next, let’s explore the Android and iOS perspectives. Although the Android and iOS platforms are often seen to have an antagonistic relationship with one another, the experiences of Android and iOS developers coming to React Native are remarkably similar. As a native developer, you might feel like you’re turning your back on all the experience you’ve gained so far. But your experience building native applications is going to be a huge benefit to your React Native team! For example, you have a deep familiarity with your platform’s user interface idioms; you should use this intuition to help your team build user interfaces that “feel” like native applications.
AJ: Accessibility. I’m a huge accessibility advocate, I push for implementation of accessibility in anything I work on. But this is a bit of a struggle with React Native. Accessibility is an area of RN that doesn’t yet have a lot of educational material out there. A lot of the principles for web still apply, but the correct way to implement accessibility in some areas isn’t yet well established and with fewer semantic building blocks very little gets built in by default. So developers need to be even more aware and intentional about what they create.
Michelle: React Native land seems like the wild wild west after coming from languages with well established patterns and libraries as well as the documentation to support it. These do currently exist for RN but because of how new this framework is and the slow (but increasing!) adoption of it, there's still a long way to go to make it accessible for more people by providing more examples and resources to refer to.
Ash: I wish that the tools were more cohesive. Having worked in the Apple developer ecosystem for so long, I know how empowering a really polished developer tool can be. Not that Apple’s tools are perfect, far from it, but they are cohesive in a way that I miss. There’s usually one way to accomplish a task, but in React Native, I’m often left figuring things out on my own.
React Native apps are still apps and, consequently, they operate under the same conditions as native apps. Mobile devices have specific constraints and capabilities that web developers aren’t used to working with. Native developers are used to thinking about an app’s user experience as more than only the user interface. For example, native developers are keenly aware of how cellular and GPS radios impact battery life. They also know the value of integrating deeply with the operating system, like using rich push notifications or native share sheets. The same skills that help native developers ensure apps are “good citizens” of their platform are still critical to building great React Native applications.
AJ: I’m not sure I’d say I’ve had a change of opinion. I went into React Native curious and uncertain of what to expect. I’d heard good things from other web devs that I knew who had tried RN. So I felt pretty confident that I’d be able to pick it up and that I would enjoy it. If anything I would say the learning process went even smoother than anticipated.
Michelle: My opinions changed when I found that a React Native app allows us to integrate with the native SDKs we've developed at Shopify and still results in a performant app. I realized that Kotlin over the React bridge works and performs well together and still keeps up my skills in native Android development.
Ash: They changed when I built my first feature from the ground-up in React, for the web. The component model just kind of “clicked” for me. The next time I worked in Swift, everything felt so cumbersome and awkward. I was spending a lot of time writing code that didn’t make the software unique or valuable, it was just boilerplate.
Native developers are also familiar with mobile devices’ native APIs for geofencing, augmented reality, push notifications, and more. All these APIs are accessible to React Native applications, either through existing open source node modules or custom native modules that you can write. It’s your job to help your team make full and appropriate use of the device’s capabilities. A purely React Native app can be good, but it takes collaborating with native developers to make an app that’s really great.
AJ: I’ve had a great experience working with React Native at Shopify. I came in as a React dev with absolutely no mobile experience of any kind. I was pointed towards a coworker’s day long “Introduction to React Native” workshop, and it gave me a better understanding than I’d gotten from the self learning I’d attempted previously. On top of that, I have knowledgeable and supportive coworkers that are always willing to take the time out of their day to lend a hand and help fill in the gaps. Additionally the tooling created by the React Native Foundations team takes away the majority of the pain involved in getting started with React Native to begin with.
Michelle: Everything goes at super speed at Shopify—this includes learning React Native! There are so many resources within Shopify to support you including internal workshops providing a crash course to RN. Other teams are also using RN so there’s opportunity to learn from them and the best practices they’re following. Shopify also has specific mobile tooling teams to support RN in our CI environment and automation to ship to production. In addition to the mobile tooling team, there’s a specific React Native Foundations team that builds internal tools to help others get familiar and quickly spin up RN apps. We have monthly mobile team meetups to share and gain visibility into the different mobile projects built across Shopify.
Ash: I’m still very new to the company, but my experience here is really positive so far. There’s a lot of time spent on the foundations of our React Native apps—fast reload, downloadable bundles built for each pull request, lint rules that keep developers from making common mistakes—that all empower developers to move very, very quickly. In React Native, there is no compile step to interrupt a developer’s workflow. We get to develop at the speed of thought. Since Shopify invests so much in developer tooling, getting up to speed with the Shop app took no time at all.
Learning anything new, including RN, can feel intimidating, but you can learn RN. Your existing skills will help you learn, and learning it is best done in a team environment with many perspectives (which we have at Shopify, apply today!).
We see now that both web developers and native developers have different perspectives on building mobile apps with React Native, and how those perspectives complement each other. React Native teams at Shopify are generally staffed with developers from web, Android, and iOS backgrounds because the teams produce the best software when they can draw from these perspectives.
Whether you’re a web developer looking to expand the possibilities of what you can create, or you’re a native developer looking to move faster with a cross-platform technology, React Native can be a great solution. But just like any new skill, learning React Native can be intimidating. The best approach is to learn in a team environment where you can draw from the strengths of your colleagues. And if you’re keen to learn React Native in a supportive, collaborative environment, Shopify is hiring! You can also view a presentation on How We Write React Native Apps at Shopify from our Shipit! Presents series.
AJ Robidas is a developer from Ontario, Canada, with a specialization in accessibility. She has a varied background from C++ and Purl, some Python backend work, to multiple web frameworks (AngularJS, Angular, StencilJS and React). For the past year she has been a React Native developer on the Shop team implementing new and updated experiences for the Shop App
Michelle Fernandez is a senior software developer from Toronto, Canada with nearly a decade of experience in the mobile applications world. She has been working on Shopify’s Android Point of Sale app since its redesign with Shopify Polaris and has contributed to its rebuild as a React Native app from inception to launch. The Shopify POS app is now in production and used by Shopify merchants around the world.
Ash Furrow is a developer from New Brunswick, Canada, with a decade of experience building native iOS applications. He has written books on software development, has a personal blog, and currently contributes to the Shop team at Shopify.
On May 19, 2021, Shipit!, our monthly event series, presented How We Write React Native Apps. Join Colin Gray, Haris Mahmood, Guil Varandas, and Michelle Fernandez who are the developers setting the React Native standards at Shopify. They’ll share more on how we write performant React Native apps.
Q: What best practices can we follow when we’re building an app, like for accessibility, theming, typography, and so on?
A: Our Restyle and Polaris documentation cover a lot of this and is worth reading through to reference, or to influence your own decisions on best practices.
Q: How do you usually handle running into crashes or weird bugs that are internal to React Native? In my experience some of these can be pretty mysterious without good knowledge of React Native internals. Pretty often issues on GitHub for some of these "rare" bugs might stall with no solution, so working on a PR for a fix isn't always a choice (after, of course, submitting a well documented issue).
A: We rely on various debugging and observability tools to detect crashes and bug patterns. That being said, running into bugs that are internal to React Native isn’t a scenario that we have to handle often, and if it ever happens, we rely on the technical expertise of our teams to understand it and communicate, or fix it through the existing channels. That’s the beauty of open source!
Q: Do you have any guide on what needs to be flexible and what fixed size... and where to use margin or paddings?
A: Try to keep most things flexible unless absolutely necessary. This results in your UI being more fluid and adaptable to various devices. We use fixed sizes mostly for icons and imagery. We utilize padding to create spacing within a component and margins to create spacing between components.
Q: Does your team use React Studio?
A: No but a few native android developers coming from the IntelliJ suite of editors have set up their IDE to allow them to code in React and Kotlin with code resolutions using one IDE
Q: Do you write automated tests using protractor/cypress or jest?
A: Jest is our go-to library for writing and running unit and integration tests.
Q: Is Shopify Brownfield app? If it is, how are you handling navigation with React Native and Native!!
A: Shop and POS are both React Native from the ground up, but we do have a Brownfield app in the works. We are adding React Native views in piecemeal, and so navigation is being handled by the existing navigation controllers. Wiring this up is work, no getting around that.
Q: How do you synchronize native (KMM) and React Native state
A: We try to treat React Native state as the “Source of Truth”. At startup, we pass in whatever is necessary for the module to begin its work, and any shared state is managed in React Native, and updated via the native module (updates from the native module are sent via EventEmitter). This means that the native module is only responsible for its internal state and shared state is kept in React Native. One exception to this in the Point of Sale app is the SQLite database. We access that entirely via a native module. But again there’s only one source of truth.
Q: How do you manage various screen sizes and responsive layouts in React Native? (Polaris or something else)
A: We try not to use fixed sizing values whenever possible resulting in UIs more able to adjust to various device sizes. The Restyle library allows you to define breakpoints and pass in different values for each breakpoint when defining styles. For example, you can pass in different font sizes or spacing values depending on the breakpoints you define.
Q: Are you using Reanimated 2 in production at Shopify?
A: We are! The Shop app uses Reanimated 2 in production today.
Q: What do you use to configure and manage your CI builds?
A: We use Buildkite. Check out these two posts to learn more
Q: In the early stage of your React Native apps did you use Expo, or it was never an option?
A: We explored it, but most of our apps so quickly needed to “eject” from that workflow. We eventually decided that we would create our React Native applications as “vanilla” applications. Expo is great though, and we encourage people to use it for their own side projects.
Q: Are the nightly QAs automatic? How is the QA cycle?
A: Nightly builds are created automatically on our main branch. These builds automatically get uploaded to a test distribution platform and the Shopifolk (product managers, designers, developers) who have the test builds installed can opt in to always be updated to the latest version. Thanks to the ShipIt tool, any feature branches with failing tests will never be allowed to be merged to main.
All our devs are responsible for QA of the app and ensuring that no regressions occur before release.
Q: Have you tried Loki?
A: Some teams have tried it, but Loki doesn’t work with our CI constraints.
On average in 2019, Shopify handled billions of dollars of transactions per week. Therefore, it’s important to ensure new features are thoroughly tested before shipping them to our merchants. A vital part of the software quality process at Shopify is a practise called tophatting. Tophatting is manually testing your coworker’s changes and making sure everything is working properly before approving their pull request (PR).
Earlier this year, we announced that React Native is the future of mobile development in the company. However, the workflow for tophatting a React Native app was quite tedious and time consuming. The reviewer had to
To provide a more convenient and painless experience, we built a tool enabling React Native developers to quickly load their peer’s work within seconds. I’ll explain how the tool works in detail.
About two years ago, the Mobile Tooling team developed a tool for tophatting native apps. The tool works by storing the app’s build artifacts in cloud storage, mobile developers can download the app and launch it in an emulator or a simulator on demand. However, the tool’s performance can be improved when there are only React Native code changes because we don’t need to rebuild and re-download the entire app. One major difference between React Native and native apps is that React Native apps produce an additional build artifact, the JavaScript bundle. If a developer only changes the React Native code and not native code, then the only build artifact needed to load the changes is the new JavaScript bundle. We leveraged this fact and developed a tool to store any newly built JavaScript bundles, so React Native apps can fetch any bundle and load the changes almost instantly.
The main idea behind the tool is to store the JavaScript bundle of any new builds in our cloud storage, so developers can simply download the artifact instead of building it on demand when tophatting.

New PR on React Native project triggers a CI pipeline in Shopify Build
When a developer opens a new PR on GitHub or pushes a new commit in a React Native project, it triggers a CI pipeline in Shopify Build, our internal continuous integration/continuous delivery (CI/CD) platform then performs the following steps:

QR code that developers can scan on their mobile device
The PR comment records that the bundle upload is successful and gives developers three options to download the bundle, which include
Once the CI pipeline uploads the JavaScript bundle to cloud storage, developers need a way to easily download the bundle and load the changes in their app. We built a React Native component library providing a user interface (called the Tophat screen) for developers to load the changes.
The component library registers the Tophat screen as a separate component and a URL listener that handles specific deep link events. All developers need to do is to inject the component into the root level of their application.
The library also includes an action that shows the Tophat screen on demand. Developers open the Tophat screen to see the current bundle version or to reset the current bundle. In the example below, we use the action to construct a “Show Tophat” button, which opens the Tophat screen on press.
The Tophat screen looks like a modal or an overlay in the app, but it’s separate from the app’s component tree, so it introduces a non-intrusive UI for React Native apps.

Here’s an example of using the tool to load a different commit in our Local Delivery app.

Typical React Native tophat workflow
The typical workflow using the Tophat library looks like:
In the native tophatting project, we didn’t use a backend service. However, we decided to use a backend service to handle most of the business logic in this tool. This creates additional maintenance and infrastructure cost to the project, but we believe its proven advantages outweigh its costs. There are two main reasons why we chose to use a backend service:
The tool requires the use of Google Cloud’s and GitHub’s SDKs, which means the client needs to have an authentication token for each of these services. If a backend service didn’t exist, then each app and its respective CI pipeline would need to configure their own tokens. The CI pipeline and the component library would also need to have consistent storage path formats. This introduces extra complexity and adds additional steps in the tool’s installation process.
The backend service abstracts away the interaction with third party services such as authentication, uploading assets, and creating Github comments. The service also generates each bundle’s storage path, eliminating the issue of having inconsistent paths across different components.
Each JavaScript bundle has important metadata that developers need to quickly retrieve along with the bundle. A solution used by the native tophatting project is to store the metadata in the filename of the build artifact. We could leverage the same technique to store the metadata in the JavaScript Bundle’s storage path. However, this isn’t scalable if we wish to include additional metadata. For example, if we want to add the author of the commit to the bundle’s metadata, it would introduce a change in the storage path format, which requires changes in every app’s CI pipeline and the component library.
By using a backend service, we store more detailed metadata in a SQL database and decouple it from the bundle’s storage. This opens up the possibility of adding features like a confirmation step before downloading the bundle and querying bundles by app IDs or branch names.
The first iteration of the tool is complete and React Native developers use the tool to tophat each other’s pull request by simply scanning a QR code or entering a bundle ID. There are improvements that we want to make in the future:
Almost all of the React Native projects at Shopify are now using the tool and my team keeps working to improve the tophatting experience for our React Native developers.
In April, we announced Shop, our digital shopping assistant that brings together the best features of Arrive and Shop Pay. The Shop app started from our React Native codebase for our previous package tracking app Arrive, with every screen receiving a complete visual overhaul to fit the new branding.
While our product designers worked on introducing a whole new design system that would decide the look and feel of the app, we on the engineering side took the initiative to evolve our thinking around how we work with styling of screens and components. The end-product became Restyle, our open source library that allowed us to move forward quickly and easily in our transformation from Arrive to Shop.
I'll walk you through the styling best practices we learned through this process. They served as the guiding principles for the design of Restyle. However anyone working with a React app can benefit from applying these best practices, with or without using our library.
We faced a number of problems with our current approach in Arrive, and these were the questions we needed to answer to take our styling workflow to the next level:
With these questions in place, we came up with the following best practices that provided answers to them.
A prerequisite for being able to write clean and consistent styling code is for the design of the app to be based on a clean and consistent design system. A design system is commonly defined as a set of rules, constraints and principles that lay the foundation for how the app should look and feel. Building a complete design system is a topic far too big to dig into here, but I want to point out three important areas that the system should define its rules for.
Size and spacing are the two parameters used when defining the layout of an app. While sizes often vary greatly between different components presented on a screen, the spacing between them should often stay as consistent as possible to create a coherent look. This means that it’s preferred to stick to a small set of predefined spacing constants that’s used for all margins and paddings in the app.
There are many conventions to choose between when deciding how to name your spacing constants, but I've found the t-shirt size scale (XS, S, M, L, XL, etc) work best. The order of sizes are easy to understand, and the system is extensible in both directions by prefixing with more X’s.
When defining colors in a design system, it’s important not only to choose which colors to stick with, but also how and when they should be used. I like to split these definitions up into two layers:
When referring to a color in the app, it should be through the semantic color mapping. This makes it easy to later change, for example, the “Primary” color to be green instead of blue. It also allows you to easily swap out color schemes on the fly to, for example, easily accommodate a light and dark mode version of the app. As long as elements are using the “Background” semantic color, you can swap it between a light and dark color based on the chosen color scheme.
Similar to spacing, it‘s best to stick to a limited set of font families, weights and sizes to achieve a coherent look throughout the app. A grouping of these typographic elements are defined together as a named text variant. Your “Header” text might be size 36, have a bold weight, and use the font family “Raleway”. Your “Body” text might use the “Merriweather” family with a regular font weight, and size 16.
A carefully put together design system following the spacing, colour, and typography practices above should be defined in the app‘s codebase as a theme object. Here‘s how a simple version might look:
All values relating to your design system and all uses of these values in the app should be through this theme object. This makes it easy to tweak the system by only needing to edit values in a single source of truth.
Notice how the palette is kept private to this file, and only the semantic color names are included in the theme. This enforces the best practice with colors in your design system.
Now that you've defined your theme object, you might be tempted to start directly importing it in all the places where it's going to be used. While this might seem like a great approach at first, you’ll quickly find its limitations once you’re looking to work more dynamically with the theming. In the case of wanting to introduce a secondary theme for a dark mode version of the app, you would need to either:
The first option will introduce a large amount of tedious code repetition. The second option will only work if you force React to re-render the whole app when switching between light and dark modes, which is typically considered a bad practice. If you have a dynamic value that you want to make available to all components, you’re better off using React’s context API. Here’s how you would set this up with your theme:
The theme in React’s context will make sure that whenever the app changes between light and dark mode, all components that access the theme will automatically re-render with the updated values. Another benefit of having the theme in context is being able to swap out themes on a sub-tree level. This allows you to have different color schemes for different screens in the app, which could, for example, allow users to customize the colors of their profile page in a social app.
While it‘s entirely possible to keep reaching into the context to grab values from the theme for any view that needs to be styled, this will quickly become repetitious and overly verbose. A better way is to have components that directly map properties to values in the theme. There are two components that I find myself needing the most when working with themes this way, Box and Text.
The Box component is similar to a View, but instead of accepting a style object property to do the styling, it directly accepts properties such as margin, padding, and backgroundColor. These properties are configured to only receive values available in the theme, like this:
The “m” and “s” values here map to the spacings we‘ve defined in the theme, and “primary” maps to the corresponding color. This component is used in most places where we need to add some spacing and background colors, simply by wrapping it around other components.
While the Box component is handy for creating layouts and adding background colors, the Text component comes into play when displaying text. Since React Native already requires you to use their Text component around any text in the app, this becomes a drop in replacement for it:
The variant property applies all the properties that we defined in the theme for textVariant.header, and the color property follows the same principle as the Box component’s backgroundColor, but for the text color instead.
Here’s how both of these components would be implemented:
Styling directly through properties instead of keeping a separate style sheet might seem weird at first. I promise that once you start doing it you’ll quickly start to appreciate how much time and effort you save by not needing to jump back and forth between components and style sheets during your styling workflow.
Responsive design is a common practice in web development where alternative styles are often specified for different screen sizes and device types. It seems that this practice has yet to become commonplace within the development of React Native apps. The need for responsive design is apparent in web apps where the device size can range from a small mobile phone to a widescreen desktop device. A React Native app only targeting mobile devices might not work with the same extreme device size differences, but the variance in potential screen dimensions is already big enough to make it hard to find a one-size-fits-all solution for your styling.
An app onboarding screen that displays great on the latest iPhone Pro will most likely not work as well with the limited screen estate available on a first generation iPhone SE. Small tweaks to the layout, spacing and font size based on the available screen dimensions are often necessary to craft the best experience for all devices. In responsive design this work is done by categorizing devices into a set of predefined screen sizes defined by their breakpoints, for example:
With these breakpoints we're saying that anything below 321 pixels in width should fall in the category of being a small phone, anything above that but below 768 is a regular phone size, and everything wider than that is a tablet.
With these set, let's expand our previous Box component to also accept specific props for each screen size, in this manner:
Here's roughly how you would go about implementing this functionality:
In a complete implementation of the above you would ideally use a hook based approach to get the current screen dimensions that also refreshes on change (for example when changing device orientation), but I’ve left that out in the interest of brevity.
This final best practice requires you to be using TypeScript for your project.
TypeScript and React pair incredibly well together, especially when using a modern code editor such as Visual Studio Code. Instead of relying on React’s PropTypes validation, which only happens when the component is rendered at run-time, TypeScript allows you to validate these types as you are writing the code. This means that if TypeScript isn’t displaying any errors in your project, you can rest assured that there are no invalid uses of the component anywhere in your app.

Using the prop validation mechanisms of TypeScript
TypeScript isn’t only there to tell you when you’ve done something wrong, it can also help you in using your React components correctly. Using the prop validation mechanisms of TypeScript, we can define our property types to only accept values available in the theme. With this, your editor will not only tell you if you're using an unavailable value, it will also autocomplete to one of the valid values for you.
Here's how you need to define your types to set this up:
Following the best practices above via our Restyle library made a significant improvement to how we work with styles in our React Native app. Styling has become more enjoyable through the use of Restyle’s Box and Text components, and by restricting the options for colors, typography and spacing it’s now much easier to build a great-looking prototype for a new feature before needing to involve a designer in the process. The use of responsive style properties has also made it easy to tailor styles to specific screen sizes, so we can work more efficiently with crafting the best experience for any given device.
Restyle’s configurability through theming allowed us to maintain a theme for Arrive while iterating on the theme for Shop. Once we were ready to flip the switch, we just needed to point Restyle to our new theme to complete the transformation. We also introduced dark mode into the app without it being a concrete part of our roadmap—we found it so easy to add we simply couldn't resist doing it.
If you've asked some of the same questions we posed initially, you should consider adopting these best practices. And if you want a tool that helps you along the way, our Restyle library is there to guide you and make it an enjoyable experience.
Merchants worldwide rely on Shopify's Point Of Sale (POS) app to operate their brick and mortar stores. Unlike many mobile apps, the POS app is mission-critical. Any downtime leads to long lineups, unhappy customers, and lost sales. The POS app must be exceptionally reliable, and any outages resolved quickly.
Reliability engineering is a well-solved problem on the server-side. Back-end teams are able to push changes to production several times a day. So, when there's an outage, they can deploy fixes right away.
This isn't possible in the case of mobile apps as app developers don’t own distribution. Any update to an app has to be submitted to Apple or Google for review. It's available to users for download only when they approve it. A review can take anywhere between a few hours to several days. Additionally, merchants may not install the update for weeks or even months.
It's important to reduce the likelihood of bugs as much as possible and resolve issues in production as quickly as possible. In the following sections, we will detail the work we’ve done in both these areas over the last few years.
We rely heavily on automation testing at Shopify. Every feature in the POS app has unit, integration, functional, and UI snapshot tests. Developers on the team write these simultaneously as they are adding new functionality to the code-base. Changes aren’t merged unless they include automated tests that cover them. These tests run for each push to the repo in our Continuous Integration environment. You can learn more about our testing strategy here.
Besides automation testing, we also perform manual testing at various stages of development. Features like pairing a Bluetooth card reader or printing a receipt are difficult to test using automation. While we use mocks and stubs to test parts of such features, we manually test the full functionality.
Sometimes tests that can be automated, inadvertently end up in the manual test suite. This causes us to spend time testing something manually when computers can do that for us. To avoid this, we audit the manual test suite every few months to weed out all such test cases.
Changes made to the code-base aren’t merged until reviewed by other engineers on the team. These reviews allow us to spot and fix issues early in the life-cycle. This process works only if the reviewers are knowledgeable about that particular part of the code-base. As the team grew, finding the right people to do reviews became difficult.
To overcome this, we have divided the code-base into components. Each team owns the component(s) that make up the feature that they are responsible for. Anyone can make changes to a component, but the team that owns it must review them before merging. We have set up Code Owners so that the right team gets added as reviewers automatically.
Reviewers must test changes manually, or in Shopify speak, "tophat", before they approve them. This can be a very time-consuming process. They need to save their work, pull the changes, build them locally, and then deploy to a device or simulator. We have automated this process, so any Pull Request can be top-hatted by executing a single command:
`dev android tophat <pull-request-url>`
`dev ios tophat <pull-request-url>`
You can learn more about mobile tophatting at Shopify here.
Historically, updates to POS were shipped whenever the team was “ready.” When the team decided it was time to ship, a release candidate was created, and we spent a few hours testing it manually before pushing it to the app stores.
These ad-hoc releases made sense when only a handful of engineers were working on the app. As the team grew, our release process started to break down. We decided to adopt the release train model and started shipping monthly.
This method worked for a few months, but the team grew so fast that it wasn’t working anymore. During this time, we went from being a single engineering team to a large team of teams. Each of these teams is responsible for a particular area of the product. We started shipping large changes every month, so testing release candidates was taking several days.
In 2018, we decided to switch to weekly releases. At first, this seemed counter-intuitive as we were doing the work to ship updates more often. In practice, it provided several benefits:
We then made it easier for the team to ship updates every week by introducing Release Captain and ShipIt Mobile.
As you can see, this is quite involved and can take a lot of time if done by the same person every week. Luckily, we had quite a large team, so we decided to make this a rotating responsibility.
Each week, the engineer responsible for the release is called the Release Captain. They work on shipping the release so that the rest of the team can focus on testing, fixing bugs, or working on future releases.
Each engineer on the team is the Release Captain for two weeks before the next engineer in the schedule takes over. We leverage PagerDuty to coordinate this, and it makes it very easy for everyone to know when they will be Release Captain next. It also simplifies planning around vacations, team offsites, etc.
To simplify things even further, we configured our friendly chatbot, spy, to automatically announce when a new Release Captain shift begins.


Once ready, the rest of the team is automatically notified in Slack to start testing.

After fixing all the bugs found, the update is submitted to the app store with just a single click. You can learn more about ShipIt Mobile here. These improvements not only make weekly releases easier, but they also make it significantly faster to ship hotfixes in case of a critical issue in production.
Despite our best efforts, bugs sometimes slip into production. To reduce the surface area of a disruption, we make the updates available only to a small fraction of our user base at first. We then monitor the release to make sure there are no crashes or regressions. If everything goes well, we gradually increase the percentage of users the update is available to over the next few days. This is done using Phased Releases and Staged Rollouts in iOS AppStore and Google Play, respectively.
The only exception to this approach is when a fix for a critical issue needs to go out immediately. In such cases, we make the update available to 100% of the users right away. We also can block users from using the app until they update to the latest version.
We do this by having the POS app query the server for the minimum supported version that we set. If the current version is older than that, the app blocks the UI and provides update instructions. This is quite disruptive and can be annoying to merchants who are trying to make a sale. So we do it very rarely and only for critical security issues.
Staged rollouts are useful for limiting how many users get the latest changes. But, they don’t provide a way to explicitly pick which users. When building new features, we often handpick a few merchants to take part in early-access. During this phase, they get to try the new features and give us feedback that we can work on before a final release.
To do that, we put features, and even big refactors behind server-side beta flags. Only merchants whose stores we have explicitly set a beta flag will see the app’s new feature. This makes it easy to run closed betas with selected merchants. We also can do staged rollouts for beta flags, which gives us another layer of flexibility.
When something goes wrong in production, we want to be the first to know about it. The POS app and backend is instrumented with comprehensive metrics, reported in real-time. Using these metrics, we have dashboards set up to track the health of the product in production.
Using these dashboards, we can check the health of any feature in a geography with just a few clicks. For example, the % of successful chip transactions made using a VISA credit card with the Tap, Chip & Swipe reader in the UK, or the % of successful tap transactions made using an Interac debit card with the Tap & Chip reader in Canada for a particular merchant.
While this is handy, we didn’t want to have to keep checking these dashboards for anomalies all the time. Instead, we wanted to get notified when something goes wrong. This is important because while most of our engineering team is in North America, Shopify POS is used worldwide.
This is harder to do than it may seem because the volume of commerce varies throughout the year. Time of day, day of the week, holidays, seasons, and even the ongoing pandemic affect how much merchants are able to sell. Setting manual thresholds to detect issues can cause a lot of false negatives and alert fatigue. To overcome this, we leverage Datadog’s Anomaly Detection. Once the selected algorithm has enough data to establish a baseline, alerts will only get fired if there’s an anomaly for that particular time of the year.
We direct these alerts to Slack so that the right folks can investigate and fix them.

In the early days of POS, bugs and outages were reported in the team Slack channel, and whoever on the team had the bandwidth, investigated them. This worked well when we had a handful of developers, but this approach didn’t scale as the team grew. Issues kept going to just a few folks who had the most context, and teams kept getting distracted from regular project work, causing delays.
To fix this, we set up a rotating on-call schedule called Retail ATC (Air Traffic Control). Every week, there is a group of developers on the team dedicated to monitoring how things are working in production and handling outages. These developers are responsible only for this and are not expected to contribute to regular project work. When there are no outages, ATCs spend time tackling tech debt and helping our Technical Merchant Support team.
Every developer on the team is on-call for two weeks at a time. The first week they are Primary ATC, and the next week they are Secondary ATC. Primary ATC is paged when something goes wrong, and they are responsible for triaging and investigating it. If they need help or are unavailable (commute time, connectivity issues, etc.), the Secondary ATC is paged. ATCs are not expected to fix all issues that arise by themselves, while often they can. They are instead responsible for working with the team that has the most context.

Since we offer the POS app on both Android on iOS, we have ATC schedules for developers that work on each of those apps. Some areas, like payments, for instance, need a lot of domain knowledge to investigate issues. So we have dedicated ATCs for developers that work in those areas.
Having folks dedicated to handling issues in production frees up the rest of the team to focus on regular project work. This approach has greatly reduced the amount of context switching teams had to do. It has also reduced the stress that comes with the responsibility of working on a mission-critical mobile application.
Over the last couple of years, ATC has also become a great way for us to help new team members onboard faster. Investigating bugs and outages exposes them to various tools and parts of our codebase in a short amount of time. This allows them to become more self-sufficient quickly. However, being on-call can be stressful. So, we only add them to the schedule after they have been on the team for a few months and have undergone training. We also pair them with more experienced folks when they go on call.
When an outage occurs, it must be resolved as quickly as possible. To do this, we have a set of best practices that the team can follow so that we can spend more time investigating the issue vs figuring out how to do something.
An incident is started by the ATC in response to an automated alert. ATCs use our ChatOps tools to start the incident in a dedicated Slack channel.


Incidents are always started in the same channel, and all communication happens in it. This is to ensure that there is a single source of information for all stakeholders.
As the investigation goes on, findings are documented by adding the 📝 emoji to messages. Our chatbot, spy automatically adds them to a service disruption document and confirms it by adding a  emoji to the same message.
Once we identify the cause of the outage and verify that it has been resolved, the incident is stopped.


The ATC then schedules a Root Cause Analysis (RCA) for the incident on the next working day. We have a no-blame culture, and the meeting is focused on determining what went wrong and how we can prevent it from happening in the future.
At the end of the RCA, action items are identified and assigned owners. Keeping track of outages over time allows us to find areas that need more engineering investment to improve reliability.
Thanks to these efforts, we've been able to take an app built for small stores and scale it for some of our largest merchants. Today, we support a large number of businesses to sell products worth billions of dollars each year. Along the way, we also scaled up our engineering team and can ship faster while improving reliability.
We are far from done, though, as each year we are onboarding bigger and bigger merchants onto our platform. If these kinds of challenges sound interesting to you, come work with us! Visit our Engineering career page to find out about our open positions. Join our remote team and work (almost) anywhere. Learn about how we’re hiring to design the future together - a future that is digital by default.
Last month, Software Mansion announced the alpha release of Reanimated 2. Version 2 is a complete paradigm shift in the way we build gestures and animations in React Native.
Last January, at the React Native Community meetup in Kraków, Krzysztof Magiera (co-creator of React Native Android and creator of Gesture Handler and Reanimated) mentioned the idea of a new implementation of Reanimated based on a concept borrowed from an experimental web API, animation worklets: JavaScript functions that run on an isolated context to compute an animation frame. And a few days later Shopify announced its support for Software Mansion’s effort in the open source community, including backing the new implementation of Reanimated.
When writing gestures and animations in React Native, the key to success is to run the complete user interaction on the UI thread. This means that you don’t need to communicate with the JavaScript thread, nor expect this thread to be free to compute an animation frame.
In Reanimated 1, the strategy employed was to use a declarative domain-specific language to declare gestures and animations beforehand. This approach is powerful, but came with drawbacks:
To use the Reanimated v1 Domain Specific Language, you have to adopt a declarative mindset which is challenging, and simple instructions could end-up being quite verbose. Basic mathematical tools such as coordinate conversions, trigonometry, and bezier curves, just to name a few, had to be rewritten using the declarative DSL.
And while the instruction set offered by v1 is large, there are still some use cases where you are forced to cross the React Native async bridge (see Understanding the React Native bridge concept), for example, when doing date or number formatting for instance.
Finally, the declaration of the animations at initialization time has a performance cost: the more animation nodes are created, the more messages need to be exchanged between the JavaScript and UI thread. On top of that, you need to take care of memoization: making sure to not re-declare animation nodes more than necessary. Memoization in v1 proved to be challenging and a substantial source of potential bugs when writing animations.
Enter Reanimated 2.
One of the interesting takeaways from the official announcement is that Software Mansion approached the problem from a different angle. Instead of starting from the main constraint, to not cross the React Native bridge, and offering a way to circumvent it, they asked: How would it look if there were no limitations when writing gestures and animations? They started the work on a solution from there.
Reanimated 2 is based on a new API named animation worklets. These are JavaScript functions that run on the UI thread independently from the JavaScript thread. These functions can be declared as a worklet via the worklet directive.
Worklets can receive parameters, access constants from the JavaScript thread, invoke other worklet functions, and invoke functions from the JavaScript thread asynchronously. This new API might remind you of web workers which are also isolated JS functions that talk to the main thread via asynchronous messages. They may also remind you of OpenGL shaders which are also pieces of code to be compiled and executed in an independent manner.
The code snippet above showcases six properties from worklets. Worklets:

Reanimated 2 liquid-swipe example - click here to see animation
The team at Software Mansion is offering us a couple of great examples to showcase the new Reanimated API. An interesting one is the liquid-swipe example. It features a couple of advanced animation techniques such as bezier curve interpolation, gesture handling, and physics-based animations, showing us that Reanimated 2 is ready for any kind of advanced gestures and animations
When writing gestures and animations, you need to do three things:
The new Reanimated API is offering us five new hooks to perform these three tasks.
There are two hooks available to create animation values. useSharedValue() creates a shared value that are like Animated.Value but they exist in both the JavaScript and the UI thread. Hence the name.
The useDerivedValue() hook creates a shared value based on some worklet execution. For instance, in the code snippet below, the theta value is computed in a worklet.
useAnimatedGestureHandler() hook can connect worklets to any gesture handler from react-native-gesture-handler. Each event implements a callback with two parameters: event, which contains the values of the gesture handler, and context which you can conveniently use to keep some state across gesture events
useAnimatedStyle() returns a style object that can be assigned to an animated component.
Finally, useAnimatedProps() is similar to useAnimatedStyle but for animated properties. Now animated props are set via the animatedProps property
Let’s build our first example with Reanimated 2. We have an object that we want to drag around the screen. Like in v1, we create two values for us to translate the card on the x and y axis, and we wrap the card component with a PanGesture handler. So far so good.
As seen in the above code, the animation values are created using useSharedValue and assigned to an animated view via useAnimatedStyle. Now let’s create a gesture handler via useAnimatedGestureHandler. In our gesture handler, we want to do three things:
translate values into the context object. This allows us to keep track of the cumulated translations across different gestures.translate the gesture translation plus its offset values.The final example source can be found on GitHub. You can see the gesture in action below.

Reanimated 2 PanGesture example - click here to see the animation
With Reanimated 2, the team at Software Mansion asked: “How would it look if there were no constraints when writing gestures and animations in React Native?” and started from there.
This new version is based on the concept of animation worklets, JavaScript functions that are executed on the UI thread independently from the JavaScript thread. Worklets can receive parameters, access constants, and asynchronously invoke functions from your React code. The new Reanimated API offers five new hooks to create animation values, gesture handlers, and assign animated values to component properties. Part of the Github repository, are many examples that showcase the power of the new Reanimated API.
We hope that you are as excited about this new version as we are. Reanimated 2 dramatically lowers the barrier to entry in building complex user-interactions in React Native. It also enables new use-cases where we previously had to cross the React Native bridge (to format values for instance). It also dramatically improves the performance at initialization time which in the future might have a substantial impact on particular tasks such as navigation transitions.
We are looking forward to following the progress of this new exciting way to write gestures and animations.
Shopify is investing in React Native as our primary choice of mobile technology moving forward. As a part of this we’ve rewritten our package tracking app Arrive with React Native and launched it on Android—an app that previously only had an iOS version.
One of the most cherished features by the users of the Arrive iOS app is the confetti that rains down on the screen when an order is delivered. The effect was implemented using the built-in CAEmitterLayer class in iOS, producing waves of confetti bursting out with varying speeds and colors from a single point at the top of the screen.
When we on the Arrive team started building the React Native version of the app, we included the same native code that produced the confetti effect through a Native Module wrapper. This would only work on iOS however, so to bring the same effect to Android we had two options before us:
As you might have guessed from the title of this blog post, we decided to go with the second option. To keep the code as performant as the native implementation, the best option would be to write it in a declarative fashion with the help of the Reanimated library.
I’ll walk you through, step by step, how we implemented the effect in React Native, while also explaining what it means to write an animation declaratively.
When we worked on this implementation, we also decided to make some visual tweaks and improvements to the effect along the way. These changes make the confetti spread out more uniformly on the screen, and makes them behave more like paper by rotating along all three dimensions.
To get our feet wet, the first step will be to render a number of confetti on the screen with different colors, positions and rotation angles.

Initialize the view of 100 confetti
We initialize the view of 100 confetti with a couple of randomized values and render them out on the screen. To prepare for animations further down the line, each confetto (singular form of confetti, naturally) is wrapped with Reanimated's Animated.View. This works just like the regular React Native View, but accepts declaratively animated style properties as well, which I’ll explain in the next section.
In React Native, you generally have two options for implementing an animation:
requestAnimationFrame on every frame to update the properties of a view.The first option might seem the most attractive at first for its simplicity, but there’s a big problem with the approach. You need to be able to calculate the new property values within 16 milliseconds every time to maintain a consistent 60 FPS animation. In a vacuum, this might seem like an easy goal to accomplish, but because of JavaScript's single threaded nature you’ll also be blocked by anything else that needs to be computed in JavaScript during the same time period. As an app grows and needs to be able to do more things at once, it quickly becomes implausible to always be able to finish the computation within the strict time limit.
With the second option, you only rely on JavaScript at the beginning of the animation to set it all up, after which all computation happens on the native UI-thread. Instead of relying on a JavaScript function to answer where to move a view on each frame, you assemble a set of instructions that the UI-thread itself can execute on every frame to update the view. When using Reanimated these instructions can include conditionals, mathematical operations, string concatenation, and much more. These can be combined in a way that almost resembles its own programming language. With this language, you write a small program that can be sent down to the native layer, that is executed once every frame on the UI-thread.
We are now ready to apply animations to the confetti that laid out in the previous step. Let's start by updating our createConfetti function:
Instead of randomizing x, y and angle, we give all confetti the same initial values but instead randomize the velocities that we're going to be applying to them. This creates the effect of all confetti starting out inside an imaginary confetti cannon and shooting out in different directions and speeds. Each velocity expresses how much a value will be changing for each full second of animation.
We need to wrap each value that we're intending to animate with Animated.Value, to prepare them for declarative instructions. The Animated.Clock value is what's going to be the driver of all our animations. As the name implies it gives us access to the animation's time, which we'll use to decide how much to move each value forward on each update.
Further down, next to where we’re mapping over and rendering the confetti, we add our instructions for how the values should be animated:
Before anything else, we set up our dt (delta time) value that will express how much time has passed since the last update, in seconds. This decides the x, y, and angle delta values that we're going to apply.
To get our animation going we need to start the clock if it's not already running. To do this, we wrap our instructions in a condition, cond, which checks the clock state and starts it if necessary. We also need to call our timeDiff (time difference) value once to set it up for future use, since the underlying diff function returns its value’s difference since the last frame it evaluated, and the first call will be used as the starting reference point.
The declarative instructions above roughly translate to the following pseudo code, which runs on every frame of the animation:
Considering the nature of confetti falling through the air, moving at constant speed makes sense here. If we were to simulate more solid objects that aren't slowed down by air resistance as much, we might want to add a yAcc (y-axis acceleration) variable that would also increase the yVel (y-axis velocity) within each frame.
Everything put together, this is what we have now:
The confetti is starting to look like the original version, but our React Native version is blurting out all the confetti at once, instead of shooting them out in waves. Let's address this by staggering our animations:
We add a delay property to our confetti, with increasing values for each group of 10 confetti. To wait for the given time delay, we update our animation code block to first subtract dt from delay until it reaches below 0, after which our previously written animation code kicks in.
Now we have something that pretty much looks like the original version. But isn’t it a bit sad that a big part of our confetti is shooting off the horizontal edges of the screen without having a chance to travel across the whole vertical screen estate? It seems like a missed potential.
Instead of letting our confetti escape the screen on the horizontal edges, let’s have them bounce back into action when that’s about to happen. To prevent this from making the confetti look like pieces of rubber macaroni bouncing back and forth, we need to use a good elasticity multiplier to determine how much of the initial velocity to keep after the collision.
When an x value is about to go outside the bounds of the screen, we reset it to the edge’s position and reverse the direction of xVel while reducing it by the elasticity multiplier at the same time:
We’re starting to feel done with our confetti, but let’s have a last bit of fun with it before shipping it off. What’s more fun than a confetti cannon shooting 2-dimensional confetti? The answer is obvious of course—it’s two confetti cannons shooting 3-dimensional confetti!
We should also consider cleaning up by deleting the confetti images and stopping the animation once we reach the bottom of the screen, but that’s not nearly as fun as the two additions above so we’ll leave that out of this blog post.
This is the result of adding the two effects above:
The final full code for this component is available in this gist.
While it can take some time to get used to the Reanimated’s seemingly arcane API, once you’ve played around with it for a bit there should be nothing stopping you from implementing butter smooth cross-platform animations in React Native, all without leaving the comfort of the JavaScript layer. The library has many more capabilities we haven’t touched on in this post, for example, the possibility to add user interactivity by mapping animations to touch gestures. Keep a lookout for future posts on this subject!
After years of native mobile development, we’ve decided to go full steam ahead building all of our new mobile apps using React Native. As I’ll explain, that decision doesn’t come lightly.
Each quarter, the majority of buyers purchase on mobile (with 71% of our buyers purchasing on mobile in Q3 of last year). Black Friday and Cyber Monday (together, BFCM) are the busiest time of year for our merchants, and buying activity during those days is a bellwether. During this year’s BFCM, Shopify merchants saw another 3% increase in purchases on mobile, an average of 69% of sales.
So why the switch to React Native? And why now? How does this fit in with our native mobile development? It’s a complicated answer that’s best served with a little background.
We have an engineering culture at Shopify of making specific early technology bets that help us move fast.
On the whole, we prefer to have few technologies as a foundation for engineering. This provides us multiple points of leverage:
At the same time, there are always new technologies emerging that provide us with an opportunity for a step change in productivity or capability. We experiment a lot for the opportunity to unlock improvements that are an order of magnitude improvement—but ultimately, we adopt few of these for our core engineering.
When we do adopt these early languages or frameworks, we make a calculated bet. And instead of shying away from the risk, we meticulously research, explore and evaluate such risks based on our unique set of conditions. As is often within risky areas, the unexplored opportunities are hidden. We instead think about how we can mitigate that risk:
Ruby on Rails was a nascent and obscure framework when Tobi (our CEO) first got involved as a core contributor in 2004. For years, Ruby on Rails has been seen as a non-serious, non-performant language choice. But that early bet gave Shopify the momentum to outperform the competition even though it was not a popular technology choice. By using Ruby on Rails, the team was able to build faster and attract a different set of talent by using something more modern and with a higher level of abstraction than traditional programming languages and frameworks. Paul Graham talks about his decision to use Lisp in building Viaweb to similar effect and 6 of the 10 most valuable Y Combinator companies today all use Ruby on Rails (even though again, it still remains largely unpopular). As a contrast, none of the Top 10 most valuable Y Combinator companies use Java; largely considered the battle tested enterprise language.
Similarly two years ago, Shopify decided to make the jump to Google Cloud. Again, a scary proposition for the 3rd largest US Retail eCommerce site in 2019—to do a cloud migration away from our own data centers, but to also pick an early cloud contender. We saw the technology arc of value creation moving us to focusing on what we’re good at—enabling entrepreneurship and letting others (in this case Google Cloud) focus on the undifferentiated heavy lifting of maintaining physical hardware, power, security, the operating system updates, etc.
In 2015, Facebook announced and open sourced React Native; it was already being used internally for their mobile engineering. React Native is a framework for building native mobile apps using React. This means you can use a best-in-class JavaScript library (React) to build your native mobile user interfaces.
At Shopify, the idea had its skeptics at the time (and still does), but many saw its promise. At the company’s next Hackdays the entire company spent time on React Native. While the early team saw many benefits, they decided that we couldn’t ship an app we’d be proud of using React Native in 2015. For the most part, this had to do with performance and the absence of first-class Android support. What we did learn was that we liked the Reactive programming model and GraphQL. Also, we built and open-sourced a functional renderer for iOS after working with React Native. We adopted these technologies in 2015 for our native mobile stack, but not React Native for mobile development en masse. The Globe and Mail documented our aspirations in a comprehensive story about the first version of our mobile apps.
Until now, the standard for all mobile development at Shopify was native mobile development. We built mobile tooling and foundations teams focused on iOS and Android helping accelerate our development efforts. While these teams and the resulting applications were all successful, there was a suspicion that we could be more effective as a team if we could:
React Native provides a way to build native cross platform mobile apps using JavaScript. React Native is similar to React in that it allows developers to create declarative user interfaces in JavaScript, for which it internally creates a hierarchy tree of UI elements or in React terminology a virtual DOM. Whereas the output of ReactJS targets a browser, React Native translates the virtual DOM into mobile native views using platform native bindings that interface with application logic in JavaScript. For our purposes, the target platforms are Android and iOS, but community driven effort have brought React Native to other platforms such as Windows, macOS and Apple tvOS.

There are situations where React Native would not be the default option for building a mobile app at Shopify. For example, if we have a requirement of:
Reminder: Low-level libraries including many open sourced SDKs will remain purely native. And we can always create our own native modules when we need to be close to the metal.
There were 3 main reasons now is a great time to take this stance:
We have many mobile surfaces at Shopify for buyers and merchants to interact, both over the web and with our mobile apps. We spent time over the last year experimenting with React Native with three separate teams over three apps: Arrive, Point of Sale, and Compass.
From our experiments we learned that:
As an aside, even though we’re making the decision to build all new apps using React Native, that doesn’t mean we’ll automatically start rewriting our old apps in React Native.
At the end of 2018, we decided to rewrite one of our most popular consumer apps, Arrive (which is now Shop app) in React Native. Arrive is no slouch, it’s a highly rated, high performing app that has millions of downloads on iOS. It was a good candidate because we didn’t have an Android version. Our efforts would help us reach all of the Android users who were clamoring for Arrive. It’s now React Native on both iOS and Android and shares 95% of the same code. We’ll do a deep dive into Arrive in a future blog post.
So far this rewrite resulted in:
The team also came up with this cool way to instantly test work-in-progress pull requests. You simply scan a QR code from an automated GitHub comment on your phone and the JavaScript bundle is updated in your app and you’re now running the latest code from that pull request. JML, our CTO, shared the process on Twitter recently.
At the beginning of 2019, we did a 6-week experiment on our flagship Point of Sale (POS) app to see if it would be a good candidate for a rewrite in React Native. We learned a lot, including that our retail merchants expect almost 2x the responsiveness in our POS due to the muscle memory of using our app while also talking to customers.
In order to best serve our retail merchants and learn about React Native in a physical retail setting, we decided to build out the new POS natively for iOS and use React Native for Android.
We went ahead with 2 teams for the following reasons:
We announced a complete rewrite of POS at Unite 2019. Look for both the native iOS and React Native Android apps to launch in 2020!
The Start team at Shopify is tasked with helping folks new to entrepreneurship. Before the company wide decision to write all mobile apps in React Native came about, the team did a deep dive into Native, Flutter and React Native as possible technology choices. They chose React Native and had iOS and Android apps live in the app stores.
The first versions of Compass, which is now Shopify Learn, were launched within 3 months with ~99% of the code shared between iOS and Android.
We have lots in store for 2020.
Will we rewrite our native apps? No. That’s a decision each app team makes independently
Will we continue to hire native engineers? Yes, LOTS!
We want to contribute to core React Native, build platform specific components, and continue to understand the subtleness of each of the platforms. This requires deep native expertise. Does this sound like you?
We believe that building software is a team sport. We have a commitment to the open web, open source and open standards.
We’re sponsoring Software Mansion and Krzysztof Magiera (co-founder of React Native for Android) in their open source efforts around React Native.
We’re working with William Candillon (host of Can It Be Done in React Native) for architecture reviews and performance work.
We’ll be partnering closely with the React Native team at Facebook on automation, 3rd party libraries and stewardship of some modules via Lean Core.
We are working with Discord to accelerate the open sourcing of FastList for React Native (a library which only renders list items that are in the viewport) and optimizing for Android.
When you make a bet and go deep into a technology, you want to gain maximum leverage from that choice. In order for us to build fast and get the most leverage, we have two types of teams that help the rest of Shopify build quickly. The first is a tooling team that helps with engineering setup, integration and deployment. The second is a foundations team that focuses on SDKs, code reuse and open source. We’ve already begun spinning up both of these teams in 2020 to focus on React Native.
Our popular Shopify Ping app (now called Shopify Inbox) which has enabled hundreds of thousands of customer conversations is currently only iOS. In 2020, we’ll be building the Android version using React Native out of our San Francisco office and we’re hiring.
In 2019, Twitter released their desktop and mobile web apps using something called React Native Web. While this might seem confusing, it allows you to use the same React Native stack for your web app as well. Facebook promptly hired Nicolas Gallagher as a result, the lead engineer on the project. At Shopify we’ll be doing some React Native Web experiments in 2020.
Shopify is always hiring sharp folks in all disciplines. Given our particular stack (Ruby on Rails/React/React Native) we’ve always invested in people even if they don’t have this particular set of experiences coming in to Shopify. In mobile engineering (btw, I love this video about engineering opinions) we’ll continue to write mobile native code and hire native engineers (iOS and Android).
Farhan Thawar is VP Engineering for Channels and Mobile at Shopify
Twitter: @fnthawar
Receipts are an essential requirement of every brick-and-mortar business. They’re the proof of purchase that allows buyers to get refunds or make returns/exchanges. Only last year, we estimate that millions of receipts were printed by merchants running Shopify Point Of Sale (POS) for iOS. This feature was only available on iOS because Shopify POS was released first for that platform and is a few development cycles ahead of its Android counterpart. Merchants that strictly needed receipt printing support had no choice but to switch to the iPad but as of March 2019, merchants using an Android device now have the option to provide printed receipts.
The receipt generation process is unique because it’s affected by most features in Shopify POS (like discounts, tips, transactions, gift cards, and refunds) and leads to over 8 billion unique receipt content combinations! These combinations also keep growing as we expand to more countries and support newer payment methods. This article presents our approach to implementing receipt printing support, starting from our goals to an overview of all the challenges involved.
These were the main goals the Payments & Hardware team had in mind for receipt printing support:
In order to achieve our goals, first we defined the /Printing Pipeline/ by dividing the receipt printing process into multiple self-contained steps that are executed one after another:

The Printing Pipeline

Receipt Sections
After the sections are defined, the receipt is ready to be printed, so we move to the Print Request Creation step. This involves creating a print request out of the buyer-friendly receipt data and sections definition. A print request also includes other printer commands like paper cuts. Depending on the receipt being printed, there might be some paper cuts in it. For example, a gift card purchase requires paper cuts so the buyer can easily detach the printed gift card from the rest of the receipt.
Now a print request is ready to be submitted to the printer, the Content Rendering step kicks in. It’s time to render images for each section of the receipt according to the paper size and printer resolution.
The Printing Pipeline is finalized by the Receipt Printing step. At this point, the receipt images are delivered to the printer vendor SDK and the merchant finally gets a paper receipt out of their printer.
The very first step is to collect all the raw models required to generate a receipt. We define an interface that asynchronously fetches all these models from either the local SQLite database or our GraphQL API.
After all the data models are collected by the Data Aggregation step, they go through the PrintableReceiptComposer class to be processed and transformed into a PrintableReceipt object, which is a dumb data class with pre-formatted receipt content that will be consumed down the pipeline.
In this context, the use of a coroutine-based API for the Data Aggregation step presented earlier not only improves performance by running all requests in parallel, but also leverages code readability, as it can be seen in the snippet above.
The PrintableReceiptComposer class is where most of the business logic lives. The content of a receipt can drastically change depending on a lot of factors, like item purchased, payment type, credit card payment, payment gateway, custom tax rules, specific card brand certification requirements, exchanges, refunds, discounts, and tips. In order to make sure we are complying with all requirements and the proper display of all features on receipts, we took a heavily test-driven approach. By using test-driven development, we could write the requirements first in the form of unit tests and achieve confidence that data transformation covers not only all the features involved but also several edge cases.
Now that we have all data put together in its own receipt model exactly like it will be on paper, it’s time to define what sections the receipt is made of:
Sections are just regular Android views that will be rendered in the Content Rendering step. In the Sections Definition step, we specify a list of ViewBinder-like classes, one per section, that is used during the receipt rendering step. Section binders are implementations of a functional interface with a fun bind(view: View, receipt: PrintableReceipt) method definition. All these binders do is bind the PrintableReceipt data model to a given view with little to no business logic in an almost one-to-one, view-to-content mapping. Here is an example of implementation for the total box section:
A PrintRequest is a printer-agnostic class composed by a sequence of receipt printer primitives (like lazily-rendered images and cut paper commands) to be executed by low-level printer integration code. It also contains the size of the paper to print on, which can be 2” or 3” wide. During this step, a PrintRequest will be created containing a list of section images and sent to our POS Hardware SDK, which integrates to every printer supported by the app.
During this step, we will render each section image defined in the PrintRequest. First, the rendering process will inflate a view for the corresponding section and use the section binder to bind the PrintableReceipt object to the inflated view. Then, this bound section view will be drawn to an in-memory Bitmap at a desired scale according to the printer resolution for that paper size.
The last step happens in the Hardware SDK where the section Bitmap objects generated in the previous step will be passed down to the printer-specific SDK. At this point, a receipt will come out of the printer.

The Hardware SDK Pipeline
The POS app will convert an Order object into a PrintRequest by executing all the aforementioned pipeline steps and then it will be sent to the ReceiptPrinterProcessManager in the POS Hardware SDK. At this point, the PrintRequest will be forwarded to a vendor-specific ReceiptPrinter implementation. Since a printer can have multiple connectivity interfaces (like Wi-Fi, Bluetooth or USB), the currently active DeviceConnection will then pass the PrintRequest down to the Printer Vendor SDK at the very last step.
The Hardware SDK is a collection of vendor-agnostic interfaces and their respective implementations that integrate with each vendor SDK. This abstraction enables us to easily add or remove support for different printers and other peripherals of different vendors in isolation, without having to change the receipt generation code.
Since receipt printing is affected by over 30 features, we wanted to make sure we had a multi-step test coverage to enforce correctness, especially when more advanced features, such as tax overrides, come into play. In order to achieve that, we heavily relied on unit tests and test-driven development for the Data Aggregation and Content Generation steps. The latter, which is the most critical one of all, has over 80 test cases stressing a multitude of extraordinary receipt data arrangements, like combinations of different payment types on custom gateways, or transactions in different countries with different currencies and credit card certification rules. Whenever a bug was found, a new test case was introduced along with the fix.
The correctness of the Sections Definition and Content Rendering steps is enforced by screenshot tests. Our continuous integration (CI) infrastructure generates screenshots out of receipt bitmaps and compare them pixel by pixel with pre-recorded baseline ones to ensure receipts look as expected. The Sections Definition benefits from these tests by making sure that each section is properly rendered in isolation and that all of them are composed together in the right order. The Content Rendering step, on the other hand, benefits from having canvas transformations asserted, so that the receipt generation engine can easily adjust to any printer/paper resolution.

Baseline screenshot diff on Github after changes made to the line items receipt section
Having a componentized and reusable printing stack gives us the agility we need to focus on extending support for new printer models in the future, no matter what printing resolutions or paper sizes they operate with and it can be done in a just a couple of hours. Taking a test-driven approach not only ensures that multiple edge cases are properly handled, but also enforces a design-by-contract methodology in which the boundaries between steps in the pipeline are well-defined and easy to maintain.
If you like working on problems like these and want to be part of a retail transformation, Shopify is hiring and we’d love to hear from you. Please take a look at the open positions on the Shopify Engineering career page.
At Shopify, we use a monorepo architecture where multiple app projects coexist in one Git repository. With hundreds of commits per week, the fast pace of evolution demands a commitment to testing at all levels of an app in order to quickly identify and fix regression bugs.
This article presents the ways we test the various components of an iOS application: Models, Views, ViewModels, View Controllers, and Flows. For brevity, we ignore the details of the Continuous Integration infrastructure where these tests are run, but you can learn more from the Building a Dynamic Mobile CI System blog post.
Consider the process of building a reliable car, base components like cylinders and pistons are individually tested to comply with design specifications (Model & View tests). Then these parts are assembled into an engine, which is also tested to ensure the components fit and function well together (View Controller tests). Finally, the major subsystems like the engine, transmission, and cooling systems are connected and the entire car is test-driven by a user (Flow tests).
The complexity and slowness of a test increases as we go from unit to manual tests, so it’s important to choose the right type and amount of tests for each component hierarchy. The image below shows the kind of tests we use for each type of app component; it reads bottom-up like a Model is tested with Regular Unit Tests.

Types of Tests Used for App Components
A Model represents a business entity like a Customer, Order, or Cart. As the foundation of all other application constructs, it’s crucial to test that the properties and methods of a model ensure conformance with their business rules. The example below shows a unit test for the Customer model where we test the rule for a customer with multiple addresses, the billingAddress must be the first default address.
Changing existing APIs in a large codebase is an expensive operation, so we often introduce new functionality as Extensions. For example, the function below enables two String Arrays to be merged without duplicates.
We follow a few conventions. Each test name follows a compact and descriptive format test<Function><Goal>. Test steps are about 15 lines max otherwise the test is broken down into separate cases. Overall, each test is very simple and requires minimal cognitive load to understand what it’s checking.
Developers aim to implement exactly what the designers intend under various circumstances and avoid introducing visual regression bugs. To achieve this, we use Snapshot Testing to record an image of a view, then subsequent tests compare that view with the recorded snapshot and fails if different.
For example, consider a UITableViewCell for Ping Pong players with the user’s name, country, and rank. What happens when the user has a very long name? Does the name wrap to a second line, truncate, or does it push the rank away? We can record our design decisions as snapshot tests so we are confident the view gracefully handles such edge cases.

UITableViewCell Snapshot Test
A ViewModel represents the state of a View component and decouples business models from Views—it’s the state of the UI. So, they store information like the default value of a slider or segmented control and the validation logic of a Customer creation form. The example below shows the CustomerEntryViewModel being tested to ensure its taxExempt property is false by default, and that its state validation function works correctly given an invalid phone number.
The ViewController is the top hierarchy of component composition. It brings together multiple Views and ViewModels in one cohesive page to accomplish a business use case. So, we check whether the overall view meets the design specification and whether components are disabled or hidden based on Model state. The example below shows a Customer Details ViewController where the Recent orders section is hidden if a customer has no orders or the ‘edit’ button is disabled if the device is offline. To achieve this, we use snapshot tests as follows.

Snapshot Testing the ViewController
A Workflow uses multiple ViewControllers to achieve a use case. It’s the highest level of functionality from the user’s perspective. Flow tests aim to answer specific user questions like: can I login with valid credentials?, can I reset my password?, and can I checkout items in my cart?
We use UI Automation Tests powered by the XCUITest framework to simulate a user performing actions like entering text and clicking buttons. These tests are used to ensure all user-facing features behave as expected. The process for developing them is as follows.
The example below shows a UI Test checking that only a user with valid credentials can login to the app. The testLogin() function is the main entry point of the test. It sets up a fresh instance of the app by calling setUpForFreshInstall(), then it calls the login() function which simulates the user actions like entering the email and password then clicking the login button.
One useful side effect of writing UI Automation Tests is that they improve the accessibility of the app, and this is very important for visually impaired users. Unlike Unit Tests, UI Tests don’t assume knowledge of the internal structure of the app, so you select an element to manipulate by specifying its accessibility label or string. These labels are read aloud when users turn on iOS accessibility features on their devices. For more information about the use of accessibility labels in UI Tests, watch this Xcode UI Testing - Live Tutorial Session video.
Although we aim to automate as much flow tests as possible, the tools available aren’t mature enough to completely exclude manual testing. Issues like animation glitches and rendering bugs are only discovered through manual testing…some would even argue that so long as applications are built for users, manual user testing is indispensable. However, we are becoming increasingly dependant on UI Automation tests to replace Manual tests.
Testing at all levels of the app gives us the confidence to release applications frequently. But each test also adds a maintenance liability. So, testing each part of an app with the right amount and type of test is important. Here are some tips to guide your decision.
Finally, remember that tests are there to ensure your app complies with business requirements, but these requirements will change over time. So, developers must consistently remove tests for features that no longer exist, modify existing tests to comply with new business rules, and add new tests to maintain code coverage.
If you'd like to continue talking about application testing strategies, please find me on Medium at @u.zziah.
There are many architectures out there to structure your app. The one we use in Shopify’s Point of Sale (POS) for Android app is the Model-View-ViewModel (MVVM) pattern based on Google’s App Architecture Guide which was announced last year at Google I/O 2017.

Shopify POS
Our POS app is three and a half years old, and we didn’t build it using MVVM from scratch. Before the move to MVVM, we had two competing architectures in our codebase: Model View Controller (MVC) and Model View Presenter (MVP). Both did the job, but they created inconsistency within the codebase. The developers on the team had difficulty switching between the two options, and we didn’t have good answers for questions about which architecture to use when developing new screens and features. The primary advantages for adopting MVVM are consistent architecture, automatic retention of state across configuration changes, and a clearer separation of concerns that lead to easier testing. MVVM helped new members of the team get up to speed during onboarding as they now can find consistent functional examples throughout the codebase and consult the official Android documentation which the team uses as a blueprint. Google is actively maintaining the Android Architecture Components, so we get peace of mind knowing that we’ll continue to reap the benefits as this library is improved.
With a significant amount of code using legacy MVC and MVP architectures, we knew we couldn’t make the switch all at once. Instead, the team committed to writing all new screens using MVVM and converting older screens when making significant changes. Though we still have a few screens using MVC and MVP, there isn’t confusion anymore because everyone now knows there is one standard and how to incorporate it into our existing and future codebase.
I’ll explain the basic idea and flow of this architecture by describing the following components of MVVM.

Flows in a Model-View-ViewModel Architecture
View: View provides an interface for the user to interact with the app. In Shopify’s POS app, Fragment holds the View and the View holds different sub-views which handle all the user interface (UI) interactions. Any actions that happen on the UI by the user (for example, a button click or text change), View tells ViewModel about those actions via an interface callback. All of our MVVM setups use interfaces/contracts to interact with one another. We never hold references to the actual instance, for example, View won’t keep a reference to the actual ViewModel object, but instead to an instance of the contract object (I’ll describe it below in the example). Another task for View is to listen to LiveData changes posted by the ViewModel and then update its UI by receiving the new data content from LiveData.
ViewModel: ViewModel is responsible for fetching data and providing the updated data back to the UI. The ViewModel gets notified of UI actions via events generated by View, for example, onButtonPressed(). Based on a particular action, it fetches the data state, mutates it as per the business logic and tells View about the new data changes by posting it to LiveData. The ViewModel instance survives configuration changes, such as screen rotations, so when re-creating the Activity or Fragment instance, they re-connect to the existing ViewModel instance. So, the data that’s held by the ViewModel object remains available to the re-created Activity or Fragment instance. ViewModel dies when the associated Activity dies, or the Fragment is detached.
ViewModelProvider: This is the class responsible for providing ViewModel to the UI component and retaining that ViewModel instance while the scope of the given Activity or Fragment is alive.
Model: The component that represents the data source (e.g., the persistent model, web service, and cache). They’re responsible for handling the data for the app. For example, if our app needs to get a list of users, it would fetch it from a local database, if available. Otherwise, it would fetch the data from the network and save it in the database for later use.
LiveData: LiveData is an observable class that acts as a container for holding data. View subscribes to LiveData objects to get notified of any data updates. LiveData respects the lifecycle states of the app components, and it only passes the updates about data when the Fragment is in the active state, i.e., only the active observers get the updates.
Let me run through a simple example to demonstrate the flow of MVVM architecture:
1. The user interacts with the View by pressing Add Product button.
2. View tells ViewModel that a UI action happened by calling onAddProductPressed() method of ViewModel.
3. ViewModel fetches related data from the DB, mutates it as per the business logic and then posts the new data to LiveData.
4. The View which earlier subscribed to listen for the changes in LiveData now gets the updated data and asks other sub-views to update their UI with the new data.
Since Shopify moved to MVVM, we’ve taken advantage of the benefits this architecture has to offer. MVVM offers separation of concerns. View is only responsible for UI related logic like displaying UI data and reacting to user actions. ViewModel handles data preparation and mutation tasks. Using contracts between the View and ViewModel provide a strong separation of concerns and well-defined responsibilities. Driving UI from a ViewModel makes our data survive configuration changes, i.e., our data state is retained due to ViewModel caching.
Testing the business logic and UI interactions is efficient and easier with MVVM because of the strong separation of concerns, we can test the business logic and different view states of the app independently. We can perform screenshot testing on the View to check the UI since it has no business logic, and similarly, we can unit test the ViewModel without having to create Fragments and Views. You can read more about it in this article about creating verifiable Android apps on Shopify Mobile’s Medium page.
LiveData takes care of complex Android lifecycle issues that happen when the user navigates through, out of, and back to the application. When updating the UI, LiveData only sends the update when the app is in an active state. When the app is in an inactive state, it doesn’t send any updates, thus saving app from crashes or other lifecycle issues.
Finally, keeping UI code and business logic separate makes the codebase easier to modify and manage for developers as we follow a consistent architecture pattern throughout the app.
For mobile apps to have an excellent user experience, they should be fast, use the network sparingly, and use visual and behavioural conventions native to the platform. To achieve this, the Shopify Mobile apps are native iOS and Android, and they're powered by GraphQL. This ensures our apps are consistent with the platforms they run on, are performant, and use the network efficiently.
This essentially means developing Shopify on each platform: iOS, Android, and web. As Shopify has far more web developers than mobile developers, it’s almost impossible to keep pace with the feature releases on the web admin. Since Shopify has invested in making the web admin responsive, we often leverage parts of the web to maintain feature parity between mobile and desktop platforms.
Core parts of the app that are used most are native to give the best experience on a small screen. A feature that is data-entry intensive or has high information density is also a good candidate for a native implementation that can be optimized for a smaller screen and for reduced user input. For secondary activities in the app, web views are used. Several of the settings pages, as well as reports, which are found in the Store tab, are web views. This allows us to focus on creating a mobile-optimized version of the most used parts of our product, while still allowing our users to have access to all of Shopify on the go.
With this mixed-architecture approach, not only can a user go from a native view to a web view, using deep-links the user can also be presented a native view from a web view. For example, tapping a product link in a web view will present the native product detail view.
At Unite, our developer conference, Shopify announced Polaris, a design language that we use internally for our web and mobile applications. A common design language ensures our products are familiar to our users, as well as helping to facilitate a mixed architecture where web pages can be used in conjunction with native views.
In addition to the features that are built internally, Shopify has an app platform, which allows third party developers to create (web) applications that extend the functionality of Shopify. In fact, we have an entire App Store dedicated to showcasing these apps. These apps authenticate to Shopify using OAuth, and consume our REST APIs. We also offer a JavaScript SDK called the Embedded App SDK (EASDK) that allow apps to be launched within an iframe of the Shopify Admin (instead of opening the app in another tab), and to use Shopify’s navigation bars, buttons, pop ups, and status messages. Apps that use the EASDK are called "embedded apps," and most of the applications developed for Shopify today are embedded.
Our users rely on these third party apps to run their business, and they are doing so increasingly from their mobile devices. When our team was tasked with bringing these apps to mobile, we quickly found these apps use too much vertical real-estate for their navigation when loaded in a web view. Also, it would introduce inconsistencies between the native app navigation bars and their web counterparts. It was clear that this would be a sub-par experience. Additionally since these apps are maintained by third-party developers, it would not be possible to update them to be responsive.
Our goal was to have apps optimize their screen usage, and have them look and behave like the rest of the mobile app. We wanted to achieve this without requiring existing apps to make any code change. This approach means our users would have all of the apps they currently use, in addition to access to the thousands of apps available on the Shopify App Store on the day we released the feature.

Content size highlighted in an app rendered in a web view (left) vs. in Shopify Mobile (right).
This screenshots above illustrate what an app would look like rendered in a web view as-is, vs. how they look now, optimized for mobile. Much of the navigation bar elements have been collapsed into the native nav bar, which allows the app to reclaim the vertical space for content instead of displaying a redundant navigation bar. Also, the web back button has been combined into the native navigation back stack, so tapping back through the web app is the same as navigating back through native views. These changes allowed the apps to reclaim more than 40% more vertical real estate.
I'll now go through how we incorporated each element.
The EASDK is what apps use to configure their UI within Shopify. We wanted to position the Shopify Mobile app to be on the receiving end of this API, much like the Shopify web admin is today. This would allow existing apps to use the EASDK with no changes. The EASDK contains several methods to configure the navigation bar which can consist of buttons, title, breadcrumbs and pagination. We looked at reducing the amount of items that the navigation bar needed to render, and starting pruning. We found that the breadcrumbs and pagination buttons were not necessary, and not a common pattern for mobile apps. They were the first to be cut. The next step was to collapse the web navigation bar into the native bar. To do this, we had to intercept the JavaScript calls to the EASDK methods.
To allow interception of calls to the EASDK, we created a middleware system on Shopify web that could be injected by the mobile apps. This allows Shopify Mobile to augment the messages before they hit their final destination or suppress them entirely. This approach is very flexible, and generic; clients can natively implement features piecemeal without the need for versioning between client and server.
This middleware is implemented in JavaScript and bundled with the mobile apps. A single shared JavaScript file contains the common methods for both platforms, and then separate platform-specific files which contain the iOS and Android specific native bridging.

The shared JavaScript file injects itself into the main context, extends the Shopify.EmbeddedApp class, and overrides the methods that are to be intercepted on the mobile app. The methods in this shared file simply forward the calls to another object, Mobile, which is implemented in the separate files for iOS and Android.
Shared JS File
On iOS, WKWebView relies on postMessage to allow the web-page to communicate to native Swift. The two JavaScript files are injected into the WKWebView using WKUserScript. The iOS specific JavaScript file forwards the method calls from the EASDK into postMessages that are intercepted by the WKScriptMessageHandler.
iOS JS File
iOS native message handling
On Android, a Java Object can be injected into the WebView, which gives the JavaScript access to its methods.
Android JS File
Android native message handling
When an embedded app is launched from the mobile app, we inject a URL parameter to inform Shopify not to render the web nav bar since we will be doing so natively. As calls to the EASDK methods are intercepted, the mobile apps render titles, buttons and activity indicators natively. This provides better use of the screen space, and required no changes to the third party apps, so all the existing apps work as-is!

App with native primary button, and secondary buttons in the overflow menu
In addition to intercepting calls from the web, the mobile apps need to communicate user interactions back to the web. For instance, when a user taps a native button, we need to trigger the appropriate behaviour as defined in the embedded app. The middleware facilitates communicating from native to web via HTML postMessages. Buttons have an associated message name, which we use when a button is tapped.
Alternatively, a button can be defined to load a URL, in which case we can simply load the target URL in the web view. A button can also be configured to emit a postMessage.
iOS implementation of button handling
Android implementation of button handling
By embracing the web in our mobile apps, we are able to keep pace with the feature releases of the rest of Shopify while complementing it with native versions for features that merchants use most. This also allows us to extend the Shopify Mobile with apps that were created by our third party developers with no change to the EASDK. By complementing the web view with a JavaScript bridge, we were able to optimize the real estate and make the apps more consistent with the rest of the mobile app.
With multiple teams contributing features to Shopify Mobile concurrently, our mobile app is the closest it’s been to reaching feature parity with the web admin, while ensuring the frequently used parts of the app to be optimized for mobile by writing them natively.
To learn more about creating apps for Shopify Mobile, check out our developer resources.
6 minute read
Swift is gaining popularity among iOS developers, which is of no surprise. It's strictly typed, which means you can prove the correctness of your program at compile time, given that your typesystem describes the domain well. It's a modern language offering syntax constructs encouraging developers to write better architecture using fewer lines of code, making it expressive. It's more fun to work with, and all the new Cocoa projects are being written in Swift.
At Shopify, we want to adopt Swift where it makes sense, while understanding that many existing projects have an extensive codebase (some of them written years ago) in Objective-C (OBJC) that are still actively supported. It's tempting to write new code in Swift, but we can't migrate all the existing OBJC codebase quickly. And sometimes it just isn't worth the effort.
18 minute read
The mobile space has changed quickly, even within the past few years. At Shopify, the world’s largest Rails application, we have seen the growth and potential of the mobile market and set a goal of becoming a mobile-first company. Today, over 130,000 merchants are using Shopify Mobile to set up and run their stores from their smartphones. Through the inherent simplicity and flexibility of the mobile platform, many mobile-focused products have found success.
This post was co-written with Arham Ahmed, and shout-outs to Sean Corcoran of MacStadium and Tim Lucas of Buildkite.
1 minute read
Today we're excited to share our involvement with the AMP Project.
Life happens on mobile. (In fact, there are over seven billion small screens now!) We're not only comfortable with shopping online, but increasingly we're buying things using our mobile devices. Delays can mean the difference between a sale or no sale, so it's important to make things run as quickly as possible.
AMP, or Accelerated Mobile Pages, is an open source, Google-led initiative aimed at improving the mobile web experience and solving the issue of slow loading content. (You can learn more about the tech here.) Starting today, Google is pointing to AMP’d content beyond their top stories carousel to include general web search results.
By Jason Brennan
LLDB is the current state of the art for iOS debugging, but it’s clunky and cumbersome and doesn’t work well with objects. It really doesn't feel very different from gdb. It's a solid tool but it requires breakpoints, and although you can integrate with Objective C apps, it's not really built for it. Dealing with objects is cumbersome, and it's hard to see your changes.
This is where Super Debugger comes in. It's a new tool for rapidly exploring your objects in an iOS app whether they're running on an iPhone, iPad, or the iOS Simulator, and it's available today on Github. Check over the included readme to see what it can do in detail.
Today we're going to run through a demonstration of an included app called Debug Me.
Clone the superdb repository locally to your Mac and change into the directory.
git clone https://github.com/Shopify/superdb.git
    cd superdb
Open the included workspace file, SuperDebug.xcworkspace, select the Debug Me target and Build and Run it for your iOS device or the Simulator. Make sure the device is on the same wifi network as your Mac.

Go back to Xcode and change to the Super Debug target. This is the Mac app that you'll use to talk to your iOS app. Build and Run this app.
In Super Debug, you'll see a window with a list of running, debuggable apps. Find Debug Me in the list (hint: it's probably the only one!) and double click it. This will open up the shell view where you can send messages to the objects in your app, all without setting a single break point.

Now let's follow the instructions shown to us by the Debug Me app.
In the Mac app, issue the command .self (note the leading dot). This updates the self pointer, which will execute a Block in the App delegate that returns whatever we want to be pointed to by the variable self. In this case (and in most cases), we want self to point to the current view controller. For Debug Me, that means it points to our instance of DBMEViewController after we issue this command.

Now that our pointer is set up, we can send a message to that pointer. Type self redView layer setMasksToBounds:YES. This sends a chain of messages in F-Script syntax. In Objective C, it would look like [[[self redView] layer] setMasksToBounds:YES]. Here we omit the braces because of our syntax.
We do use parentheis sometimes, when passing the result of a message send would be ambiguous, for example something like this in Objective C: [view setBackgroundColor:[UIColor purpleColor]] would be view setBackgroundColor:(UIColor purpleColor) in our syntax.

The previous step has no visible result, so lets make a change. Type self redView layer setCornerRadius:15 and see the red view get nice rounded corners!
Now for the impressive part. Move your mouse over the number 15 and see it highlight. Now click and drag left or right, and see the view's corner radius update in real time. Awesome, huh?


That should be enough to give you a taste of this brand new debugger. Interact with your objects in real-time. Iterate instantly. No more build, compile, wait. It's now Run, Test, Change. Fork the project on Github and get started today.