Development

Translation missing: en.categories.development.content_html
How to Fix Slow Code in Ruby

How to Fix Slow Code in Ruby

By Jay Lim and Gannon McGibbon

At Shopify, we believe in highly aligned, loosely coupled teams to help us move fast. Since we have many teams working independently on a large monolithic Rails application, inefficiencies in code are sometimes inadvertently added to our codebase. Over time, these problems can add up to serious performance regressions.

By the time such performance regressions are noticeable, it might already be too late to track offending commits down. This can be exceedingly challenging on codebases with thousands of changes being committed each day. How do we effectively find out why our application is slow? Even if we have a fix for the slow code, how can we prove that our new code is faster?

It all starts with profiling and benchmarking. Last year, we wrote about writing fast code in Ruby on Rails. Knowing how to write fast code is useful, but insufficient without knowing how to fix slow code. Let’s talk about the approaches that we can use to find slow code, fix it, and prove that our new solution is faster. We’ll also explore some case studies that feature real world examples on using profiling and benchmarking.

Profiling

Before we dive into fixing unperformant code, we need to find it first. Identifying code that causes performance bottlenecks can be challenging in a large codebase. Profiling helps us to do so easily.

What is Profiling?

Profiling is a type of program analysis that collects metrics about the program at runtime, such as the frequency and duration of method calls. It’s carried out using a tool known as a profiler, and a profiler’s output can be visualized in various ways. For example, flat profiles, call graphs, and flamegraphs.

Why Should I Profile My Code?

Some issues are challenging to detect by just looking at the code (static analysis, code reviews, etc.). One of the main goals of profiling is observability. By knowing what is going on under the hood during runtime, we gain a better understanding of what the program is doing and reason about why an application is slow. Profiling helps us to narrow down the scope of a performance bottleneck to a particular area.

How Do I Profile?

Before we figure out what to profile, we need to first figure out what we want to know: do we want to measure elapsed time for a specific code block, or do we want to measure object allocations in that code block? In terms of granularity, do we need elapsed time for every single method call in that code block, or do we just need the aggregated value? Elapsed time here can be further broken down into CPU time or wall time.

For measuring elapsed time, a simple solution is to measure the start time and the end time of a particular code block, and report the difference. If we need a higher granularity, we do this for every single method. To do this, we use the TracePoint API in Ruby to hook into every single method call made by Ruby. Similarly, for object allocations, we use the ObjectSpace module to trace object allocations, or even dump the Ruby heap to observe its contents.

However, instead of building custom profiling solutions, we can use one of the available profilers out there, and each has its own advantages and disadvantages. Here are a few options:

1. rbspy

rbspy samples stack frames from a Ruby process over time. The main advantage is that it can be used as a standalone program without needing any instrumentation code.

Once we know the Ruby Process Identifier (PID) that we want to profile, we start the profiling session like this:

rbspy record —pid $PID

2. stackprof

Like rbspy, stackprof samples stack frames over time, but from a block of instrumented Ruby code. Stackprof is used as a profiling solution for custom code blocks:

profile = StackProf.run(mode: :cpu) do
  # Code to profile
end

3. rack-mini-profiler

The rack-mini-profiler gem is a fully-featured profiling solution for Rack-based applications. Unlike the other profilers described in this section, it includes a memory profiler in addition to call-stack sampling. The memory profiler collects data such as Garbage Collection (GC) statistics, number of allocations, etc. Under the hood, it uses the stackprof and memory_profiler gems.

4. app_profiler

app_profiler is a lightweight alternative to rack-mini-profiler. It contains a Rack-only middleware that supports call-stack profiling for web requests. In addition to that, block level profiling is also available to any Ruby application. These profiles can be stored in a configurable storage backend such as Google Cloud Storage, and can be visualized through a configurable viewer such as Speedscope, a browser-based flamegraph viewer.

At Shopify, we collect performance profiles in our production environments. Rack Mini Profiler is a great gem, but it comes with a lot of extra features such as database and memory profiling, and it seemed too heavy for our use case. As a result, we built App Profiler that similarly uses Stackprof under the hood. Currently, this gem is used to support our on-demand remote profiling infrastructure for production requests.

Case Study: Using App Profiler on Shopify

An example of a performance problem that was identified in production was related to unnecessary GC cycles. Last year, we noticed that a cart item with a very large quantity used a ridiculous amount of CPU time and resulted in slow requests. It turns out, the issue was related to Ruby allocating too many objects, triggering the GC multiple times.

The figure below illustrates a section of the flamegraph for a similar slow request, and the section corresponds to approximately 500ms of CPU time.

A section of the flamegraph for a similar slow request

A section of the flamegraph for a similar slow request

The highlighted chunks correspond to the GC operations, and they interleave with the regular operations. From this section, we see that GC itself consumed about 35% of CPU time, which is a lot! We inferred that we were allocating too many Ruby objects. Without profiling, it’s difficult to identify these kinds of issues quickly.

Benchmarking

Now that we know how to identify performance problems, how do we fix them? While the right solution is largely context sensitive, validating the fix isn’t. Benchmarking helps us prove performance differences in two or more different code paths.

What is Benchmarking?

Benchmarking is a way of measuring the performance of code. Often, it’s used to compare two or more similar code paths to see which code path is the fastest. Here’s what a simple ruby benchmark looks like:

This code snippet is benchmarking at its simplest. We’re measuring how long a method takes to run in seconds. We could extend the example to measure a series of methods, a complex math equation, or anything else that fits into a block. This kind of instrumentation is useful because it can unveil regression or improvement in speed over time.

While wall time is a pretty reliable measurement of “performance”, there’s other methods one can measure code by besides realtime, the Ruby standard library’s Benchmark module includes bm and bmbm.

The bm method shows a more detailed breakdown of timing measurements. Let’s take a look at a script with some output:

User, system, and total are all different measurements of CPU time. User refers to time spent working in user space. Similarly, system denotes time spent working in kernel space. Total is the sum of CPU timings, and real is the same wall time measurement we saw from Benchmark.realtime.


What about bmbm? Well, it is exactly the same as bm with one unique difference. Here’s what the output looks like:

The rehearsal, or warmup step is what makes bmbm useful. It runs benchmark code blocks once before measuring to prime any caching or similar mechanism to produce more stable, reproducible results.

Lastly, let’s talk about the benchmark-ips gem. This is the most common method of benchmarking Ruby code. You’ll see it a lot in the wild, this is what a simple script looks like:

Here, we’re benchmarking the same method using familiar syntax with ips method. Notice the inline bundler and gemfile code. We need this in a scripting context because benchmark-ips isn’t part of the standard library. In a normal project setup, we add gem entries to the Gemfile as usual.

The output of this script is as follows:

Ignoring the bundler output, we see the warmup iteration score per 100 milliseconds ran for the default of 2 seconds, and how many times the code block was able to run in 5 seconds. It’ll become more apparent why benchmark-ips is so popular later.

Why Should I Benchmark My Code?

So, now we know what benchmarking is and some tools available to us. But why even bother benchmarking at all? It may not be immediately obvious why benchmarking is so valuable.

Benchmarks are used to quantify the performance of one or more blocks of code. This becomes very useful when there are performance questions that need answers. Often, these questions boil down to “which is faster, A or B?”. Let’s look at an example:

In this script, we’re doing most of what we did in the first benchmark-ips example. Pay attention to the addition of another method, and how it changes the benchmark block. When benchmarking more than one thing at once, simply add another report block. Additionally, the compare! method prints a comparison of all reports:

Wow, that’s pretty snazzy! compare! is able to tell us which benchmark is slower and by how much. Given the amount of thread sleeping we’re doing in our benchmark subject methods, this aligns with our expectations.

Benchmarking can be a means of proving how fast a given code path is. It’s not uncommon for developers to propose a code change that makes a code path faster without any evidence.

Depending on the change, comparison can be challenging. As in the previous example, benchmark-ips may be used to benchmark individual code paths. Running the same single report benchmark on versions of code easily tests pre and post patch performance.

How Do I Benchmark My Code?

Now we know what benchmarking is and why it is important. Great! But how do you get started benchmarking in an application? Trivial examples are easy to learn from but aren’t very relatable.

When developing in a framework like Ruby on Rails, it can be difficult to understand how to set up and load framework code for benchmark scripts. Thankfully, one of the latest features of Ruby on Rails can generate benchmarks automatically. Let’s take a look:

This benchmark can be generated by running bin/rails generate benchmark my_benchmark, placing a file in script/benchmarks/my_benchmark.rb. Note the inline gemfile isn’t required because we piggyback off of the Rails app’s Gemfile. The benchmark generator is slated for release in Rails 6.1.

Now, let’s look at a real world example of a Rails benchmark:

In this example, we’re subclassing Order and caching the calculation it does to find the total price of all line items. While it may seem obvious that this would be a beneficial code change, it isn’t obvious how much faster it is compared to the base implementation. Here’s a more unabridged version of the script for full context.

Running the script reveals a ~50x improvement to a simple order of 4 line items. With orders with more line items, the payoff only gets better.

One last thing to know about benchmarking effectively is being aware of micro-optimization. These are optimizations that are so small, the performance improvement isn’t worth the code change. While these are sometimes acceptable for hot code paths, it’s best to tackle larger scale performance issues first.

Case Study: Rails Contributions

As with many open source projects, Ruby on Rails usually requires performance optimization pull requests to include benchmarks. The same is common for new features to performance sensitive areas like Active Record query building or Active Support’s cache stores. In the case of Rails, most benchmarks are made with benchmark-ips to simplify comparison.

For example, https://github.com/rails/rails/pull/36052 changes how primary keys are accessed in Active Record instances. Specifically, refactoring class method calls to instance variable references. It includes before and after benchmark results with a clear explanation of why the change is necessary.

https://github.com/rails/rails/pull/38401 changes model attribute assignment in Active Record so that key stringification of attribute hashes is no longer needed. A benchmark script with multiple scenarios is provided with results. This is a particularly hot codepath because creating and updating records is at the heart of most Rails apps.

Another example, https://github.com/rails/rails/pull/34197 reduces object allocations in ActiveRecord#respond_to?. It provides a memory benchmark that compares total allocations before and after the patch, with a calculated diff. Reducing allocations delivers better performance because the less Ruby allocates, the less time Ruby spends assigning objects to blocks of memory.

Final Thoughts

Slow code is an inevitable facet of any codebase. It isn’t important who introduces performance regressions, but how they are fixed. As developers, it’s our job to leverage profiling and benchmarking to find and fix performance problems.

At Shopify, we’ve written a lot of slow code, often for good reasons. Ruby itself is optimized for the developer, not the servers we run it on. As Rubyists, we write idiomatic, maintainable code that isn’t always performant, so profile and benchmark responsibly, and be wary of micro-optimizations!

Additional Information


If this sounds like the kind of problems you want to solve, we're always on the lookout for talent and we’d love to hear from you. Visit our Engineering career page to find out about our open positions. Learn about the actions we’re taking as we continue to hire during COVID‑19


Continue reading

Optimizing Ruby Lazy Initialization in TruffleRuby with Deoptimization

Optimizing Ruby Lazy Initialization in TruffleRuby with Deoptimization

Shopify's involvement with TruffleRuby began half a year ago, with the goal of furthering the success of the project and Ruby community. TruffleRuby is an alternative implementation of the Ruby language (where the reference implementation is CRuby, or MRI) developed by Oracle Labs. TruffleRuby has high potential in speed, as it is nine times faster than CRuby on optcarrot, a NES emulator benchmark developed by the Ruby Core Team.

I’ll walk you through a simple feature I investigated and implemented. It showcases many important aspects of TruffleRuby and serves as a great introduction to the project!

Introduction to Ruby Lazy Initialization

Ruby developers tend to use the double pipe equals operator ||= for lazy initialization, likely somewhat like this:

Syntactically, the meaning of the double pipe equals operator is that the value is assigned if the value of the variable is currently not set.

The common use case of the operator isn’t so much “assign if” and more “assign once”.

This idiomatic usage is a subset of the operator’s syntactical meaning so prioritizing that logic in the compiler can improve performance. For TruffleRuby, this would lead to less machine code being emitted as the logic flow is shortened.

Analyzing Idiomatic Usage

To confirm that this usage is common enough to be worth optimizing for, I ran static profiling on how many times this operator is used as lazy initialization.

For a statement to count as a lazy initialization for these profiling purposes, we had it match one of the following requirements:

  • The value being assigned is a constant (uses only literals of int, string, symbol, hash, array or is a constant variable). An example would be a ||= [2 * PI].
  • The statement with the ||= operator is in a function, an instance or class variable is being assigned, and the name of the instance variable contains the name of the function or vice versa. The function must accept no params. An example would be def get_a; @a ||= func_call.

These criteria are very conservative. Here are some examples of cases that won’t be considered a lazy initialization but probably still follow the pattern of “assign once”.

After profiling 20 popular open-source projects, I found 2082 usages of the ||= operator, 64% of them being lazy initialization by this definition.

Compiling Code with TruffleRuby

Before we get into optimizing TruffleRuby for this behaviour, here’s some background on how TruffleRuby compiles your code.

TruffleRuby is an implementation of Ruby that aims for higher performance through optimizing Just In Time (JIT) compilation (programs that are compiled as they're being executed). It’s built on top of GraalVM, a modified JVM built by Oracle that provides Truffle, a framework used by TruffleRuby for implementing languages through building Abstract Syntax Tree (AST) interpreters. With Truffle, there’s no explicit step where JVM bytecode is created as with a conventional JVM language, rather Truffle will just use the interpreter and communicate with the JVM to create machine code directly with profiling and a technique called partial evaluation. This means that GraalVM can be advertised as magic that converts interpreters into compilers!

TruffleRuby also leverages deoptimization (more than other implementations of Ruby) which is a term for quickly moving between the fast JIT-compiled machine code to the slow interpreter. One application for deoptimization is how the compiler handles monkey patching (e.g. replacing a class method at runtime). It’s unlikely that a method will be monkey patched, so we can deoptimize if it has been monkey patched to find and execute the new method. The path for handling the monkey patching won't need to be compiled or appear in the machine code. In practice, this use case is even better—instead of constantly checking if a function has been redefined, we can just place the deoptimization where the redefinition is and never need a check in compiled code.

In this case with lazy initialization, we make the deoptimization case the uncommon one where the variable needs to be assigned a value more than once.

Implementing the Deoptimization

Before when TruffleRuby encountered the ||= operator, a Graal profiler would see that since both sides have been used, the entire statement should be compiled into machine code. Our knowledge of how Ruby is used in practice tells us that the right hand side is unlikely to be run again, and so doesn’t need to be compiled into machine code if it’s never been executed or has been executed just once.

TruffleRuby uses little objects called nodes to represent each part of a Ruby program. We use an OrNode to handle the ||= operator, with the left side being the condition and the right side being the action to execute if the left side is true (in this case the action is an assignment). The creation of these nodes are implemented in Java.

To make this optimization, we swapped out the standard OrNode for an OrLazyValueDefinedNode in the BodyTranslator which translates the Ruby AST into nodes that Truffle can understand.

The basic OrNode executes like this:

The ConditionProfile is what counts how many times each branch is executed. With lazy initialization it counts both sides as used by default, so compiles them both into the machine code.

The OrLazyValueDefinedNode only changes the else block. What I'm doing here is counting the number of times the else part is executed, and turning it into a deoptimization if it’s less than twice.

Benchmarking and Impact

Benchmarking isn’t a perfect measure of how effective this change is (benchmarking is arguably never perfect, but that’s a different conversation), as the results would be too noisy to observe in a large project. However, I can still benchmark on some pieces of code to see the improvements. By doing the “transfer to interpreter and invalidate”, time and space is saved in creating machine code for everything related to the right side.

With our new optimization this piece of code compiles about 6% faster and produces about 63% fewer machine code by memory (about half the number of assembly instructions). Faster compilation means more time for your app to run, and smaller machine code means less usage of memory and cache. Producing less machine code more quickly improves responsiveness and should in turn make the program run faster, though it's difficult to prove.

Function foo without optimization

Function foo without optimization


Above is a graph of the foo method in sample code above without the optimization that vaguely represents the logic present in the machine code. I can look at the actual compiler graphs produced by Graal at various stages to understand how exactly our code is being compiled, but this is the overview.

Each of the nodes in this graph expands to more control flow and memory access, which is why this optimization can impact the amount of machine code so much. This graph represents the uncommon case where the checks and call to the calculate_foo method are needed, so for lazy initialization it’ll only need this flow once or zero times.

Function foo with optimizationFunction foo with optimization

The graph that includes the optimization is a bit less complex. The control flow doesn’t need to know anything about variable assignment or anything related to calling and executing a method.

What I've added is just an optimization, so if you:

  • aren’t using ||= to mean lazy initialization
  • need to run the right-hand-side of the expression multiple times
  • need it to be fast

then the optimization goes away and the code is compiled as it would have done before (you can revisit the OrLazyValueDefinedNode source above to see the logic for this).

This optimization shows the benefit of looking at codebases used in industry for patterns that aren’t visible in the language specifications. It’s also worth noting that none of the code changes here were very complicated and modified code in a very modular way—other than the creation of the new node, only one other line was touched!

Truffle is actually named after the chocolates, partially in reference to the modularity of a box of chocolates. Apart from modularity, TruffleRuby is also easy to develop on as it's primarily written in Ruby and Java (there's some C in there for extensions).

Shopify is leading the way in experimenting with TruffleRuby for production applications. TruffleRuby is currently mirroring storefront traffic. This helped us work through some bugs, build better tooling for TruffleRuby and can lead to a faster browsing for customers.

We also contribute to CRuby/MRI and Sorbet as a part of our work on Ruby. We like desserts, so along with contributions to TruffleRuby and Sorbet, we maintain Tapioca! If you'd like to become a part of our dessert medley (or work on other amazing Shopify projects), send us an application!

Additional Information

Tangentially related things about Ruby and TruffleRuby


If this sounds like the kind of problems you want to solve, we're always on the lookout for talent and we’d love to hear from you. Visit our Engineering career page to find out about our open positions.

Continue reading

Refactoring Legacy Code with the Strangler Fig Pattern

Refactoring Legacy Code with the Strangler Fig Pattern

Large objects are a code smell: overloaded with responsibilities and dependencies, as they continue to grow, it becomes more difficult to define what exactly they’re responsible for. Large objects are harder to reuse and slower to test. Even worse, they cost developers additional time and mental effort to understand, increasing the chance of introducing bugs. Unchecked, large objects risk turning the rest of your codebase into a ball of mud, but fear not! There are strategies for reducing the size and responsibilities of large objects. Here’s one that worked for us at Shopify, an all-in-one commerce platform supporting over one million merchants across the globe. 

As you can imagine, one of the most critical areas in Shopify’s Ruby on Rails codebase is the Shop model. Shop is a hefty class with well over 3000 lines of code, and its responsibilities are numerous. When Shopify was a smaller company with a smaller codebase, Shop’s purpose was clearer: it represented an online store hosted on our platform. Today, Shopify is far more complex, and the business intentions of the Shop model are murkier. It can be described as a God Object: a class that knows and does too much.

My team, Kernel Architecture Patterns, is responsible for enforcing clean, efficient, scalable architecture in the Shopify codebase. Over the past few years, we invested a huge effort into componentizing Shopify’s monolithic codebase (see Deconstructing the Monolith) with the goal of establishing well-defined boundaries between different domains of the Shopify platform.

Not only is creating boundaries at the component-level important, but establishing boundaries between objects within a component is critical as well. It’s important that the business subdomain modelled by an object is clearly defined. This ensures that classes have clear boundaries and well-defined sets of responsibilities.

Shop’s definition is unclear, and its semantic boundaries are weak. Unfortunately, this makes it an easy target for the addition of new features and complexities. As advocates for clean, well-modelled code, it was evident that the team needed to start addressing the Shop model and move some of its business processes into more appropriate objects or components.

Using the ABC Code Metric to Determine Code Quality

Knowing where to start refactoring can be a challenge, especially with a large class like Shop. One way to find a starting point is to use a code metric tool. It doesn’t really matter which one you choose, as long as it makes sense for your codebase. Our team opted to use Flog, which uses a score based on the number of assignments, branches and calls in each area of the code to understand where code quality is suffering the most. Running Flog identified a particularly disordered portion in Shop: store settings, which contains numerous “global attributes” related to a Shopify store.

Refactoring Shop with the Strangler Fig Pattern

Extracting store settings into more appropriate components offered a number of benefits, notably better cohesion and comprehension in Shop and the decoupling of unrelated code from the Shop model. Refactoring Shop was a daunting task—most of these settings were referenced in various places throughout the codebase, often in components that the team was unfamiliar with. We knew we’d potentially make incorrect assumptions about where these settings should be moved to. We wanted to ensure that the extraction process was well laid out, and that any steps taken were easily reversible in case we changed our minds about a modelling decision or made a mistake. Guaranteeing no downtime for Shopify was also a critical requirement, and moving from a legacy system to an entirely new system in one go seemed like a recipe for disaster.

What is the Strangler Fig Pattern?

The solution? Martin Fowler’s Strangler Fig Pattern. Don’t let the name intimidate you! The Strangler Fig Pattern offers an incremental, reliable process for refactoring code. It describes a method whereby a new system slowly grows over top of an old system until the old system is “strangled” and can simply be removed. The great thing about this approach is that changes can be incremental, monitored at all times, and the chances of something breaking unexpectedly are fairly low. The old system remains in place until we’re confident that the new system is operating as expected, and then it’s a simple matter of removing all the legacy code.

That’s a relatively vague description of the Strangler Fig Pattern, so let’s break down the 7-step process we created as we worked to extract settings from the Shop model. The following is a macro-level view of the refactor.

Macro-level view of the Strangler Fig Pattern

We’ll dive into exactly what is involved in each step, so don’t worry if this diagram is a bit overwhelming to begin with.

Step 1: Define an Interface for the Thing That Needs to Be Extracted

Define the public interface by adding methods to an existing class, or by defining a new model entirely.
Define the public interface by adding methods to an existing class, or by defining a new model entirely

The first step in the refactoring process is to define the public interface for the thing being extracted. This might involve adding methods to an existing class, or it may involve defining a new model entirely. This first step is just about defining the new interface; we’ll depend on the existing interface for reading data during this step. In this example, we’ll be depending on an existing Shop object and will continue to access data from the shops database table.

Let’s look at an example involving Shopify Capital, Shopify’s finance program. Shopify Capital offers cash advances and loans to merchants to help them kick-start their business or pursue their next big goal. When a merchant is approved for financing, a boolean attribute, locked_settings, is set to true on their store. This indicates that certain functionality on the store is locked while the merchant is taking advantage of a capital loan. The locked_settings attribute is being used by the following methods in the Shop class:

We already have a pretty clear idea of the methods that need to be involved in the new interface based on the existing methods that are in the Shop class. Let’s define an interface in a new class, SettingsToLock, inside the Capital component.

As previously mentioned, we’re still reading from and writing to a Shop object at this point. Of course, it’s critical that we supply tests for the new interface as well.

We’ve clearly defined the interface for the new system. Now, clients can start using this new interface to interact with Capital settings rather than going through Shop.

Step 2: Change Calls to the Old System to Use the New System Instead

Replace calls to the existing “host” interface with calls to the new system instead

Now that we have an interface to work with, the next step in the Strangler Fig Pattern is to replace calls to the existing “host” interface with calls to the new system instead. Any objects sending messages to Shop to ask about locked settings will now direct their messages to the methods we’ve defined in Capital::SettingsToLock.

In a controller for the admin section of Shopify, we have the following method:

This can be changed to:

A simple change, but now this controller is making use of the new interface rather than going directly to the Shop object to lock settings.

Step 3: Make a New Data Source for the New System If It Requires Writing

New Data Source
New data source

If data is written as a part of the new interface, it should be written to a more appropriate data source. This might be a new column in an existing table, or may require the creation of a new table entirely.

Continuing on with our existing example, it seems like this data should belong in a new table. There are no existing tables in the Capital component relevant to locked settings, and we’ve created a new class to hold the business logic—these are both clues that we need a new data source.

The shops table currently looks like this in db/schema.rb

We create a new table, capital_shop_settings_locks, with a column locked_settings and a reference to a shop.

The creation of this new table marks the end of this step.

Step 4: Implement Writers in the New Model to Write to the New Data Source

implement writers in the new model to write data to the new data source while also writing to the existing data source
Implement writers in the new model to write data to the new data source and existing data source

The next step in the Strangler Fig Pattern is a bit more involved. We need to implement writers in the new model to write data to the new data source while also writing to the existing data source.

It’s important to note that while we have a new class, Capital::SettingsToLock, and a new table, capital_shop_settings_locks, these aren’t connected at the moment. The class defining the new interface is a plain old Ruby object and solely houses business logic. We are aiming to create a separation between the business logic of store settings and the persistence (or infrastructure) logic. If you’re certain that your model’s business logic is going to stay small and uncomplicated, feel free to use a single Active Record. However, you may find that starting with a Ruby class separate from your infrastructure is simpler and faster to test and change.

At this point, we introduce a record object at the persistence layer. It will be used by the Capital::SettingsToLock class to read data from and write data to the new table. Note that the record class will effectively be kept private to the business logic class.

We accomplish this by creating a subclass of ApplicationRecord. Its responsibility is to interact with the capital_shop_settings_locks table we’ve defined. We define a class Capital::SettingsToLockRecord, map it to the table we’ve created, and add some validations on the attributes.

Let’s add some tests to ensure that the validations we’ve specified on the record model work as intended:

Now that we have Capital::SettingsToLockRecord to read from and write to the table, we need to set up Capital::SettingsToLock to access the new data source via this record class. We can start by modifying the constructor to take a repository parameter that defaults to the record class:

Next, let’s define a private getter, record. It performs find_or_initialize_by on the record model, Capital::SettingsToLockRecord, using shop_id as an argument to return an object for the specified shop.

Now, we complete this step in the Strangler Fig Pattern by starting to write to the new table. Since we’re still reading data from the original data source, we‘ll need to write to both sources in tandem until the new data source is written to and has been backfilled with the existing data. To ensure that the two data sources are always in sync, we’ll perform the writes within transactions. Let’s refresh our memories on the methods in Capital::SettingsToLock that are currently performing writes.

After duplicating the writes and wrapping these double writes in transactions, we have the following:

The last thing to do is to add tests that ensure that lock and unlock are indeed persisting data to the new table. We control the output of SettingsToLockRecord’s find_or_initialize_by, stubbing the method call to return a mock record.

At this point, we are successfully writing to both sources. That concludes the work for this step.

Step 5: Backfill the New Data Source with Existing Data

Backfill the data
Backfill the data

The next step in the Strangler Fig Pattern involves backfilling data to the new data source from the old data source. While we’re writing new data to the new table, we need to ensure that all of the existing data in the shops table for locked_settings is ported over to capital_shop_settings_locks.

In order to backfill data to the new table, we’ll need a job that iterates over all shops and creates record objects from the data on each one. Shopify developed an open-source iteration API as an extension to Active Job. It offers safer iterations over collections of objects and is ideal for a scenario like this. There are two key methods in the iteration API: build_enumerator specifies the collection of items to be iterated over, and each_iteration defines the actions to be taken out on each object in the collection. In the backfill task, we specify that we’d like to iterate over every shop record, and each_iteration contains the logic for creating or updating a Capital::SettingsToLockRecord object given a store. The alternative is to make use of Rails’ Active Job framework and write a simple job that iterates over the Shop collection. 

Some comments about the backfill task: the first is that we’re placing a pessimistic lock on the Shop object prior to updating the settings record object. This is done to ensure data consistency across the old and new tables in a scenario where a double write occurs at the same time as a row update in the backfill task. The second thing to note is the use of a logger to output information in the case of a persistence failure when updating the settings record object. Logging is extremely helpful in pinpointing the cause of persistence failures in a backfill task such as this one, should they occur.

We include some tests for the job as well. The first tests the happy path and ensures that we're creating and updating settings records for every Shop object. The other tests the unhappy path in which a settings record update fails and ensures that the appropriate logs are generated

After writing the backfill task, we enqueue it via a Rails migration:

Once the task has run successfully, we celebrate that the old and new data sources are in sync. It’s wise to compare the data from both tables to ensure that the two data sources are indeed in sync and that the backfill hasn’t failed anywhere.

Step 6: Change the Methods in the Newly Defined Interface to Read Data from the New Source

Change the reader methods to use the new data source

The remaining steps of the Strangler Fig Pattern are fairly straightforward. Now that we have a new data source that is up to date with the old data source and is being written to reliably, we can change the reader methods in the business logic class to use the new data source via the record object. With our existing example, we only have one reader method:

It’s as simple as changing this method to go through the record object to access locked_settings:

Step 7: Stop Writing to the Old Source and Delete Legacy Code

Remove the now-unused, “strangled” code from the codebase

We’ve made it to the final step in our code strangling! At this point, all objects are accessing locked_settings through the Capital::SettingsToLock interface, and this interface is reading from and writing to the new data source via the Capital::SettingsToLockRecord model. The only thing left to do is remove the now-unused, “strangled” code from the codebase.

In Capital::SettingsToLock, we remove the writes to the old data source in lock and unlock and get rid of the getter for shop. Let’s review what Capital::SettingsToLock looks like.

After the changes, it looks like this:

We can remove the tests in Capital::SettingsToLockTest that assert that lock and unlock write to the shops table as well.

Last but not least, we remove the old code from the Shop model, and drop the column from the shops table.

With that, we’ve successfully extracted a store settings column from the Shop model using the Strangler Fig Pattern! The new system is in place, and all remnants of the old system are gone.

Takeaways

In summary, we’ve followed a clear 7-step process known as the Strangler Fig Pattern to extract a portion of business logic and data from one model and move it into another:

  1. We defined the interface for the new system.
  2. We incrementally replaced reads to the old system with reads to the new interface.
  3. We defined a new table to hold the data and created a record for the business logic model to use to interface with the database.
  4. We began writing to the new data source from the new system.
  5. We backfilled the new data source with existing data from the old data source.
  6. We changed the readers in the new business logic model to read data from the new table.
  7. Finally, we stopped writing to the old data source and deleted the remaining legacy code.

The appeal of the Strangler Fig Pattern is evident. It reduces the complexity of the refactoring journey by offering an incremental, well-defined execution plan for replacing a legacy system with new code. This incremental migration to a new system allows for constant monitoring and minimizes the chances of something breaking mid-process. With each step, developers can confidently move towards a refactored architecture while ensuring that the application is still up and tests are green. We encourage you to try out the Strangler Fig Pattern with a small system that already has good test coverage in place. Best of luck in future code-strangling endeavors!

Continue reading

Creating Native Components That Accept React Native Subviews

Creating Native Components That Accept React Native Subviews

React Native adoption has been steadily growing since its release in 2015, especially with its ability to quickly create cross-platform apps. A very strong open-source community has formed, producing great libraries like Reanimated and Gesture Handler that allow you to achieve native performance for animations and gestures while writing exclusively React Native code. At Shopify we are using React Native for many different types of applications, and are committed to giving back to the community.

However, sometimes there is a native component you made for another app, or already exists on the platform, which you want to quickly port to React Native and aren’t able to build cross-platform using exclusively React Native. The documentation for React Native has good examples of how to create a native module which exposes native methods or components, but what should you do if you want to use a component you already have and render React Native views inside of it? In this guide, I’ll show you how to make a native component which provides bottom sheet functionality to React Native and lets you render React views inside of it. 

A simple example is the bottom sheet pattern from Google’s Material Design. It’s a draggable view which peeks up from the bottom of the screen and is able to expand to take up the full screen. It renders subviews inside of the sheet, which can be interacted with when the sheet is expanded.

This guide only focuses on an Android native implementation and assumes a basic knowledge of Kotlin. When creating an application, it’s best to make sure all platforms have the same feature parity.

Bottom sheet functionality

Bottom sheet functionality

Table of Contents

Setting Up Your Project

If you already have a React Native project set up for Android with Kotlin and TypeScript you’re ready to begin. If not, you can run react-native init NativeComponents —template react-native-template-typescript in your terminal to generate a project that is ready to go.

As part of the initial setup, you’ll need to add some Gradle dependencies to your project.

Modify the root build.gradle (android/build.gradle) to include these lines:

Make sure to substitute your current Kotlin version in the place of 1.3.61.

This will add all of the required libraries for the code used in the rest of this guide.

You should use fixed version numbers instead of + for actual development.

Creating a New Package Exposing the Native Component

To start, you need to create a new package that will expose the native component. Create a file called NativeComponentsReactPackage.kt.

Right now this doesn’t actually expose anything new, but you’ll add to the list of View Managers soon. After creating the new package, go to your Application class and add it to the list of packages.

Creating The Main View

A ViewGroupManager<T> can be thought of as a React Native version of ViewGroup from Android. It accepts any number of children provided, laying them out according to the constraints of the type T specified on the ViewGroupManager.

Create a file called ReactNativeBottomSheet.kt and a new

The basic methods you have to implement are getName() and createViewInstance().

name is what you’ll use to reference the native class from React Native.

createViewInstance is used to instantiate the native view and do initial setup.

Inflating Layouts Using XML

Before you create a real view to return, you need to set up a layout to inflate. You can set this up programmatically, but it’s much easier to inflate from an XML layout.

Here’s a fairly basic layout file that sets up some CoordinatorLayouts with behaviours for interacting with gestures. Add this to android/app/src/main/res/layout/bottom_sheet.xml.

The first child is where you’ll put all of the main content for the screen, and the second is where you’ll put the views you want inside BottomSheet. The behaviour is defined so that the second child can translate up from the bottom to cover the first child, making it appear like a bottom sheet.

Now that there is a layout created, you can go back to the createViewInstance method in ReactNativeBottomSheet.kt.

Referencing The New XML File

First, inflate the layout using the context provided from React Native. Then save references to the children for later use.

If you aren’t using Kotlin Synthetic Properties, you can do the same thing with container = findViewById(R.id.container).

For now, this is all you need to initialize the view and have a fully functional bottom sheet.

The only thing left to do in this class is to manage how the views passed from React Native are actually handled.

Handling Views Passed from React Native To Native Android

By overriding addView you can change where the views are placed in the native layout. The default implementation is to add any views provided as children to the main CoordinatorLayout. However, that won’t have the effect expected, as they’ll be siblings to the bottom sheet (the second child) you made in the layout.

Instead, don’t make use of super.addView(parent, child, index) (the default implementation), but manually add the views to the layout’s children by using the references stored earlier.

The basic idea followed is that the first child passed in is expected to be the main content of the screen, and the second child is the content that’s rendered inside of the bottom sheet. Do this by simply checking the current number of children on the container. If you already added a child, add the next child to the bottomSheet.

The way this logic is written, any views passed after the first one will be added to the bottom sheet. You’re designing this class to only accept two children, so you’ll make some modifications later.

This is all you need for the first version of our bottom sheet. At this point, you can run react-native run-android, successfully compile the APK, and install it.

Referencing the New Native Component in React Native

To use the new native component in React Native you need to require it and export a normal React component. Also set up the props here, so it will properly accept a style and children.

Create a new component called BottomSheet.tsx in your React Native project and add the following:

Now you can update your basic App.tsx to include the new component.

This is all the code that is required to use the new native component. Notice that you're passing it two children. The first child is the content used for the main part of the screen, and the second child is rendered inside of our new native bottom sheet.

Adding Gestures

Now there's a working native component that renders subviews from React Native, you can add some more functionality.

Being able to interact with the bottom sheet through gestures is our main use case for this component, but what if you want to programmatically collapse/expand the bottom sheet?

Since you’re using a CoordinatorLayout with behaviour to make the bottom sheet in native code, you can make use of BottomSheetBehaviour. Going back to ReactNativeBottomSheet.kt, we will update the createViewInstance() method.

By creating a BottomSheetBehaviour you can make more customizations to how the bottom sheet functions and when you’re informed about state changes.

First, add a native method which specifies what the expanded state of the bottom sheet should be when it renders.

This adds a prop to our component called sheetState which takes a string and sets the collapsed/expanded state of the bottom sheet based on the value sent. The string sent should be either collapsed or expanded.

We can adapt our TypeScript to accept this new prop like so:

Now, when you include the component, you can change whether it’s collapsed or expanded without touching it. Here’s an example of updating your App.tsx to add a button that updates the bottom sheet state.

Now, when pressing the button, it expands the bottom sheet. However, when it’s expanded, the button disappears. If you drag the bottom sheet back down to a collapsed state, you'll notice that the button isn't updating its text. So you can set the state programmatically from React Native, but interacting with the native component isn't propagating the value of the bottom sheet's state back into React. To fix this you will add more to the *BottomSheetBehaviour* you created earlier.

This code adds a state change listener to the bottom sheet, so that when its collapsed/expanded state changes, you emit a React Native event that you listen to in the React component. The event is called "BottomSheetStateChange” and has the same value as the states accepted in setSheetState().

Back in the React component, you listen to the emitted event and call an optional listener prop to notify the parent that our state has changed due to a native interaction.

https://gist.github.com/josephmbeveridge/38c218bc960cfd96300c6d63543654ca

Updating the App.tsx again

Now when you drag the bottom sheet, the state of the button updates with its collapsed/expanded state.

Native Code And Cross Platform Components

When creating components in React Native our goal is always to make cross-platform components that don’t require native code to perform well, but sometimes that isn’t possible or easy to do. By creating ViewGroupManager classes, we are able to extend the functionality of our native components so that we can take full advantage of React Native’s flexible layouts, with very little code required.

Additional Information

All the code included in the guide can be found at the react-native-bottom-sheet-example repo.

This guide is just an example of how to create native views that accept React Native subviews as children. If you want a complete implementation for bottom sheets on Android, check out the react-native wrapper for android BottomSheetBehavior.

You can follow the Android guideline for CoordinatorLayout and BottomSheetBehaviour to better understand what is going on. You’re essentially creating a container with two children.


If this sounds like the kind of problems you want to solve, we're always on the lookout for talent and we’d love to hear from you. Visit our Engineering career page to find out about our open positions.

Continue reading

How to Implement a Secure Central Authentication Service in Six Steps

How to Implement a Secure Central Authentication Service in Six Steps

As Shopify merchants grow in scale they will often introduce multiple stores into their organization. Previously, this meant that staff members had to be invited to multiple stores to setup their accounts. This introduced administrative friction and more work for the staff users who had to manage multiple accounts just to do their jobs.

We created a new service to handle centralized authentication and user identity management called, surprisingly enough, Identity. Having a central authentication service within Shopify was accomplished by building functionality on the OpenID Connect (OIDC) specification. Once we had this system in place, we built a solution to reliably and securely allow users to combine their accounts to get the benefit of single sign-on. Solving this specific problem involved a team comprising product management, user experience, engineering, and data science working together with members spread across three different cities: Ottawa, Montreal, and Waterloo.

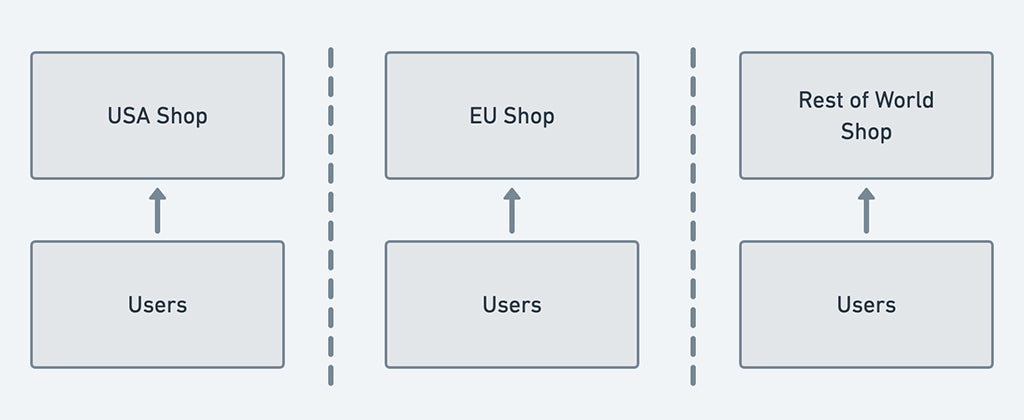
The Shop Model

Shopify is built so that all the data belonging to a particular store (called a Shop in our data model) lives in a single database instance. The data includes core commerce objects like Products, Orders, Customers, and Users. The Users model represents the staff members who have access, with specific permissions, to the administration interface for a particular Shop.

Shop Commerce Object Relationships

User authentication and profile management belonged to the Shop itself and worked as long as your use of Shopify never went beyond a single store. As soon as a Merchant organization expanded to using multiple stores, the experience for both the person managing store users and the individual users involved more overhead. You had to sign into each store independently as there was no single sign-on (SSO) capabilities because Shops don’t share any data between each other. The users had to manage their profile data, password, and two-step authentication on each store they had access to.

Shop isolation of users

Modelling User Accounts Within Identity

User accounts modelled within our Identity service are two important types: Identity accounts and Legacy accounts. A service or application that a user can access via OIDC is modelled as a Destination within Identity. Examples of destinations within Shopify would be stores, the Partners dashboard, or our Community discussion forums.

A Legacy account only has access to a single store and an Identity account can be used to access multiple destinations.

Legacy account model: one destination per account. Can only access Shops
Legacy account model: one destination per account. can only access Shops

We ensured that new accounts are created as Identity accounts and that existing users with legacy accounts can be safely and securely upgraded to Identity accounts. The big problem was combining multiple legacy accounts together. When a user has the same email to sign into several different Shopify stores we combined these accounts together into a single Identity account without blocking their access to any of the stores they used.

Combined account model: each account can have access to multiple destinations

There were six steps needed to get us to a single account to rule them all.

  1. Synchronize data from existing user accounts into a central Identity service.
  2. Have all authentication go through the central Identity service via OpenID Connect.
  3. Prompt users to combine their accounts together.
  4. Prompt users to enable a second factor (2FA) to protect their account.
  5. Create the combined Identity account.
  6. Prevent new legacy accounts from being created.

1. Synchronize Data From Existing User Accounts Into a Central Identity Service

We ensured that all user profile and security credential information was synchronized from the stores, where it's managed, into the centralized Identity service. This meant synchronizing data from the store to the Identity service every time one of the following user events occurred

  • creation
  • deletion
  • profile data update
  • security data update (password or 2FA).

2. Have All Authentication Go Through the Central Identity Service Via OpenID Connect (OIDC)

OpenID Connect is an extension to the OpenID 2.0 specification and the method used to delegate authentication from the Shop to the Identity service. Prior to this step, all password and 2FA verification was done within the core Shop application runtime. Given that Shopify shards the database for the core platform by Shop, all of the data associated with a given Shop is available on a single database instance.

One downside with having all authentication go through Identity is that when a user first signs into a Shopify service it requires sending the user’s browser to Identity to perform an OIDC authentication request (AuthRequest), so there is a longer delay on initial sign in to a particular store.

 Users signing into Shopify got familiar with this loading spinner
Users signing into Shopify got familiar with this loading spinner

3. Prompt Users to Combine Their Accounts Together

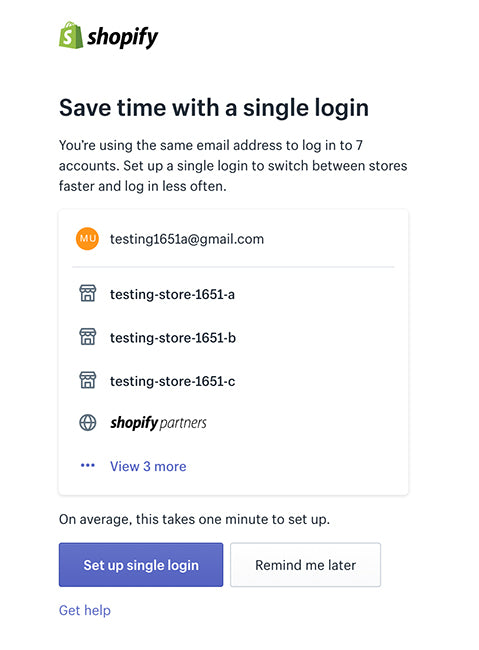
Users with an email address that can sign into more than one single Shopify service are prompted to combine their accounts together into a single Identity account. When a legacy user is signing into a Shopify product we interrupt the OIDC AuthRequest flow, after verifying they were authenticated but before sending them to their destination, to check if they had accounts that could be upgraded.

There were two primary upgrade paths to an Identity account for a user: auto-upgrading a single legacy account or combining multiple accounts.

Auto-upgrading a single legacy account occurs when a user’s email address only has a single store association. In this case, we convert the single account into an Identity account retaining all of their profile, password, and 2FA settings. Accounts in the Identity service are modelled using single table inheritance with a type attribute specifying which class a particular record uses. Upgrading a legacy account in this case was as simple as updating the value of this type attribute. This required no other changes anywhere else within the Shopify system because the universally unique identifier (UUID) for the account didn't change and this is the value used to identity an account in other systems.

Combining multiple accounts is triggered when a user has more than one active account (legacy or Identity) that uses the same email address. We created a new session object, called a MergeSession, for this combining process to keep track of all the data required to create the Identity account. The MergeSession was associated to an individual AuthRequest which means that when the AuthRequest was completed, the session would no longer be active. If a user went through more than a single combining process we would have to generate a new MergeSession object for each one.

The prompt users saw when they had multiple accounts that could be combined

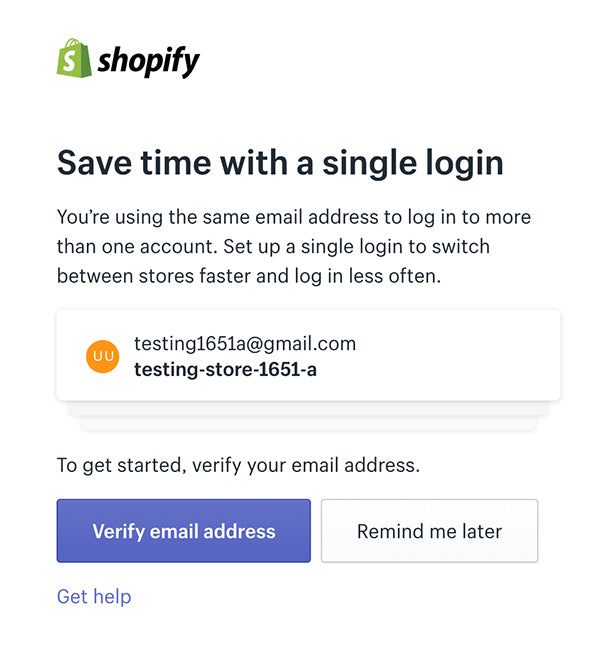
Shopify doesn't require users to verify their email address when creating a new store. This means it’s possible that someone could sign up for a trial using an email address they don’t have access to. Because of this we need to verify that you have access to the email address before we show a user information about other accounts with the same email or allow you to take any actions on those other accounts. This verification involves you requesting an email be sent to your address with a link.

If the user’s email address on the store they were signing in to was verified, we list all of the other destinations where their email address was used. If a user hadn't verified their email address for the account they are authenticating into then we would only indicate that there were other accounts and they must verify their email address before proceeding with combining them.

The prompt users saw when they signed in with an unverified email address

If any of the accounts that need combining use 2FA then the user had to provide a valid code for each required account. When someone uses SMS as a 2FA method, they could potentially save some time in this step if they use the same phone number across multiple accounts because we only require a single code for all of the destinations that use the same number. This was a secure convenience to our users in an attempt to reduce time spent on this step. Individuals using an authenticator app (e.g. Google Authenticator, Authy, 1Password, etc.), however, had to provide a code per destination because the authenticator app is configured per user account and there’s nothing associating them to one another.

If a user couldn’t provide a 2FA code for any accounts other than the account they are signing into, they are able to exclude that account from being combined. Legitimate reasons why a person may be unable to provide a code include if the account uses an old SMS phone number that the person no longer has access to or the person no longer has an authenticator app configured to generate a code for that account.

The idea here is that any account which was excluded can be combined at a later date when the user re-gains access to the account.

Once the 2FA requirements for all accounts are satisfied we prompt the user to setup a new password for their combined account. We store the encrypted password hash on an object that is keeping track of state for this session.

4. Prompt Users to Enable a Second Factor to Protect Their Account

Having a user engaged in performing account maintenance was an excellent opportunity to expose them to the benefits of protecting their account with a second factor of security. We displayed a different flow to users who already had 2FA enabled on at least one of their accounts being combined as the assumption was they don’t require explanation about what 2FA is but someone who had never set it up most likely would.

5. Create the Combined Identity Account

Once a user had validated their 2FA configuration of choice, or opted out of setting it up, we performed the following actions:

Attach 2FA setup, if present, to an object that keeps track of the specific account combination session (MergeSession).

Merge session object with new password and 2FA configuration.

Inside a single database transaction create the complete new account, associate destinations from legacy accounts to it, and delete the old accounts

We needed to do this inside a transaction after getting all of the information from a user to prevent the potential for reducing the security of their accounts. If a user was using 2FA before starting this process and we created the Identity account immediately after the new password was provided, there exists a small window of time when their new Identity account would be less secure than their old legacy accounts. As soon as the Identity account exists and has a password associated with it, it could be used to access destinations with only knowledge of the password. Deferring account creation until both password and 2FA are defined means that the new account can be as secure as the ones being combined were.

Final state of combined account

Generate a session for the new account and use it to satisfy the AuthRequest that initiated this session in the first place.

Some of the more complex pieces of logic for this process included finding all of the related accounts for a given email address and the information about the destinations they had access to, replacing the legacy accounts when creating the Identity account, and ensuring that the Identity account was setup correctly with all of the required data defined correctly. For these parts of the solution we relied on a Ruby library called ActiveOperation. It's a very small framework allowing you to isolate and model business logic within your application in an operation class. Traditionally in a Rails application you end up having to put logic either in your controllers or models and in this case we were able to have controllers and models that were very small by defining the complex business logic as operations. These operations were easily testable given that they were isolated and had very specific responsibilities that each separate class was responsible for.

There are other libraries for handling this kind of business logic process but we chose ActiveOperation because it was easy to use, made our code easier to understand, and had built-in support for the RSpec testing framework we were using.

We added support for the new Web Authentication (WebAuthn) standard in our Identity service just as we were beginning to roll out the account combining flow to our users. This meant that we were able to allow users to use physical security keys as a second factor when securing their accounts rather than just the options of SMS or an authenticator app.

6. Prevent New Legacy Accounts From Being Created

We didn’t want any more legacy accounts created. There were two user scenarios that needed to be updated to use the Identity creation flow: signing up for a new trial store on shopify.com and inviting new staff members to an existing store.

When signing up for a new store you would enter your email address as part of that process. This email address was used as the primary owner for the new store. With legacy accounts even if the email address belonged to another store we’d still be creating a new legacy account for the newly created store.

When inviting a new staff member to your store you would enter the email address for the new user and an invite would be sent that email address that includes a link to accept the invite and finish setting up their account. Similarly to the store creation process, this would always be a new legacy account on each individual store.

In both cases with the new process we determine whether the email address belongs to an Identity account already and, if so, require the user to be authenticated for the account belonging to that email address before they can proceed.

Build New Experiences for Shopify Users That Rely on SSO Identity Accounts

As of the time of this writing over 75% of active user accounts have been auto-upgraded or combined into a single Identity account. Accounts that don’t require user interaction, such as accounts that can be auto-upgraded, can be done automatically without the user signing in. The accounts that require a user to prove ownership of their accounts can only be combined when logging in. At some point in the future we will prevent users from signing into Shopify without having an Identity account.

When product teams within Shopify can rely on our active users having Identity accounts we can start building new experiences for those users that delegate authentication and profile management to the Identity service. Authorization is still up to the service leveraging these Identity accounts as Identity specifically only handles authentication and knows nothing about the permissions within the services that the accounts can access.

For our users, it means that they don’t have to create and manage a new account when Shopify launches a new service that utilizes Identity for user sign in.


If this sounds like the kind of problems you want to solve, we're always on the lookout for talent and we’d love to hear from you. Visit our Engineering career page to find out about our open positions. 

Continue reading

How Shopify Manages API Versioning and Breaking Changes

How Shopify Manages API Versioning and Breaking Changes

Earlier this year I took the train from Ottawa to Toronto. While I was waiting in line in the main hall of the station, I noticed a police officer with a detection dog. The police officer was giving the dog plenty of time at each bag or person as they worked and weaved their way back and forth along the lines. The dog would look to his handler for direction, receiving it with the wave of a hand or gesture towards the next target. That’s about the moment I began asking myself a number of questions about dogs… and APIs.

To understand why, you have to appreciate that the Canadian government recently legalized cannabis. Watching this incredibly well-trained dog work his way up and down the lines, it made me wonder, how did they “update” the dogs once the legislation changed? Can you really retrain or un-train a dog? How easy is it to implement this change, and how long does it take to roll out? So when the officer ended up next to me I couldn’t help but ask,

ME: “Excuse me, I have a question about your dog if that’s alright with you?”

OFFICER: “Sure, what’s on your mind?”

ME: “How did you retrain the dogs after the legalization of cannabis?”

OFFICER: “We didn’t. We had to retire them all and train new ones. You really can’t teach an old dog new tricks.“

ME: “Wow, seriously? How long did that take?”

OFFICER: “Yep, we needed a full THREE YEARS to retire the previous group and introduce a new generation. It was a ton of work.”

I found myself sitting on the train thinking about how simple it might have been for one layer of government plotting out the changes, to completely underestimate the downstream impact on the K9 unit of the police services. To anyone that didn’t understand the system (dogs), the change sounds simple. Simply detect substances in a set that is now n-1 in size. In reality, due to the way this dog-dependent system works, it requires significant time and effort, and a three-year program to migrate from the old system to the new.

How We Handle API Versioning

At Shopify, we have tens of thousands of partners building on our APIs that depend on us to ensure our merchants can run their businesses every day. In April of this year, we released the first official version of our API. All consumers of our APIs require stability and predictability and our API versioning scheme at Shopify allows us to continue to develop the platform while providing apps with stable API behavior and predictable timelines for adopting changes.

The increasing growth of our API RPM quarter over quarter since 2017 overlaid with growth in active API clients

The increasing growth of our API RPM quarter over quarter since 2017 overlaid with growth in active API clients

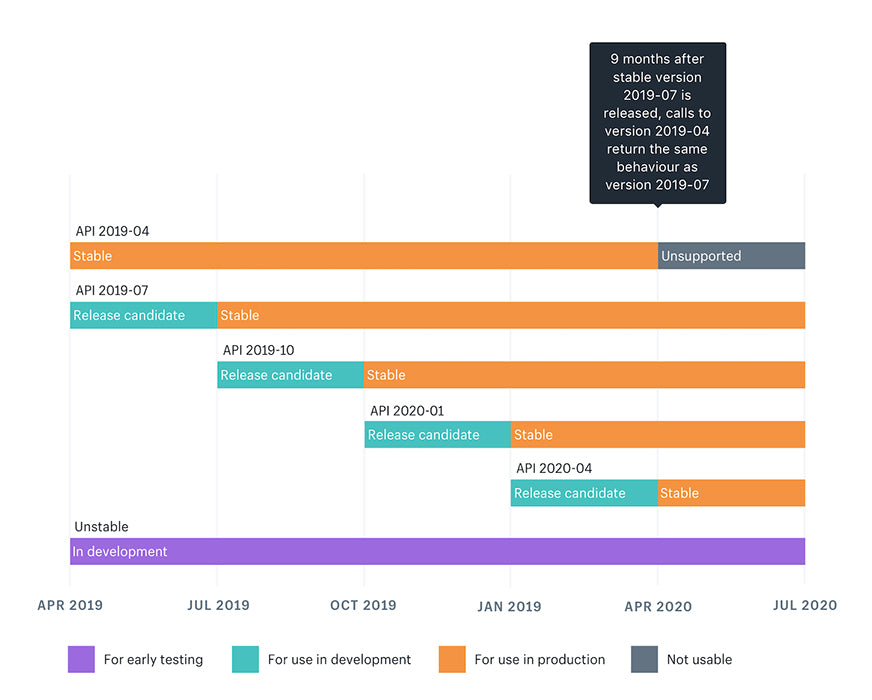
To ensure that we provide a stable and predictable API, Shopify releases a new API version every three months at the beginning of the quarter. Version names are date-based to be meaningful and semantically unambiguous (for example, 2020-01).

Shopify API Versioning Schedule

Shopify API Versioning Schedule


Although the Platform team is responsible for building the infrastructure, tooling, and systems that enforce our API versioning strategy at Shopify, there are a 1000+ engineers working across Shopify, each with the ability to ship code that can ultimately affect any of our APIs. So how do we think about versioning, and help manage changes to our APIs at scale?

Our general rule of thumb about versioning is that

API versioning is a powerful tool that comes with added responsibility. Break the API contract with the ecosystem only when there are no alternatives or it’s uneconomical to do otherwise.

API versions and changes are represented in our monolith through new frozen records, one file for versions, and one for changes. API changes are packaged together and shipped as a part of a distinct version. API changes are initially introduced to the unstable version, and can optionally have a beta flag associated with the change, to prevent the change from being visible publicly. At runtime, our code can check whether a given change is in effect through a ApiChange.in_effect? construct. I’ll show you how this, and other methods of the ApiChange module are used in an example later on.

Dealing With Breaking and Non-breaking Changes

As we continue to improve our platform, changes are necessary and can be split into two broad categories: breaking and non-breaking.

Breaking changes are more problematic and require a great deal of planning, care and go-to-market effort to ensure we support the ecosystem and provide a stable commerce platform for merchants. Ultimately, a breaking change is any change that requires a third-party developer to do any migration work to maintain the existing functionality of their application. Some examples of breaking changes are

  • adding a new or modifying an existing validation to an existing resource
  • requiring a parameter that wasn’t required before
  • changing existing error response codes/messages
  • modifying the expected payload of webhooks and async callbacks
  • changing the data type of an existing field
  • changing supported filtering on existing endpoints
  • renaming a field or endpoint
  • adding a new feature that will change the meaning of a field
  • removing an existing field or endpoint
  • changing the URL structure of an existing endpoint.

Teams inside Shopify considering a breaking change conduct an impact analysis. They put themselves into the shoes of a third-party developer using the API and think through the changes that might be required. If there is ambiguity, our developer advocacy team can reach out to our partners to gain additional insight and gauge the impact of proposed changes. 

On the other hand, to determine if a change is non-breaking, a change must pass our forward compatibility test. Forward compatible changes are those which can be adopted and used by any merchant, without limitation, regardless of whether shops have been migrated or any other additional conditions have been met.

Forward compatible changes can be freely adopted without worrying about whether there is a new user experience or the merchant’s data is adapted to work with the change, etc. Teams will keep these changes in the unstable API version and if forward compatibility cannot be met, keep access limited and managed by protecting the change with a beta flag.

Every change is named in the changes frozen record mentioned above, to track and manage the change, and can be referenced by its name, for example,

ApiChange.in_effect?(:really_big_change)

Analyzing the Impact of Breaking Changes

If a proposed change is identified as a breaking change, and there is agreement amongst the stakeholders that it’s necessary, the next step is to enable our teams to figure out just how big the change’s impact is.

Within the core monolith, teams make use of our API change tooling methods mark_breaking and mark_possibly_breaking to measure the impact of a potential breaking change. These methods work by capturing request metadata and context specific to the breaking code path then emitting this into our event pipeline, Monorail, which places the events into our data warehouse.

The mark_breaking method is called when the request would break if everything else was kept the same, while mark_possibly_breaking would be used when we aren’t sure whether the call would have an adverse effect on the calling application. An example would be the case where a property of the response has been renamed or removed entirely:

ApiChange.mark_breaking(:really_big_change).

Once shipped to production, teams can use a prebuilt impact assessment report to see the potential impact of their changes across a number of dimensions.

Measuring and Managing API Adoption

Once the change has shipped as a part of an official API version, we’re able to make use of the data emitted from mark_breaking and mark_possibly_breaking to measure adoption and identify shops and apps that are still at risk. Our teams use the ApiChange.in_effect? method (made available by our API change tooling) to create conditionals and manage support for the old and new behaviour in our API. A trivial example might look something like this:

The ApiChange module and the automated instrumentation it drives allow teams at Shopify to assess the current risk to the platform based on the proportion of API calls still on the breaking path, and assist in communicating these risks to affected developers.

At Shopify, our ecosystem’s applications depend on the predictable nature of our APIs. The functionality these applications provide can be critical for the merchant’s businesses to function correctly on Shopify. In order to build and maintain trust with our ecosystem, we consider any proposed breaking change thoroughly and gauge the impact of our decisions. By providing the tooling to mark and analyze API calls, we empower teams at Shopify to assess the impact of proposed changes, and build a culture that respects the impact our decisions have on our ecosystem. There are real people out there building software for our merchants, and we want to avoid ever having to ask them to replace all the dogs at once!


We're always on the lookout for talent and we’d love to hear from you. Please take a look at our open positions on the Engineering career page.

Continue reading

Sam Saffron AMA: Performance and Monitoring with Ruby

Sam Saffron AMA: Performance and Monitoring with Ruby

Sam Saffron is a co-founder of Discourse and the creator of the mini_profiler, memory_profiler, mini_mime and mini_racer gems. He has written extensively about various performance topics on samsaffron.com and is dedicated to ensuring Discourse keeps running fast.

Sam visited Shopify in Ottawa and talked to us about Discourse’s approach to Ruby performance and monitoring. He also participated in an AMA and answered the top voted questions submitted by Shopifolk which we are sharing here.

Ruby has a bad reputation when it comes to performance. What do you think are the actual problems? And do you think the community is on the right track to fix this reputation?

Sam Saffron: I think there are a lot of members of the community that are very keen to improve performance. And this runs all the way from above. DHH is also very interested in improving performance of Ruby.

I think the big problem that we have is resources and focus. A lot of times, I can feel that as a community we’re not focusing necessarily on the right thing. It’s very tempting, in performance, just to look at a micro bench. And it’s easy just to look at micro bench and make something 20 times faster, but in the big scheme of things you may not be fixing the right thing. So, it doesn’t make a big difference.

I think one area that Ruby can get better at, is finding the actual real production bottlenecks that people are seeing out there, and working towards solving them. And when I think about performance for us at Discourse, the biggest pain is memory, not CPU. When looking at adoption of Discourse, a lot of it depends on the people being able to run it on very cheap servers and they’re very constrained on memory. It’s a huge difference to adoption for us whether we can run on a 512MB system versus 1024MB. We see these memory issues in our hosting as well, our CPUs are usually doing okay, but memory is where we have issues. I wish the community would focus more on memory.

Just to summarize, I wish we looked at what big pain points consumers in the ecosystem are having and just set the agenda based on that. The other thing would be to spend more time on memory.

Are there any Ruby features or patterns that you generally avoid for performance reasons?

Sam Saffron: That’s an interesting question. Well, I’ll avoid ActiveRecord sometimes if I have something performance sensitive. For example, when I think of a user flow that I’m working on, it could be one that the user will visit once a month, or it could be one an extremely busy route like the topic page. If I’m working on the topic page, it’s a performance sensitive area, then maybe I may opt to skip ActiveRecord and just use MiniSql.

As for using Ruby patterns, I don’t go and write while loops just because I hate blocks and I know that blocks are a little bit slower. I like how wonderful Ruby looks and how wonderful it reads. So, I won’t be like, “Oh, yeah, I have to write C in Ruby now because I don’t want to use blocks anywhere.” I think it’s a there’s a balancing act with patterns and I’ll only strive or move away for two reasons. One is clarity. If the code will be clearer without like using some of these sophisticated patterns, I’ll just go for clear and dumb versus fancy, sophisticated and pretty. I prefer clear and dumb. An example of that is I hate using /unless/. It’s a pet peeve that I have, I won’t use the /unless/ keyword because I find it harder for me to comprehend what the code means. And the second is for performance reasons only. Only rarely where I absolutely have to take the performance hit, will I do that.

Sam Saffron presenting at Shopify in OttawaSam Saffron presenting at Shopify in Ottawa

What is the right moment to shift focus on the performance of a product, rather than on other features? Do you have any tripwires or metrics in place?
Sam Saffron: We’re constantly thinking about performance at Discourse. We’ve always got the monitoring in place and we’re always looking at our graphs to see how things are going. I don’t think performance is something that you forget about for two years then go back and say, “Yeah, we’ll do a round of performance now.” I think there should be a culture of performance instilled day-to-day and always be considering it. It doesn’t mean performance the only thing you should be thinking about but it should be in the back of your mind as something that is a constant that you are trying to do.

There’s a balancing act. You want to ship new features, but as long as performance is something the team is constantly thinking about, then I think it’s safe. I would never consider shipping a new feature that is very slow just because I want to get the feature out there. I prefer to have the feature both correct and fast before shipping it.

What was one of the most difficult performance bugs you’ve found? How did you stay focused and motivated?

Sam Saffron: The thing that keeps me focused is having very clear goals. It’s important when you’re dealing with performance issues. You have a graph, it’s going a certain shape, and you want to change the shape of it. That’s your goal. You forget about everything else and it’s about taking that graph from this shape to that shape. When you can break a problem down from something that is impossible into something that is practical and easy to reason about, it’s at that point, you can attack these problems.

Particular war stories are hard—there’s nothing that screams out at me as the worst bug we’ve had. I guess memory leaks have been traditionally, some of the hardest problems we’ve faced. Back in the old days we used the TheRubyRacer, and it had a leak in the interop layer between Ruby and V8. It was a nightmare to find, because you’d have these processes that just keep climbing, and you don’t know what’s responsible for it. It’s something random that you’re doing but how do you get to it? So we looked at that graph and start removing parts of the app and when you remove half of the app, the graph is suddenly stable. So, we put the other half of the app back in and slowly bisect it until you find the problem area and start resolving it. Luckily these days the tooling for debugging memory leaks is far more advanced making it much easier to deal with issues like this.

Do you employ any kind of performance budgeting in your products and/or libraries? If you do, what metrics do you monitor and how do you decide on a budget?

Sam Saffron: Well, one constant budget I have is that any new dependency in our gem file has to be approved by me, and people have to justify its use. So I think dependencies are a big thing which is part of performance budget. In that, it’s easy to add dependencies, but to remove them later is very hard. I need to make sure that every new dependency we add is part of a performance budget that we agree we absolutely need it.

I’m constantly thinking about our performance budget. We’ve got the budget on boot. I’m very proud of the way that I can boot Rails console in under two seconds on my laptop. So boot budget is important to me, especially for dev work. If I want to just open a Rails console, I just do it. I don’t have to think that I’m going to have to wait 20 seconds for this thing to boot up. I might as well go and browse the web.

We’ve got this constant budget, they’re the high profile pages. We can’t afford any of regression there. So, one thing that we’re looking at adding is alerts. If the query count on a topic page is now sitting on a median of 60 queries to SQL, if it goes up to 120, I want to get an alert saying, “There are 120 queries on this page, and there used to be 60 only.” So somebody will have a look at that, and it’ll open an alert topic on Discourse. So I definitely do want to get into more alerting that say, “Look, something happened at this point, look at it.”

What’s your take on the different Ruby runtimes out there? Is MRI still the “go to one” for a new project? If so, what do you think are the other ones missing to become real contenders?

Sam Saffron: We’ve always wanted Discourse to work on a wide array of platforms. That’s been a goal because when we started it was just about pure adoption. We didn’t care if people were paying us or not paying us, we just wanted the software to be adopted. So if it can run on JRuby, all power to JRuby—it makes adoption easier. The unfortunate thing that happened over the years is that we have never been able to run Discourse on JRuby, and they’ve been attempts out there but we are not quite there. Being able to host V8 in Java in JRuby is very very hard. A lot of what we do is married to the C implementation. It’s extremely hard to move to another world. I want there to be diversity, but unfortunately the only option we have at the moment is MRI, and I don’t see any other options in the next couple of years popping up that would be feasible.

Matz (Yukihiro Matsumoto) is saying that he wants Ruby 3 to be three times faster. Are you following the Ruby 3 development? Do you think they are going in the right direction?

Sam Saffron: I think there’s definitely a culture of performance at CRuby. There are a lot of improvements happening patch after patch where they are shaving this bit off and that bit off. CRuby itself, is tracking well but whether it’ll get three times faster or not, I don’t know. Where it gets complicated, the ecosystem itself is tracking its own trajectory and that’s where it gets complicated. There’s one trajectory for the engine, but the other trajectory for the ecosystem.

If you look at things like Active Record, it’s not tracking three times faster for the next version of Rails, unfortunately. And that’s where all our pain is at the moment. When you look at what CRuby is doing, the goal is not making Active Record three times faster because it’s not a goal that is even practical for them to take on. So, they’re just dealing with little micro benchmarks that may help this situation or they may not help the situation, we don’t know.

Overall, Do I think MRI is tracking well? Yes, MRI is tracking well, but I think we need to put a lot more focus around the ecosystem, if we want to the ecosystem to be 3x faster.

Is there any performance tooling that you think MRI is missing right now?

Sam Saffron: Yes. I’d say memory profiling is the big tooling piece that is missing. We have a bunch of tooling, for example, you can get full heap dumps. But the issue is how are you going to analyze it? The tooling for analysis is woeful, to say the least. If you compare Ruby on Rails to what they have in Java or .NET, we’re worlds behind. In Java and .NET, when it comes to tooling for looking at memory, you can get back traces from where something is allocated. In MRI, at best, you can get a call site of where something was allocated, you can’t get the full backtrace of where it was allocated. Having the full backtrace gives you significantly more tools to figure out and pinpoint what it is.

So, I’d say there are some bits missing of raw information that you could opt in for, that would be very handy. And a lot of tooling around visualizing and analyzing what is going on, especially when it comes to the world between managed and unmanaged because it’s very murky.

People look at a process and the process is consuming one gig of memory, and they want to know why. And if you were able at Shopify, for example, to have that picture immediately of why? You might say, well, maybe killing Unicorn workers is not what we need because all the memory looks like this and it’s coming from here. Maybe we just rewrite this little component and we don’t have to kill these Unicorns anymore because we’ve handled the root cause. I think that area is missing.


Intrigued about scaling using Ruby? Shopify is hiring and we’d love to hear from you. Please take a look at our open positions on the Engineering career page.

Continue reading

Five Common Data Stores and When to Use Them

Five Common Data Stores and When to Use Them

An important part of any technical design is choosing where to store your data. Does it conform to a schema or is it flexible in structure? Does it need to stick around forever or is it temporary?

In this article, we’ll describe five common data stores and their attributes. We hope this information will give you a good overview of different data storage options so that you can make the best possible choices for your technical design.

The five types of data stores we will discuss are

  1. Relational database
  2. Non-relational (“NoSQL”) database
  3. Key-value store
  4. Full-text search engine
  5. Message queue

Relational Database

Databases are, like, the original data store. When we stopped treating computers like glorified calculators and started using them to meet business needs, we started needing to store data. And so we (and by we, I mean Charles Bachman) invented the first database management system in 1963. By the mid to late ‘70s, these database management systems had become the relational database management systems (RDBMSs) that we know and love today.

A relational database, or RDB, is a database which uses a relational model of data.

Data is organized into tables. Each table has a schema which defines the columns for that table. The rows of the table, which each represent an actual record of information, must conform to the schema by having a value (or a NULL value) for each column.

Each row in the table has its own unique key, also called a primary key. Typically this is an integer column called “ID.” A row in another table might reference this table’s ID, thus creating a relationship between the two tables. When a column in one table references the primary key of another table, we call this a foreign key.

Using this concept of primary keys and foreign keys, we can represent incredibly complex data relationships using incredibly simple foundations.

SQL, which stands for structured query language, is the industry standard language for interacting with relational databases.

At Shopify, we use MySQL as our RDBMS. MySQL is durable, resilient, and persistent. We trust MySQL to store our data and never, ever lose it.

Other features of RDBMSs are

  • Replicated and distributed (good for scalability)
  • Enforces schemas and atomic, consistent, isolated, and durable (ACID) transactions (leads to well-defined, expected behavior of your queries and updates)
  • Good, configurable performance (fast lookups, can tune with indices, but can be slow for cross-table queries)

When to Use a Relational Database

Use a database for storing your business critical information. Databases are the most durable and reliable type of data store. Anything that you need to store permanently should go in a database.

Relational databases are typically the most mature databases: they have withstood the test of time and continue to be an industry standard tool for the reliable storage of important data.

It’s possible that your data doesn’t conform nicely to a relational schema or your schema is changing so frequently that the rigid structure of a relational database is slowing down your development. In this case, you can consider using a non-relational database instead.

Non-Relational (NoSQL) Database

Computer scientists over the years did such a good job of designing databases to be available and reliable that we started wanting to use them for non-relational data as well. Data that doesn’t strictly conform to some schema or that has a schema which is so variable that it would be a huge pain to try to represent it in relational form.

These non-relational databases are often called “NoSQL” databases. They have roughly the same characteristics as SQL databases (durable, resilient, persistent, replicated, distributed, and performant) except for the major difference of not enforcing schemas (or enforcing only very loose schemas).

NoSQL databases can be categorized into a few types, but there are two primary types which come to mind when we think of NoSQL databases: document stores and wide column stores.

(In fact, some of the other data stores below are technically NoSQL data stores, too. We have chosen to list them separately because they are designed and optimized for different use cases than these more “traditional” NoSQL data stores.)

Document Store

A document store is basically a fancy key-value store where the key is often omitted and never used (although one does get assigned under the hood—we just don’t typically care about it). The values are blobs of semi-structured data, such as JSON or XML, and we treat the data store like it’s just a big array of these blobs. The query language of the document store will then allow you to filter or sort based on the content inside of those document blobs.

A popular document store you might have heard of is MongoDB.

Wide Column Store

A wide column store is somewhere in between a document store and a relational DB. It still uses tables, rows, and columns like a relational DB, but the names and formats of the columns can be different for various rows in the same table. This strategy combines the strict table structure of a relational database with the flexible content of a document store.

Popular wide column stores you may have heard of are Cassandra and Bigtable.

At Shopify, we use Bigtable as a sink for some streaming events. Other NoSQL data stores are not widely used. We find that the majority of our data can be modeled in a relational way, so we stick to SQL databases as a rule.

When to use a NoSQL Database

Non-relational databases are most suited to handling large volumes of data and/or unstructured data. They’re extremely popular in the world of big data because writes are fast. NoSQL databases don’t enforce complicated cross-table schemas, so writes are unlikely to be a bottleneck in a system using NoSQL.

Non-relational databases offer a lot of flexibility to developers, so they are also popular with early-stage startups or greenfield projects where the exact requirements are not yet clear.

Key-Value Store

Another way to store non-relational data is in a key-value store.

A key-value store is basically a production-scale hashmap: a map from keys to values. There are no fancy schemas or relationships between data. No tables or other logical groups of data of the same type. Just keys and values, that’s it.

At Shopify, we use two key-value stores: Redis and Memcached.

Both Redis and Memcached are in-memory key-value stores, so their performance is top-notch.

Since they are in-memory, they (necessarily) support configurable eviction policies. We will eventually run out of memory for storing keys and values, so we’ll need to delete some. The most popular strategies are Least Recently Used (LRU) and Least Frequently Used (LFU). These eviction policies make key-value stores an easy and natural way to implement a cache.

(Note: There are also disk-based key-value stores, such as RocksDB, but we have no experience with them at Shopify.)

One major difference between Redis and Memcached is that Redis supports some data structures as values. You can declare that a value in Redis is a list, set, queue, hash map, or even a HyperLogLog, and then perform operations on those structures. With Memcached, everything is just a blob and if you want to perform any operations on those blobs, you have to do it yourself and then write it back to the key again.

Redis can also be configured to persist to disk, which Memcached cannot. Redis is therefore a better choice for storing persistent data, while Memcached remains only suitable for caches.

When to use a Key-Value Store

Key-value stores are good for simple applications that need to store simple objects temporarily. An obvious example is a cache. A less obvious example is to use Redis lists to queue units of work with simple input parameters.

Full-Text Search Engine

Search engines are a special type of data store designed for a very specific use case: searching text-based documents.

Technically, search engines are NoSQL data stores. You ship semi-structured document blobs into them, but rather than storing them as-is and using XML or JSON parsers to extract information, the search engine slices and dices the document contents into a new format that is optimized for searching based on substrings of long text fields.

Search engines are persistent, but they’re not designed to be particularly durable. You should never use a search engine as your primary data store! It should be a secondary copy of your data, which can always be recreated from the original source in an emergency.

At Shopify we use Elasticsearch for our full-text search. Elasticsearch is replicated and distributed out of the box, which makes it easy to scale.

The most important feature of any search engine, though, is that it performs exceptionally well for text searches.

To learn more about how full-text search engines achieve this fast performance, you can check out Toria’s lightning talk from StarCon 2019.

When to use a Full-Text Search Engine

If you have found yourself writing SQL queries with a lot of wildcard matches (for example, “SELECT * FROM products WHERE description LIKE “%cat%” to find cat-related products) and you’re thinking about brushing up on your natural-language processing skills to improve the results… you might need a search engine!

Search engines are also pretty good at searching and filtering by exact text matches or numeric values, but databases are good at that, too. The real value add of a full-text search engine is when you need to look for particular words or substrings within longer text fields.

Message Queue

The last type of data store that you might want to use is a message queue. It might surprise you to see message queues on this list because they are considered more of a data transfer tool than a data storage tool, but message queues store your data with as much reliability and even more persistence than some of the other tools we’ve discussed already!

At Shopify, we use Kafka for all our streaming needs. Payloads called “messages” are inserted into Kafka “topics” by “producers.” On the other end, Kafka “consumers” can read messages from a topic in the same order they were inserted in.

Under the hood, Kafka is implemented as a distributed, append-only log. It’s just files! Although not human-readable files.

Kafka is typically treated as a message queue, and rightly belongs in our message queue section, but it’s technically not a queue. It’s technically a distributed log, which means that we can do things like set a data retention time of “forever” and compact our messages by key (which means we only retain the most recent value for each key) and we’ve basically got a key-value document store!

Although there are some legitimate use cases for such a design, if what you need is a key-value document store, a message queue is probably not the best tool for the job. You should use a message queue when you need to ship some data between services in a way that is fast, reliable, and distributed.

When to use a Message Queue

Use a message queue when you need to temporarily store, queue, or ship data.

If the data is very simple and you’re just storing it for use later in the same service, you could consider using a key-value store like Redis. You might consider using Kafka for the same simple data if it’s very important data, because Kafka is more reliable and persistent than Redis. You might also consider using Kafka for a very large amount of simple data, because Kafka is easier to scale by adding distributed partitions.

Kafka is often used to ship data between services. The producer-consumer model has a big advantage over other solutions: because Kafka itself acts as the message broker, you can simply ship your data into Kafka and then the receiving service can poll for updates. If you tried to use something more simple, like Redis, you would have to implement some kind of notification or polling mechanism yourself, whereas Kafka has this built-in.

In Conclusion

These are not the be-all-end-all of data stores, but we think they are the most common and useful ones. Knowing about these five types of datastores will get you on the path to making great design decisions!

What do you think? Do you have a favourite type of datastore that didn’t make it on the list? Let us know in the comments below.


We’re always looking for awesome people of all backgrounds and experiences to join our team. Visit our Engineering career page to find out what we’re working on.

Continue reading

How to Write Fast Code in Ruby on Rails

How to Write Fast Code in Ruby on Rails

At Shopify, we use Ruby on Rails for most of our projects. For both Rails and Ruby, there exists a healthy amount of stigma toward performance. You’ll often find examples of individuals (and entire companies) drifting away from Rails in favor of something better. On the other hand, there are many who have embraced Ruby on Rails and found success, even at our scale, processing millions of requests per minute (RPM).

Part of Shopify’s success with Ruby on Rails is an emphasis on writing fast code. But, how do you really write fast code? Largely, that’s context sensitive to the problem you’re trying to solve. Let’s talk about a few ways to start writing faster code in Active Record, Rails, and Ruby.

Active Record Performance

Active Record is Rails’ default Object Relational Mapper (ORM). Active Record is used to interact with your database by generating and executing Structured Query Language (SQL). There are many ways to query large volumes of data poorly. Here are some suggestions to help keep your queries fast.

Know When SQL Gets Executed

Active Record evaluates queries lazily. So, to query efficiently, you should know when queries are executed. Finder methods, calculations, and association methods all cause queries to evaluated. Here’s an example:

Here the code is appending a comment to a blog post and automatically saving it to the database. It isn’t immediately obvious that this executes a SQL insert to save the appended blog post. These kinds of gotchas become easier to spot through reading documentation and experience.

Select Less Where Possible

Another way to query efficiently is to select only what you need. By default, Active Record selects all columns in SQL with SELECT *. Instead, you can leverage select and pluck to take control of your select statements:

Here, we’re selecting all IDs in a blog’s table. Notice select returns an Active Record Relation object (that you can chain query methods off of) whereas pluck returns an array of raw data.

Forget About The Query Cache

Did you know that if you execute the same SQL within the lifetime of a request, Active Record will only query the database once? Query Cache is one of the last lines of defense against redundant SQL execution. This is what it looks like in action:

In the example, subsequent blog SELECTs using the same parameters are loaded from cache. While this is helpful, depending on query cache is a bad idea. Query cache is stored in memory, so its persistence is short-lived. The cache can be disabled, so if your code will run both inside and outside of a request, it may not always be efficient.

Avoid Querying Unindexed Columns

Avoid querying unindexed columns, it often leads to unnecessary full table scans. At scale, these queries are likely to timeout and cause problems. This is more of a database best practice that directly affects query efficiency.

The obvious solution to this problem is to index the columns you need to query. What isn’t always obvious, is how to do it. Databases often lock writes to a table when adding an index. This means large tables can be write-blocked for a long time.

At Shopify, we use a tool called Large Hadron Migrator (LHM) to solve these kinds of scaling migration problems for large tables. On later versions of Postgres and MySQL, there is also concurrent indexing support.

Rails Performance

Zooming out from Active Record, Rails has many other moving parts like Active Support, Active Job, Action Pack, etc. Here are some generalized best practices for writing fast code in Ruby on Rails.

Cache All The Things

If you can’t make something faster, a good alternative is to cache it. Things like complex view compilation and external API calls benefit greatly from caching. Especially if the resultant data doesn’t change often.

Taking a closer look at the fundamentals of caching, key naming and expiration are critical to building effective caches. For example:

In the first block, we cache all subscription plan names indefinitely (or until the key is evicted by our caching backend). The second block caches the JSON of all posts for a given blog. Notice how cache keys change in the context of a different blog or when a new post is added to a blog. Finally, the last block caches a global comment count for approved comments. The key will automatically be removed by our caching backend every five minutes after initial fetching.

Throttle Bottlenecks

But what about operations you can’t cache? Things like delivering an email, sending a webhook, or even logging in can be abused by users of an application. Essentially, any expensive operation that can’t be cached should be throttled.

Rails doesn’t have a throttling mechanism by default. So, gems like rack-attack and rack-throttle can help you throttle unwanted requests. Using rack-attack:

This snippet limits a given IP’s post requests to /admin/sign_in to 10 in 15 minutes. Depending on your application’s needs, you can also build solutions that throttle further up the stack inside your rails app. Rack-based throttling solutions are popular because they allow you to throttle bad requests before they hit your Rails app.

Do It Later (In a Job)

A cornerstone of the request-response model we work with as web developers is speed. Keeping things snappy for users is important. So, what if we need to do something complicated and long-running?

Jobs allow us to defer work to another process through queueing systems often backed by Redis. Exporting a dataset, activating a subscription, or processing a payment are all great examples of job-worthy work. Here’s what jobs look like in Rails:

This is a trivial example of how you would write a CSV exporting job. Active Job is Rails’ job definition framework which plugs into specific queueing backends like Sidekiq or Resque.

Start Dependency Dieting

Ruby’s ecosystem is rich, and there are a lot of great libraries you can use in your project. But how much is too much? As a project grows and matures, dependencies often turn into liabilities.

Every dependency adds more code to your project. This leads to slower boot times and increased memory usage. Being aware of your project’s dependencies and making conscious decisions to minimize them help maintain speed in the long term.

Shopify’s core monolith, for example, has ~500 gem dependencies. This year, we’ve taken steps to evaluate our gem usage and remove unnecessary dependencies where possible. This lead to removing unused gems, addressing tech debt to remove legacy gems, and using a dependency management service (eg. Dependabot).

Ruby Performance

A framework is only as fast as the language it’s written in. Here are some pointers on writing performant Ruby code. This section is inspired by Jeremy Evans’s closing keynote on performance at RubyKaigi 2019.

Use Metaprogramming Sparingly

Changing a program’s structure at runtime is a powerful feature. In a highly dynamic language like Ruby, there are significant performance costs associated to metaprogramming. Let’s look at method definition as an example:

These are three common ways of defining a method in Ruby. The first most common method uses def. The second uses define_method to define a metaprogrammed method. The third uses class_eval to evaluate a string at runtime as source code (which defines a method using def).

This is output of a benchmark that measures the speed of these three methods using the benchmark-ips gem. Let’s focus on the lower half of the benchmark that measures how many times Ruby could run the method in 5 seconds. For the normal def method, it was ran 10.9 million times, 7.7 million times for the define_method method, and 10.3 million times for the class_eval def defined method.

While this is a trivial example, we can conclude there are clear performance differences associated with _how_ you define a method. Now, let’s look at method invocation

This simply defines invoke and method_missing methods on an object named obj. Then, we call the invoke method normally, using the metaprogrammed send method, and finally via method_missing.

Less surprisingly, a method invoked with send or method_missing is much slower than a regular method invocation. While these differences might seem minuscule, they add up fast in large codebases, or when called many times recursively. As a rule of thumb, use metaprogramming sparingly to prevent unnecessary slowness.

Know the difference between O(n) and O(1)

What O(n) and O(1) mean is that there are two kinds of operations. O(n) is an operation that scales in time with size, and O(1) is one that is constant in time regardless of size. Consider this example:

This becomes very apparent when finding a value in an array compared to a hash. With every element you add to an array, there’s more potential data to iterate through whereas hash lookups are always constant regardless of size. The moral of the story here is to think about how your code will scale with more data.

Allocate Less

Memory management is a complicated subject in most languages, and Ruby is no exception. Essentially, the more objects you allocate, the more memory your program consumes. High-level languages usually implement Garbage Collection to automate removal of unused objects making developers’s lives much easier.

Another aspect of memory management is object mutability. For example, if you need to combine two arrays together, do you allocate a new array or mutate an existing one? Which option is more memory efficient?

Generally speaking, less allocations is better. Rubyists often classify these kinds of self-mutating methods as “dangerous”. Dangerous methods in Ruby often (but not always) end with an exclamation mark. Here’s an example:

The code above allocates an array of symbols. The first uniq call allocates and returns a new array with all redundant symbols removed. The second uniq! call mutates the receiver directly to remove redundant symbols and returns itself.

If used improperly, dangerous methods can lead to unwanted side effects in your code. A best practice to follow is to avoid mutating global state while leveraging mutation on local state.

Minimize Indirection

Indirection in code, especially through layered abstractions, can be described as both a blessing and a curse. In terms of performance, it’s almost always a curse

Merb, a web application framework that was merged into Rails has a motto: “No code is faster than no code.” This can be interpreted as “The more layers of complexity you add to something, the slower it will be.’’ While this isn’t necessarily true for performance optimizing code, it’s still a good principle to remember when refactoring.

An example of necessary indirection is Active Resource, an ORM for interacting with web services. Developers don’t use it for better performance, they use it because manually crafting requests and responses is much more difficult (and error prone) by comparison.

Final Thoughts

Software development is full of tradeoffs. As developers, we have enough difficult decisions to make while juggling technical debt, code style, and code correctness. This is why optimizing for speed shouldn’t come first.

At Shopify, we treat speed as a feature. While it lends itself to better user experiences and lower server bills, it shouldn’t take precedence over the happiness of developers working on an application. Remember to keep your code fun while making it fast!

Additional Reading


We’re always looking for awesome people of all backgrounds and experiences to join our team. Visit our Engineering career page to find out what we’re working on.

Continue reading

Want to Improve UI Performance? Start by Understanding Your User

Want to Improve UI Performance? Start by Understanding Your User

My team at Shopify recently did a deep dive into the performance of the Marketing section in the Shopify admin. Our focus was to improve the UI performance. This included a mix of improvements that affected load time, perceived load time, as well as any interactions that happen after the merchant has landed in our section.

It’s important to take the time to ask yourself what the user (in our case, merchant) is likely trying to accomplish when they visit a page. Once you understand this, you can try to unblock them as quickly as possible. We as UI developers can look for opportunities to optimize for common flows and interactions the merchant is likely going to take. This helps us focus on improvements that are user centric instead of just trying to make our graphs and metrics look good.

I’ll dive into a few key areas that we found made the biggest impact on UI performance:

  • How to assess your current situation and spot areas that could be improved
  • Prioritizing the loading of components and data
  • Improving the perceived loading performance by taking a look at how the design of loading states can influence the way users experience load time.

Our team has always kept performance top of mind. We follow industry best practices like route-based bundle splitting and are careful not to include any large external dependencies. Nevertheless, it was still clear that we had a lot of room for improvement.

The front end of our application is built using React, GraphQL, and Apollo. The advice in this article aims to be framework agnostic, but there are some references to React specific tooling.

Assess Your Current Situation

Develop Merchant Empathy by Testing on Real-World Devices

In order to understand what needed to be improved, we had to first put ourselves in the shoes of the merchant. We wanted to understand exactly what the merchant is experiencing when they use the Marketing section. We should be able to offer merchants a quality experience no matter what device they access the Shopify admin from.

We think testing using real, low-end devices is important. Testing on a low-end device allows us to ensure that our application performs well enough for users who may not have the latest iPhone or Macbook Pro.

Moto G3
Moto G3 Device

We grabbed a Moto G3 and connected the device to Chrome developer tools via the remote devices feature. If you don’t have access to a real device to test with, you can make use of webpagetest.org to run your application on a real device remotely.

Capture an Initial Profile

Our initial performance profile captured using Chrome Developer tools.
Our initial performance profile captured using Chrome Developer tools

After capturing our initial profile using the performance profiler included in the Chrome developer tools, we needed to break it down. This profile gives us a detailed timeline of every network request, JavaScript execution, and event that happens during our recording plus much, much more. We wanted to understand exactly what is happening when a merchant interacts with our section.

We ran the audit with React in development mode so we could take advantage of the user timings they provide. Running the application with React in production mode would have performed better, but having the user timings made it much easier to identify which components we need to investigate.

React profiler by React dev tools
React Profiler from React Dev Tools

We also took the time to capture a profile using the profiler provided by React dev tools. This tool allowed us to see React specific details like how long it took to render a component or how many times that component has been updated. The React profiler was particularly useful when we sorted our components from slowest to fastest.

Get Our Priorities in Order

After reviewing both of these profiles, we were able to take a step back and gain some perspective. It became clear that our priorities were out of order.

We found that the components and data that are most crucial to merchants were being delayed by components that could have been loaded at a later time. There was a big opportunity here to rearrange the order of operations in our favor with the ultimate goal of making the page useful as soon as possible.

We know that the majority of visits to the Marketing section are incremental. This means that the merchant navigated to the Marketing section from another page in the admin. Because the admin is a single page app, these incremental navigations are all handled client side (in our case using React Router). This means that traditional performance metrics like time to first byte or first meaningful paint may not be applicable. We instead make use of the Navigation Timing API to track navigations within the admin.

When a merchant visits the Marketing section, the following events happen:

  • JavaScript required to render the page is fetched
  • A GraphQL query is made for the data required for the page
  • The JavaScript is executed and our view is rendered with our data

Any optimizations we do will be to improve one of those events. This could mean fetching less data and JavaScript, or making the execution of the JavaScript faster.

Deprioritize Non-Essential Components and Code Execution

We wanted the browser to do the least amount of work necessary to render our page. In our case, we were asking the browser to do work that did not immediately benefit the merchant. This low-priority work was getting in the way of more important tasks. We took two approaches to reducing the amount of work that needed to be done:

  • Identifying expensive tasks that are being run repeatedly and memoize (~cache) them.
  • Identifying components that are not immediately required and deferring them.

Memoizing Repetitive and Expensive Tasks

One of the first wins here was around date formatting. The React profiler was able to identify one component that was significantly slower than the rest of the components on the page.

React Profiler Identifying <StartEndDates /> Component is Significantly Slower

The <StartEndDates /> component stood out. This component renders a calendar that allows merchants to select a start and end date. After digging into this component, we discovered that we were repeating a lot of the same tasks over and over. We found that we were constructing a new Intl.DateTimeFormat object every time we needed to format a date. By creating a single Intl.DateTimeFormat object and referencing it every time we needed to format a date, we were able to reduce the amount of work the browser needed to do in order to render this component.

<StartEndDates /> after memoization of two other date formatting utilities

This in combination with the memoization of two other date formatting utilities resulted in a drastic improvement in this components render time. Taking it from ~64.7 ms down to ~0.5 ms.

Defer Non-Essential Components

Async loading allows us to load only the minimum amount of JavaScript required to render our view. It is important to keep the JavaScript we do load small and fast as it contributes to how quickly we can render the page on navigation.

One example of a component that we decided to defer was our <ImagePicker />. This component is a modal that is not visible until the merchant clicks a Select image button. Since this component is not needed on the initial load, it is a perfect candidate for deferred loading.

By moving the JavaScript required for this component into a separate bundle that is loaded asynchronously, we were able to reduce the size of the bundle that contained the JavaScript that is critical to rendering our initial view.

Get a Head Start

Prefetching the image picker when the merchant hovers over the activator button makes it feel like the modal instantly loads.
Prefetching the image picker when the merchant hovers over the activator button makes it feel like the modal instantly loads

Deferring the loading of components is only half the battle. Even though the component is deferred, it may still be needed later on. If we have the component and its data ready when the merchant needs it, we can provide an experience that really feels instant.

Knowing what a merchant is going to need before they explicitly request it is not an easy task. We do this by looking for hints the merchant provides along the way. This could be a hover, scrolling an element in to the viewport, or common navigation flows within the Shopify admin.

In the case of our <ImagePicker /> modal, we do not need the modal until the Select image button is clicked. If the merchant hovers over the button, it’s a pretty clear hint that they will likely click. We start prefetching the <ImagePicker /> and its data so by the time the merchant clicks we have everything we need to display the modal.

Improve the Loading Experience

In a perfect world, we would never need to show a loading state. In cases where we are unable to prefetch or the data hasn’t finished downloading, we fallback to the best possible loading state by using a spinner or skeleton content. We typically choose to use a skeleton if we have an idea what the final content would look like.

Use Skeletons

Skeleton content has emerged as a best practice for loading states. When done correctly, skeletons can make the merchant feel like they have ‘arrived’ at the next state before the page has finished loading.

Skeletons are often not as effective as they could be. We found that it’s not enough to put up a skeleton and call it a day. By including static content that does not rely on data from our API, the page will feel a lot more stable as data arrives from the server. The merchant feels like they have ‘arrived’ instead of being stuck in an in between loading state.

Animation showing how adding headings helps the merchant understand what content they can expect as the page loads.
Animation showing how adding headings helps the merchant understand what content they can expect as the page loads

Small tweaks like adding headings to the skeleton go a long way. These changes give the merchant a chance to scan the page and get a feel for what they can expect once the page finishes loading. They also have the added benefit of reducing the amount of layout shift that happens as data arrives.

Improve Stability

When navigating between pages, there are often going to be several loading stages. This may be caused by data being fetched from multiple sources, or the loading of resources such as images or fonts.

As we move through these loading stages, we want the page to feel as stable as possible. Drastic changes to the pages layout are disorienting and can even cause the user to make mistakes.

Using a skeleton to help improve stability by matching the height of the skeleton to the height of the final content as closely as possible.
Using a skeleton to help improve stability by matching the height of the skeleton to the height of the final content as closely as possible

Here’s an example how we used a skeleton to help improve stability. The key is to match the height of the skeleton to the height of the final content as closely as possible.

Make the Page Useful as Quickly as Possible

Rendering the ‘Create campaign’ button while we are still in the loading state
Rendering the Create campaign button while we are still in the loading state

In this example, you can see that we are rendering the Create campaign button while we are still in the loading state. We know this button is always going to be rendered, so there’s no sense in hiding it while we are waiting for unrelated data to arrive. By showing this button while still in the loading state, we unblock the merchant.

No Such Thing as Too Fast

The deep dive helped our team develop best practices that we are able to apply to our work going forward. It also helped us refine a performance mindset that encourages exploration. As we develop new features, we can apply what we’ve learned while always trying to improve on these techniques. Our focus on performance has spread to other disciplines like design and research. We are able to work together to build up a clearer picture of the merchants intent so we can optimize for this flow.

Resources

Many of the techniques described by this article are powered by open source JavaScript libraries that we’ve developed here at Shopify.

The full collection of libraries can be found in our Quilt repo. Here you will find a large selection of packages that enable everything from preloading, to managing React forms, to using Web Workers with React.


We’re always looking for awesome people of all backgrounds and experiences to join our team. Visit our Engineering career page to find out what we’re working on.

Continue reading

Building Resilient GraphQL APIs Using Idempotency

Building Resilient GraphQL APIs Using Idempotency

A payment service which isn’t resilient could fail to complete a charge or even double-charge buyers. Also, the client calling the API wouldn’t be certain of the outcome in the case of errors returned from the request reducing trust in the payment methods provided by that service. Shopify’s new Payment Service, which centralizes payment processing for certain payment methods, uses API idempotency to prevent these situations from happening in the first place.

Shopify's New Payment Service

The new Payment Service is owned by the Money Infrastructure team which is responsible for the code that moves money, handles and records the interactions with various payment providers. The service provides a GraphQL interface that’s used by Shopify and our Billing system. The Billing system charges the merchants and pays Shopify Partners, based on monthly subscriptions and usage, as well as paying application developers.

The Issues With Non-resilient Payment Services

A payment API should offer an ‘exactly once’ model of resiliency. Payments should not happen twice, and should offer a way for clients to recover in the case of an error. When an API request can’t be re-attempted and an error happens during a payment attempt, the outcome is unknown.

For example, the Payment Service has a ChargeCreate mutation which creates a payment using the buyer’s chosen payment method. If this mutation is called by the client, and that request returns an error or times-out, then without idempotency the client can’t discover what state this new payment is in.

If the error occurred before the payment was completed, and the client doesn’t retry the request, then the merchant would go unpaid. If the error occurred after the Payment was completed, and the client retries the request, which would not be associated with the first attempt, then the buyer would be double charged.

Possible Solutions

The Money Infrastructure team chose API level idempotency to create a resilient system but there are different approaches to dealing with this:

  • Fix manually: Ship maintenance tasks created one by one, to repair the data. This doesn’t scale.
  • Automatic Reconciliation: Write code to detect cases where the payment state is unknown and repair them. This would require ongoing work since introducing new payment methods and providers would require new reconciliation work. And the results of reconciliation would require API clients to react to these corrections as well to keep their data up to date.

What is API Idempotency?

An idempotent API is one where repeated requests with the same parameters will be executed only once, no matter how many times it’s retried. This strategy gives clients the flexibility to retry API requests which may have failed due to connection issues, without causing duplication or conflicts in the API provider’s system.

Creating an Idempotent API

There are some requirements when creating an idempotent API. Please note that if remote service providers APIs are not idempotent, it will be very hard to implement an idempotent API.

Name the Request: Use Idempotency Keys

One of the parameters to every mutation is an idempotency-key, which is used to uniquely identify the request. We use a randomly generated universally unique identifier (UUID), but it could be any unique identifier.

Here is an example of a mutation and input which shows the idempotency key is part of the input. The idempotency key is a ‘first class citizen’ of the API, we’re not using an HTTP header for middleware. This allows us to require the presence of the idempotency key using the same GraphQL parameter validation as the rest of the API, and return any errors in the usual way, rather than returning errors outside the GraphQL mechanism.

Lock the API Call: on the ‘name’ Client + Idempotency Key to Prevent Duplicate Simultaneous Requests

One way a request can fail is due to dropping network connections. If this happens after the API server has received the request and begun processing, the client can retry the request while the first attempt is still processing. To prevent the duplicate simultaneous request, a lock around the API call based on the client and idempotency key will allow the server to reject the request with an HTTP code of 409, meaning that the client may try again shortly.

Track Requests: Store the Incoming Requests, Uniquely Identified By Client + Idempotency Key

The Payment Service needs to keep track of these requests and stores that information in the database. The Payment Service uses a model called IncomingRequest to track information related to each request. Each model instance is uniquely identified by the client and idempotency key.

The existence of the saved IncomingRequest instance can be used to determine if any request is a new request or a retry. If the IncomingRequest model instance is loaded instead of created, then we know that the request is a retry. When the request is started it can also determine if the previous request was completed or not. If the request was previously completed, the previous response can be returned immediately.

Track Progress: The IncomingRequest Record Provides a Place to Track Progress for That Request

The IncomingRequest model includes a column where the progress for a request is stored as it is completed. The Payment Service breaks the progress for a given mutation into named steps, or recovery points. The code in each step (sometimes called recovery points) must be structured in a specific way, otherwise any errors will leave a given request in an unknown state.

Using Steps Explained

Using steps is a strategy for structuring code in a way that isolates the types of side effects a given function has. This isolation allows the progress to be recorded in a stepwise fashion, so that if an error occurs, the current state is known. There are three different kinds of side effects we need to be concerned with in this design:

  • No side effects: This step makes no http calls, or database writes. This is typically a qualifier function, ie. resolving if this handler can process these records in this way.
  • Local side effects: This step only makes writes to the database, and this step will be wrapped in a database transaction so that any errors will cause a rollback.
  • Remote side effects: Calls to service providers, loggers, analytics.

Each step is implemented as a ‘run’ function in a handler class, possibly paired with ‘recover’ version of that function. A step may not need a recover step, for example, if the run step confirms that the handler is the appropriate handler. In the case of a recovery, if the handler made it further than that step, the qualification step would have succeeded in the original request and a recovery function does not need to do anything in the retry request.

How steps are used:

  1. For each step completed in the request, record the successful completion. As the request handler successfully executes each step, the IncomingRequest record is updated to the name of that completed step.
  2. If the request is retrying, but was incomplete, then recover previously completed steps, and continue. If the request is retrying a request that was not completed on a previous attempt, the handler will recover the completed steps and then continue to run the reset of the steps. Every step may have both a ‘run’ and a `recover` function.

The flow through the steps of the initial `run`, versus a subsequent `recover`, after the initial run failed on step 3
The flow through the steps of the initial `run` and subsequent `recover` for the failed step 3

This diagram shows the flow through the steps of the initial `run`, versus a subsequent `recover`, after the initial run failed on step 3.

Here is the handler class implementation for the Sofort payment method. Each recovery_point is configured with a run function, an optional recover function and transactional boolean. The recovery points are configured in the order that they’re executed.

Ruby makes it easy to write an internal Domain Specific Language (DSL), which results in mutation handler implementations which are straightforward and clear. Separating the steps by side-effect does force a certain coding approach, which gives a uniformity to the code.

Drawbacks of API Idempotency

Storing the progress of a request requires extra database writes, this will add overhead to every API call. The stepwise structure of the request handlers forces a specific coding style, which may feel awkward for developers who are new to it. It requires the developer to approach each handler implementation in a particular way, considering which type of side effects each piece of code has, and structuring it up appropriately. Our team quickly learned this new style with a combination of short teaching sessions and example code.

Modifying the implementation of a mutation handler may change, add or remove recovery points. If that happens, the developer must take extra steps to ensure that the implementation can still recover from any already stored recovery points and ensure that any step can be correctly recovered from when the modified handler is deployed. We have a test suite for every handler which exercises every step, as well the different recovery situations the code must handle. This helps us ensure that any modification is correct, and will correctly recover from the different failures.

Remembering the Side Effects is Fundamental

When considering how to implement an idempotent API in your project, start by partitioning the code in a given API implementation into steps by the kind of side effects it has. This will let you see how the parts interact and provide an opportunity to determine how to recover each part. This is the fundamental part of implementing an idempotent API.

There are always going to be trade-offs when adding idempotency to an API, both in performance, as well as ease of implementation and maintenance. We believe that using the recovery point strategy for our mutation handlers has resulted in code that’s clear, well structured and easy to maintain, which is worth the overhead of this approach.


We’re always looking for awesome people of all backgrounds and experiences to join our team. Visit our Engineering career page to find out what we’re working on.

Continue reading

Pagination with Relative Cursors

Pagination with Relative Cursors

When requesting multiple pages of records from a server the simple implementation is to have an incremental page number in the URL. Starting at page one, each subsequent request that’s sent has a page number that’s one greater than the previous. The problem is that incremental page numbers scale poorly—the bigger the page number, the slower the query. The simple solution is relative cursor pagination because it remembers where you were and continues from that point onwards instead.

The Problem

A common activity for third-party applications on Shopify to do is to sync the full catalogue of products. Some shops have more than 100,000 products and these can’t all be loaded in a single request as it would time out. Instead, the application would make multiple requests to Shopify for successive pages of products which look like this:

https:<your-shop-domain>.myshopify.com/admin/products.json?page=25&limit=100

This would generate a SQL query like this:

This query scales poorly because the bigger the offset, the slower the query. In the above example, the query needs to go through 2500 records and then discard the first 2400. Using a test shop with 14 million products, we ran some experiments loading pages of products at various offsets. Taking the average time over five runs at each offset, here are the results:

Offset

Time (ms)

10

6.54

100

7.72

1,000

8.46

10,000

79.82

100,000

2,221.60

Omitted from the table are tests with the 1,000,000th offset and above since they consistently timed out.

Not only do queries take a long time when a large offset is used, but there’s also a limited number of queries that can be run concurrently. If too many requests with large page numbers are made at the same time, they can pile up faster than they can be executed. This leads to unrelated, quick queries timing out while waiting to be run because all of the database connections are in use by these slow, large-offset queries.

It’s particularly problematic on large shops when third-party applications load all records for a particular model, be it products, collects, orders, or anything else. Such usage has ramifications outside of the shop they are being run on. Since multiple shops are run on the same database instances, a moderate volume of large-offset queries cause unrelated queries from shops that happen to share the same database instance to be slower or time out altogether. For the long-term health of our platform we couldn’t allow this situation to continue unchecked.

What is Relative Cursor Pagination?

Relative cursor pagination remembers where you were so that each request after the first continues from where the previous request left off. The downside is that you can no longer jump to a specific page. The easiest way to do this is remembering the id of the last record from the last page you’ve seen and continuing from that record, but it requires the results to be sorted by id. With a last id of 67890 this would looks like:

A good index set up can handle this query and will perform much better than using an offset, in this example, it’s the primary index on id. Using the same test shop, here’s how long it takes to get the same pages of records but this time using the last id:

Offset

Time using offset (ms)

Time using last id (ms)

Percentage improvement

10

6.54

5.32

18.65%

100

7.72

5.78

25.13%

1,000

8.46

5.76

31.91%

10,000

79.82

6.04

92.43%

100,000

2,221.60

5.24

99.76%

With an offset of 100,000 it’s over 400 times faster to use last id! It’s much faster, and it doesn’t matter how many pages you request, the last page takes around the same amount of time as the first.

Sorting and Skipping Records

Sorting by something other than id is possible by remembering the last value of the field being sorted on. For example, if you’re sorting by title, then the last value is the title of the last record in the page. If the sort value is not unique, then if we used it alone we would potentially be skipping records. For example, assume you have the following products:

Sorting by Title
Sorting by Title

Requesting a page size of two sorted by title would return product with ids 3 and 2. To request the next page, just querying by title > “Pants” would skip product 4 and start at product 1.

Sorting by Title - Product Skipped

Whatever the use case of the client that requests these records, it’s likely to have problems if records are sometimes skipped. The solution is to set a secondary sort column on a unique value, like id, and then remembering both the last value and last id. In that case the query for the second page would look like this:

Querying in this way results in getting the expected products on the second page.

Sorting by Title - No Skipped Product

To ensure the query is performant as the number of records increases you’d need a database index set up on title and id. If an appropriate index is not set up then it could be even slower than using a page number.

Using the same test shop as before, here’s how long it takes to get the same pages of records but this time using both last value and last id:

Offset

Time using offset (ms)

Time using last id (ms)

Time using last value (ms)

Percentage improvement over offset

Percentage improvement over last id

10

6.54

5.32

6.64

-1.53%

-24.81%

100

7.72

5.78

6.22

19.43%

-7.61%

1,000

8.46

5.76

6.5

23.17%

-12.85%

10,000

79.82

6.04

9.18

88.50%

-51.99%

100,000

2,221.60

5.24

6

99.73%

-14.50%

Overall, it’s slower than using a last id alone, but still orders of magnitude faster than using an offset when the offset grows large.

Making it Easy for Clients to Use Relative Cursors

The field being sorted on might not be included in the response. For example, in the Shopify API pages of products sorted by total inventory can be requested. We don’t expose total inventory directly on the product, but it can be derived by adding up the inventory_quantity from the nested variants, which are included in the response. Rather than requiring clients do this calculation themselves we make it easy for them by generate URLs that can be used to request the next and previous page, and include them in a Link header in the response. If there’s both a next page and a previous page it looks like this: 

Conversion in Shopify

The problem of large offsets causing queries to be slow was well known within Shopify, as was the solution of using relative cursors. In our internal endpoints, we were making liberal use of them, but rolling relative cursors out to external clients is a much bigger effort. We just added API versioning to our REST API, so it’s reasonable to make such a large change as removing page numbers and switching everything to relative cursors.

As the responsibility for the different endpoints was spread across many different teams there was no clear owner of pagination as a whole. Though the problem wasn’t directly related to my team, Merchandising, our ownership of the products and collects APIs meant we were acutely aware of the problem. They’re two of the largest APIs in terms of both the volume of requests, and the number of records they deal with.

I wanted to fix the problem and no one else was tackling it, so I put together a proposal on how we could fix it across our platform and sent it to my lead and senior engineering leadership. They agreed with my solution and I got the green light to work on it. A couple more engineers joined me and together we put together the patterns all endpoints were to follow, along with the common code they would use, and a guide for how to migrate their endpoints. We made a list of all the endpoints that would need to be converted and pushed it out to the teams who owned them. Soon we had dozens of developers across the company working on it.

As third-party developers must opt in to use relative cursors for now, adoption is currently quite low and we don’t have much in the way of performance measures to share. Early usage of relative pagination on the /admin/products.json endpoint show it to be about 11 times faster on average than comparable requests using a page number. By July 2020 no endpoints will support page numbers on any API version and will need to use relative pagination. We’ll have to wait until then to see the full results of the change.


We’re always looking for awesome people of all backgrounds and experiences to join our team. Visit our Engineering career page to find out what we’re working on.

Continue reading

Componentizing Shopify’s Tax Engine

Componentizing Shopify’s Tax Engine

By Chris Inch and Vignesh Sivasubramanian

Reading Time: 8 minutes

At Shopify, we value building for the long term. This can come in many forms but within Engineering, we want to build things in a way that is easy to understand, modify, and deploy so we are confident to build without introducing bugs or unnecessary complexity. The tax engine that existed in Shopify’s codebase started out simple, but over years of development and incremental additions, it became a challenging part of code to work within. This article details how our Engineering team tackled the problems associated with complex code, and how we built for the long term by moving our tax engine to a componentized architecture within Shopify’s codebase. Oh… and we did all this without anyone noticing.

Tax Calculations: The Wild West

Tax calculations on orders are complex by nature. Many factors go into calculating the final amount charged in taxes on an order like product type, customer location, shipping origin, physical and economic nexus of a business. This complexity created a complicated system within our product where ownership of tax logic was spread far and wide to components that knew too much about how tax calculations worked. It felt like the Wild West of tax code.

Lucky for us, we have a well-defined componentization architecture at Shopify and we leveraged this architecture to implement a new tax component. Essentially, we needed to retain the complexity, but eliminate the complications. Here’s how we did it.

Educate the Team

The first step to making things less complicated was creating a team that would spend time gaining knowledge of the code base around tax. We needed to fully understand which parts of Shopify were influencing tax calculations and how they were being used. And it’s not just code! Taxes are tricky in general. To be able to create a tax component, one must not only understand the code involved, but also understand the tax domain itself. We used an in-house tax Subject Matter Expert (SME) to ensure we continued to support the many complexities of calculating taxes. We also employed different strategies to bring the team’s tax knowledge up to snuff which included weekly trivia question on taxes around the world. This allowed us to learn the domain and have a bit of fun while doing so.

Do you know the difference between zero-rated taxes and no taxes? No? Neither did we but with persistence and a tenacity for learning, the team leveled up with all the intricacies of taxation faced by Shopify merchants. We realized if we wanted to make taxes an independent component in our system, we need to be able to discern what proper tax calculations look like.

Understand Existing Tax Logic

The team figured out where tax logic was used by other systems and how it was consumed. This initial step took the most effort as we used a lot of regular expressions, scripts, and manual processes to find all of the areas that touched taxes. We found that the best way to gain expertise quickly was to work on any known bugs relating to taxes. There was some re-factoring that was beneficial to tackle up front, before componentization, but some of the tax logic was so intertwined with other systems that it would be easier to re-factor once the larger componentization change was in place.

Tax Engine Structure Before Componentization
Taxes Before Componentization

After a full understanding of the tax logic was achieved, the team devised the best strategy to isolate the tax logic into its own component. A component is an efficient way to organize large sections of code that changes together by breaking a large code base into meaningful distinct parts, each with its own defined dependencies. After this, all communication becomes explicit over the component’s architectural boundaries. For example, one of the most complicated aspects of Shopify’s code is order creation. During the creation of an order, the tax engine is invoked by three distinct parts of Shopify Cart -> Checkout -> Order. This change of context brings in more complexity to the system because each area is using taxes in its own selfish way, without consistency. When Checkout changed how it used Taxes, it might have unknowingly broken how Cart was using it.

Creating a Tax Component

Define the Interface

In order to componentize the tax logic, first we had to define a clear interface and entry point into all the tax calls being made in Shopify’s codebase. Everything that requires tax information will pass a set of defined parameters, and expect a specific response when requesting tax rates. The tax request outlines the data it requires in a clear and understandable format. Each of the complex attributes is simply a collection of simple types, this way the tax logic need not worry about the implementation of the caller.

The tax response schema is also composed of simple types that don't make any assumptions about the calling component.

Componentized Tax Engine

This above diagram shows how each component interacts cleanly with the tax engine using well-defined requests and responses, TaxesRequestSchema and TaxesReponseSchema. With the new interface, the flow of execution on tax engine looks much more streamlined and easy to understand.

Executing the Plan

Once we had defined a clean interface to make tax requests, it was time to wrangle all the instances of tax-aware code throughout the entire Shopify codebase. We did this by moving all source files touching tax logic under tax component. If taxes were the Wild West, then we were the Sheriff coming to town. We couldn’t leave any rogue tax code outside of our tax component. Additionally, we wanted to make our changes future-proof so that other developers at Shopify aren’t able to accidentally add new code that reaches past our component boundaries, so we added GitHub bot triggers to notify our team on any commits pushed against source files under tax component, this allowed us to be sure that no additional dependencies were added to the system while it is undergoing change.

Updating our Tax Testing Suites

Every line of code that we moved within the component was tested and cleaned. Existing unit tests were re-checked, and new integrations tests were written. We added end-to-end scenarios for each consumer of the tax component until we were satisfied that it tested the usage of tax logic sufficiently— this was the best way to capture failures that may have been introduced to the system as a whole. The unit tests provided confidence that the individual units of our code produced the same functionality and our integration tests provided confidence that our new component did not alter the macro functionality of the system.

Slowly but surely, we completed work on the tax component. Finally, it was ready, and there was just one thing left to do: start using it.

Releasing

Our code cleanup work was complete, and the only task left was releasing it. We had high confidence in the changes we introduced through componentization of this logic. Even still, we needed to ensure we did not change the behavior of the existing system for the hundreds of thousands of merchants who rely on tax calculations within Shopify while we released it. Up to this point, the code paths into the component were not yet being used in production. For our team, it was paramount that the overall calculation of taxes remained unaffected, so we took a systematic, methodological and measurable approach to releasing.

The Experimental Code Path

The first step to our release was to ensure that our shiny new component was calculating taxes the same way that our existing tax engine was already calculating these same taxes.

We accomplished this by running an “experiment” code path on the new component. When taxes were requested within our code, we allowed our old gnarly code to run, but we simultaneously kicked off the same calculations through the new tax component. Both code paths were being triggered simultaneously and taxes were calculated in both pieces of code concurrently so that we could compare the results. Once we compared the results of old and new code paths, the results from the new component were discarded. Literally, we calculated taxes twice and measured any discrepancies between the two calculations. These result comparisons helped expose some of the more nuanced and intricate portions of code that we needed to modify or test further. Through iterations and minor revisions, we solidified the component and ensured that we didn’t introduce any new problems in the process. This also gave us the opportunity to add additional tests and increase our confidence.

Once there were no discrepancies between old and new, it was time to release the component and start using the new architecture. In order to perform this Indiana Jones-style swap, we rolled out the component to a small number of Shopify shops first, then tested, observed, and monitored. Once we were sure that things were behaving properly, we slowly scaled up the number of shops whose checkouts used the new tax component. Eventually, over the course of a few days, 100% of shops on Shopify were using the new tax component. The tax component is now the only path through the code that is being used to calculate taxes.

Benefits and Impact

Through the efforts of our tax Engineering team, we have added sustainability and extensibility to our tax engine. We did this with no downtime and no merchant impact.

Many junior developers are concerned only with building the required, correct behavior to complete their task. A software engineer needs to ensure that solutions not only deliver the correct behavior, but do it in a way that is easy to understand, modify, and deploy for years to come. Through these componentization efforts, the team organized the code base in a way that is easy for all future developers to work within for years to come.

We constantly receive praise from other developers at Shopify, thanking us for the clean entry point into the Tax Component. Componentization like this reduces the cognitive load and abstract knowledge of the internals of tax calculations in our system.

Interested in learning more about Componentization? Check out cbra.info. It helped us define better interfaces, flow of data and software boundaries.


We’re always looking for awesome people of all backgrounds and experiences to join our team. Visit our Engineering career page to find out what we’re working on.

Continue reading

Deconstructing the Monolith: Designing Software that Maximizes Developer Productivity

Deconstructing the Monolith: Designing Software that Maximizes Developer Productivity

Shopify is one of the largest Ruby on Rails codebases in existence. It has been worked on for over a decade by more than a thousand developers. It encapsulates a lot of diverse functionality from billing merchants, managing 3rd party developer apps, updating products, handling shipping and so on. It was initially built as a monolith, meaning that all of these distinct functionalities were built into the same codebase with no boundaries between them. For many years this architecture worked for us, but eventually, we reached a point where the downsides of the monolith were outweighing the benefits. We had a choice to make about how to proceed.

Microservices surged in popularity in recent years and were touted as the end-all solution to all of the problems arising from monoliths. Yet our own collective experience told us that there is no one size fits all best solution, and microservices would bring their own set of challenges. We chose to evolve Shopify into a modular monolith, meaning that we would keep all of the code in one codebase, but ensure that boundaries were defined and respected between different components.

Each software architecture has its own set of pros and cons, and a different solution will make sense for an app depending on what phase of its growth it is in. Going from monolith to modular monolith was the next logical step for us.

Monolithic Architecture

According to Wikipedia, a monolith is a software system in which functionally distinguishable aspects are all interwoven, rather than containing architecturally separate components. What this meant for Shopify was that the code that handled calculating shipping rates lived alongside the code that handled checkouts, and there was very little stopping them from calling each other. Over time, this resulted in extremely high coupling between the code handling differing business processes.

Advantages of Monolithic Systems

Monolithic architecture is the easiest to implement. If no architecture is enforced, the result will likely be a monolith. This is especially true in Ruby on Rails, which lends itself nicely to building them due to the global availability of all code at an application level. Monolithic architecture can take an application very far since it’s easy to build and allows teams to move very quickly in the beginning to get their product in front of customers earlier. 

Maintaining the entire codebase in one place and deploying your application to a single place has many advantages. You’ll only need to maintain one repository, and be able to easily search and find all functionality in one folder. It also means only having to maintain one test and deployment pipeline, which, depending on the complexity of your application, may avoid a lot of overhead. These pipelines can be expensive to create, customize, and maintain because it takes concerted effort to ensure consistency across them all. Since all of the code is deployed in one application, the data can all live in a single shared database. Whenever a piece of data is needed, it’s a simple database query to retrieve it. 

Since monoliths are deployed to one place, only one set of infrastructure needs to be managed. Most Ruby applications come with a database, a web server, background jobs capabilities, and then perhaps other infrastructure components like Redis, Kafka, Elasticsearch and much more. Every additional set of infrastructure that is added, increases the amount of time you will have to spend with your DevOps hat on rather than your building hat. Additional infrastructure also increases the possible points of failure, decreasing your applications resiliency and security.

One of the most compelling benefits of choosing the monolithic architecture over multiple separate services is that you can call into different components directly, rather than needing to communicate over web service API’s. This means you don’t have to worry about API version management and backward compatibility, as well as potentially laggy calls.

Disadvantages of Monolithic Systems

However, if an application reaches a certain scale or the team building it reaches a certain scale, it will eventually outgrow monolithic architecture. This occurred at Shopify in 2016 and was evident by the constantly increasing challenge of building and testing new features. Specifically, a couple of things served as tripwires for us.

The application was extremely fragile with new code having unexpected repercussions. Making a seemingly innocuous change could trigger a cascade of unrelated test failures. For example, if the code that calculates our shipping rate called into the code that calculates tax rates, then making changes to how we calculate tax rates could affect the outcome of shipping rate calculations, but it might not be obvious why. This was a result of high coupling and a lack of boundaries, which also resulted in tests that were difficult to write, and very slow to run on CI. 

Developing in Shopify required a lot of context to make seemingly simple changes. When new Shopifolk onboarded and got to know the codebase, the amount of information they needed to take in before becoming effective was massive. For example, a new developer who joined the shipping team should only need to understand the implementation of the shipping business logic before they can start building. However, the reality was that they would also need to understand how orders are created, how we process payments, and much more since everything was so intertwined. That’s too much knowledge for an individual to have to hold in their head just to ship their first feature. Complex monolithic applications result in steep learning curves.

All of the issues we experienced were a direct result of a lack of boundaries between distinct functionality in our code. It was clear that we needed to decrease the coupling between different domains, but the question was how

Microservice Architecture

One solution that is very trendy in the industry is microservices. Microservices architecture is an approach to application development in which a large application is built as a suite of smaller services, deployed independently. While microservices would address the problems we experienced, they’d bring another whole suite of problems. 

We’d have to maintain multiple different test & deployment pipelines and take on infrastructural overhead for each service while not always having access to the data we need when we need it. Since each service is deployed independently, communicating between services means crossing the network, which adds latency and decreases reliability with every call. Additionally, large refactors across multiple services can be tedious, requiring changes across all dependent services and coordinating deploys.

Modular Monoliths

We wanted a solution that increased modularity without increasing the number of deployment units, allowing us to get the advantages of both monoliths and microservices without so many of the downsides.

Monolith vs Microservices by Simon Brown

A modular monolith is a system where all of the code powers a single application and there are strictly enforced boundaries between different domains.

Shopify’s Implementation of the Modular Monolith: Componentization

Once it was clear that we had outgrown the monolithic structure, and it was affecting developer productivity and happiness, a survey was sent out to all the developers working in our core system to identify the main pain points. We knew we had a problem, but we wanted to be data-informed when coming up with a solution, to ensure it was designed to actually solve the problem we had, not just the anecdotally reported one.

The results of that survey informed the decision to split up our codebase. In early 2017, a small but mighty team was put together to tackle this. The project was initially named “Break-Core-Up-Into-Multiple-Pieces”, and eventually evolved into “Componentization”.

Code Organization

The first issue they chose to address was code organization. At this time, our code was organized like a typical Rails application: by software concepts (models, views, controllers). The goal was to re-organize it by real-world concepts (like orders, shipping, inventory, and billing), in an attempt to make it easier to locate code, locate people who understand the code, and understand the individual pieces on their own. Each component would be structured as its own mini rails app, with the goal of eventually namespacing them as ruby modules. The hope was that this new organization would highlight areas that were unnecessarily coupled.

Reorganization By Real World Concepts Before And After Snapshots
Reorganization By Real World Concepts - Before And After

Coming up with the initial list of components involved a lot of research and input from stakeholders in each area of the company. We did this by listing every ruby class (around 6000 in total) in a massive spreadsheet and manually labeling which component it belongs in. Even though no code changed in this process, it still touched the entire codebase and was potentially very risky if done incorrectly. We achieved this move in one big bang PR built by automated scripts. Since the changes introduced were just file moves, the failures that might occur would result from our code not knowing where to find object definitions, resulting in runtime errors. Our codebase is well tested, so by running our tests locally and in CI without failures, as well as running through as much functionality as possible locally and on staging, we were able to ensure that nothing was missed. We chose to do it all in one PR so we’d only disrupt all developers as little as possible. An unfortunate downside of this change is that we lost a lot of our Git history in Github when file moves were incorrectly tracked as deletions and creations rather than renames. We can still track the origins using the git `-follow` option which follows history across file moves, however, Github doesn’t understand the move.

Isolating Dependencies

The next step was isolating dependencies, by decoupling business domains from one another. Each component defined a clean dedicated interface with domain boundaries expressed through a public API and took exclusive ownership of its associated data. While the team couldn’t achieve this for the whole Shopify codebase since it required experts from each business domain, they did define patterns and provide tools to complete the task. 

We developed a tool called Wedge in-house, which tracks the progress of each component towards its goal of isolation. It highlights any violations of domain boundaries (when another component is accessed through anything but its publicly defined API), and data coupling across boundaries. To achieve this, we wrote a tool to hook into Ruby tracepoints during CI to get a full call graph. We then sort callers and callees by component, selecting only the calls that are across component boundaries, and sending them to Wedge. Along with these calls, we send along some additional data from code analysis, like ActiveRecord associations and inheritance. Wedge then determines which of those cross-component things (calls, associations, inheritance) are ok, and which are violating. Generally:

  • Cross-component associations are always violating componentization
  • Calls are ok only to things that are explicitly public
  • Inheritance will be similar but isn’t yet fully implemented

Wedge then computes an overall score as well as lists violations per component.

Shopify's Wedge - Tracking the Progress of Each Component Towards its Goal of Isolation
Shopify's Wedge - Tracking the Progress of Each Component Goal

As a next step, we will graph score trends over time, and display meaningful diffs so people can see why and when the score changed.

Enforcing Boundaries

In the long term, we’d like to take this one step further and enforce these boundaries programmatically. This blog post by Dan Manges provides a detailed example of how one app team achieved boundary enforcement. While we are still researching the approach we want to take, the high-level plan is to have each component only load the other components that it has explicitly depended upon. This would result in runtime errors if it tried to access code in a component that it had not declared a dependency on. We could also trigger runtime errors or failing tests when components are accessed through anything other than their public API. 

We’d also like to untangle the domain dependency graph by removing accidental and circular dependencies. Achieving complete isolation is an ongoing task, but it’s one that all developers at Shopify are invested in and we are already seeing some of the expected benefits. As an example, we had a legacy tax engine that was no longer adequate for the needs of our merchants. Before the efforts described in this post, it would have been an almost impossible task to swap out the old system for a new one. However, since we had put so much effort into isolating dependencies, we were able to swap out our tax engine for a completely new tax calculation system.

In conclusion, no architecture is often the best architecture in the early days of a system. This isn’t to say don’t implement good software practices, but don’t spend weeks and months attempting to architect a complex system that you don’t yet know. Martin Fowler’s Design Stamina Hypothesis does a great job of illustrating this idea, by explaining that in the early stages of most applications you can move very quickly with little design. It’s practical to trade off design quality for time to market. Once the speed at which you can add features and functionality begins to slow down, that’s when it’s time to invest in good design. 

The best time to refactor and re-architect is as late as possible, as you are constantly learning more about your system and business domain as you build. Designing a complex system of microservices before you have domain expertise is a risky move that too many software projects fall into. According to Martin Fowler, “almost all the cases where I’ve heard of a system that was built as a microservice system from scratch, it has ended in serious trouble… you shouldn’t start a new project with microservices, even if you’re sure your application will be big enough to make it worthwhile”.

Good software architecture is a constantly evolving task and the correct solution for your app absolutely depends on what scale you’re operating at. Monoliths, modular monoliths, and Service Oriented Architecture fall along an evolutionary scale as your application increases in complexity. Each architecture will be appropriate for a different sized team/app and will be separated by periods of pain and suffering. When you do start experiencing many of the pain points highlighted in this article, that’s when you know you’ve outgrown the current solution and it’s time to move onto the next.

Thank you to Simon Brown for permission to post his Monolith vs Microservices image. For more information on Modular Monolith's please check out Simon's talk from GOTO18.


We're always on the lookout for talent and we’d love to hear from you. Please take a look at our open positions on the Engineering career page.

Continue reading

Unifying Our GraphQL Design Patterns and Best Practices with Tutorials

Unifying Our GraphQL Design Patterns and Best Practices with Tutorials

Read Time: 5 minutes

In 2015, Shopify began a journey to put mobile first. The biggest undertaking was rebuilding our native Shopify Mobile app and improving the tools and technology to accomplish this. We experimented with GraphQL to build the next generation of APIs that power our mobile apps and give our 600,000+ merchants the same seamless experience when using Shopify. There are currently hundreds Shopify developers across teams and offices contributing to our GraphQL APIs including our two public APIs: Admin and Storefront.

Continue reading

Handling Addresses from All Around the World

Handling Addresses from All Around the World

Four months ago, I joined the International Growth team at Shopify. The mission of the INTL team (as we call it) is to help Shopify conquer international markets. Our team builds tools, services and enhances Shopify’s platform to make it scale to different markets where we need to tailor the experience locally to a country: add new shipping patterns, new payment paradigms, and be compliant with local laws.

As a senior web developer, the first problem I tackled was to make sure addresses were formatted correctly for everyone, everywhere. Addresses are core parts of our merchant’s business; crucial when delivering products and dealing with customers. At the same time, they are also a crucial part of a customer's journey. Entering an address in a form seems obvious, but there are essential details that you need to get right when going international. Details that might not seem obvious if you haven't thought about it or never lived abroad.

I’m going to take you through some of the problems the team encountered when dealing with addresses and how we solved some of those problems.

The Problem with Addresses

Definition

Let’s start with a simple definition. At Shopify, we describe an address with the following fields:

  • First name
  • Last name
  • Address line 1
  • Address line 2
  • Zone code
  • Postal code
  • City
  • Country code
  • Phone

Zones are administrative divisions by country (see Wikipedia’s article), they are States in the US, provinces in Canada, etc. Some of these fields may be optional or required depending on the country.

Ordering

When looking at the fields listed above, I’m assuming that for some readers, the order of the fields listed make sense. Well, it’s not the case for most people of the world. For example:

  • In Japan, people start their address by entering their postal code. Postal codes are very precise, so with just seven digits, a whole address can be auto-completed. The last name is first, otherwise, it’s considered rude
  • In France, the postal code comes before the city while in Canada it’s the opposite

As you can imagine, the list goes on and on. All of these details can’t be overlooked for a proper localized experience for customers connecting from everywhere in the world. At the same time, creating one version of the form for every country leads to unnecessary code duplication— something to avoid for the code to scale and remain maintainable.

Wording

Let's talk about wording. What is address1? What is zone? Parts of an address aren’t the same around the world, so how to name the labels of forms when building them? The tough part of these differences, from a developer’s perspective, is that we had variations per country, as well as, variations per locale. For example:

  • Zone can refer to "states", "provinces", "regions" or even "departments" in certain countries (such as Peru) 
  • Postal code can be called "ZIP code" or "postcode" or even "postal code"
  • address2 might refer to "apartment number", "unit number" or "suite"
  • In Japan, when displaying an address, the symbol 〒 is prepended to the postal code so, if a user enters 153-0062, it displays as 〒153-0062

Translations

Translation is the most obvious problem, form labels need translation but so do country and zone names. Canada is written the same way in most languages, it’s カナダ in Japanese or كندا in Arabic. Canada is bilingual, so provinces labels are language specific: British Columbia in English becomes Colombie-Britannique in French, etc.

Our Solution (So Far)

We’re at the beginning of our journey to go international. Solutions we come up with are never finished; we iterate and evolve as we learn more. That being said, here’s what we're doing so far.

A Database for Countries

The one thing we needed was a database storing all the data representing every country. Thankfully, we already built it at the beginning of our Internationalization journey (phew!) and had every country represented with YAML files in a GitHub repository. The database stored every country’s basic information such as country code, name, currency code, and a list of zones, where applicable.

Normalization

The same way we have formats to represent dates, we created formats to describe addresses per country. With our database for countries, we can store these formats for every country.

Form Representation

What is the order we want to show input fields when presenting an address form? We came up with the following format to make it easier for reuse:

  • {fieldName}: Name of the field
  • _: line break

Here’s an example with Canada and Japan:

 Japan
{company}_{lastName}{firstName}_{zip}_{country}_{province}{city}_{address1}_{address2}_{phone}


Form Representation Japan


Canada
{firstName}{lastName}_{company}_{address1}_{address2}_{city}_{country}{province}{zip}_{phone}


Form Representation Canada

Now, with a format for every country, we dynamically reorder the fields of an address form based on the selected country. When the page loads, we already know which country the shop is located and where the user is connecting from, so we can prepopulate the form with the country and show the fields in the right order. If the user changes the country, we also reorder on the fly the form. And since we store the data on provinces, we can also prepopulate the zone dropdown on the fly. 

Display Representation

We’ve used the same representation to show an address as above and the only difference here is that extra characters used to represent an address for different locales are displayed. Here’s another example with Japan and Canada:

Japan
{country}_〒{zip}{province}{city}{address1}{address2}_{company}_{lastName} {firstName}様_{phone}
Canada
{firstName} {lastName}_{company}_{address1} {address2}_{city} {province} {zip}_{country}_{phone}


The thing to note here is that for Japan, we add characters such as 〒 to indicate that what follows is a postal code or we add 様 (“sama”) after the first name which is the formal and respectful form of Miss/Mr/Mrs. And for other countries, we can add commas if necessary and account for spaces.

Labels and Translations

The other problem to resolve was the name of the labels we use to display address data. Remember, the label for postal code can be different in different countries. To solve this, we created a list of keys for certain fields. Our implementation approach is to make changes incrementally instead of taking on the enormous task (it would probably take forever!) of having our address forms work for all countries from the get-go. Based on our most popular countries, we came up with specific label keys that we translate in our front end.

So, as in our previous example, zones are Provinces in Canada and in Japan they’re Prefectures. So in our YAML file for Canada, we’ve added zone_key: province and in Japan’s we’ve added zone_key: prefecture. We translate these keys in our front end. We’ve applied this same logic to other countries and fields when needed. For example, we have zip_key: postcode for certain countries and zip_key: pincode for others. We include default values for all our label keys since we don’t have a value for all countries yet.

Screenshot of the checkout in Japanese and English


Translations

As mentioned earlier, country names and province names need translation so we store them per language for most of them. We translate country names in all of our supported locales, but we only translate zones when necessary and based on the usage and the locale. So, for example, Canada has translations for French and English for now. So by default, the provinces will be rendered in English unless your locale is fr. We’ll evolve our translations over time.

API endpoint

Shopify is an ecosystem where many apps live. To ensure our data is up to date everywhere at the same time we created an API endpoint to access it. This way, our iOS, Android and front-end applications will be in sync when introducing new formats for new countries. No need to update the information everywhere since every app will be using the endpoint. The advantage of this approach is in the future we might realize that some formatting isn't only country related but also locale related, e.g. firstName and lastName are reversed when the locale is Japanese no matter if the address in Japan or Canada. Since the endpoint receives the locale for each request, this problem will be transparent from the client.

Creating Abstraction / Libraries

To make the life of developers easier, we’ve created abstraction libraries. Yes, we want to localize our apps, but we also want to keep our developers happy. And asking them to query a graph endpoint and parse the formats we came up with is… maybe a bit much. So we’ve created abstractions to overcome this:

  • Other non-public components built on top of @shopify/address such as an AddressForm and an Address to add another easy abstraction for developers which displays the address form as easily as doing:

The Future

This is the current state of how we’re solving these problems. There are drawbacks that we’re tackling, such as overcoming the fact that we need to fetch information to render an address. Implementing caching solution to prevent from having to do a network call every time we want to render an address or an address form for instance. But this will evolve as we gain more context, knowledge and we grow our tooling around going international.


Intrigued by Internationalization? Shopify is hiring and we’d love to hear from you. Please take a look at our open positions on the Engineering career page.

Continue reading

Creating Locale-aware Number and Currency Condensing

Creating Locale-aware Number and Currency Condensing

It’s easy to transform a long English number into an abbreviated one. Two thousand turns into 2K, 1,000,000 becomes 1M and 10,000,000,000 is 10B. But when multiple languages are involved, condensing numbers stops being so straightforward.

I discovered that hard truth earlier this year as Shopify went multilingual, allowing our 600,000+ merchants to use Shopify admin in six additional languages (French, German, Japanese, Italian, Brazilian Portuguese, and Spanish). 

My team is responsible for the front-end web development of Shopify Home and Analytics within the admin, which merchants see when they’re logged in. Shopify Home and Analytics are the windows into every merchant's customers and sales. One of the internationalization challenges we faced was condensing numbers worldwide for graphs displaying essential information, including sales, visits and customer data. Without shortening numbers, many merchants would see long numbers taking up too much space on a graph’s axis, throwing off the design of Shopify’s Admin.

Without condense-number

With condense-number

Team member Andy Mockler and I wrapped up most of the project in June, over Shopify’s quarterly Hack Days, which allows Shopifolk to take a two-day break from regular work to hack uninterrupted on a project of their choice. We realized that Hack Days presented the ideal opportunity to deliver this functionality and make it available to other developers in Shopify working on their internationalization goals.

Initially, we looked around to see if there was an existing JavaScript solution that worked for us. (Spoiler alert: there wasn’t.) There’s a built-in JavaScript Intl API for language-sensitive formatting, but a proposal to add number condensing isn’t implemented. We found a couple existing libraries that do a range of international formatting, but they either did more than we needed or were incompatible with our stack.

Ideally, we wanted to be able to take a number, like 3,000, and display an abbreviated version according to the audience’s locale. While 3,000 becomes 3K in English, it’s 3 mil in Portuguese, for example. Another consideration was different counting systems; India uses lakhs (1,00,000) and crores (1,00,00,000) instead of some Western increments like millions.

Through our research ahead of Hack Days, we stumbled across a treasure trove of international formatting data: the Unicode Common Locale Data Repository (CLDR). Unicode describes CLDR as the “largest and most extensive standard repository of locale data available.” It’s used by companies including Apple, Google, IBM, and Microsoft. It contains information about how to format dates, times, timezones, numbers, currencies, places and time periods. Most importantly, for Andy and I, it contained almost all the information we needed about abbreviating numbers. Once we combined that data with currency information from Intl.js, we were able to write a small set of functions to condense both numbers and currencies, according to locale.

Andy has more experience with open source packages than I do and he quickly realized our code would be useful to other developers. Since our solution could help across Shopify and beyond, we decided to open it up for others to use. In July 2018, we released our package, condense-number, on npm. If you have any international number formatting needs, we’d love for you to give it a try. If we’re missing a language or feature you’d like us to support, file an issue in the condense-number repository.
Intrigued? Shopify is hiring and we’d love to hear from you. Please take a look at our open positions on the Engineering career page.

Continue reading

Building a Data Table Component in React

Building a Data Table Component in React

I’m a front-end developer at Shopify, the leading commerce platform for over 600,000 merchants across the globe. I started in web development when the industry used tables for layout (nearly 20 years ago) and have learned my way through different web frameworks and platforms as web technology evolved. I now work on Polaris, Shopify’s design system that contains design guidelines, content guidelines, and a React component library that Shopify developers use to build the main platform and third-party app developers use to create apps on the App store.

When I started learning React its main advantage (especially for the component library of a design system) was obvious because everything in React is a component and intended to be reused. React props make it possible to choose which component attributes and behaviors to expose and which to hard-code. So, the design system can both standardize design while making customization easier.

But when it came to manipulating the DOM in React, I admit I initially felt frustrated because my background was heavy in jQuery. It’s easy to target an element in jQuery using a selector, pull a value from that element using a baked-in method, and then use another method to apply that value. My initial opinion was that React over-engineered DOM manipulation until I understood the bigger picture.

As developers, we tend to read more code than we write and I’ve inherited my fair share of legacy code. I’ve wasted many hours searching through jQuery files for that elusive piece of code that’s creating that darn animation I need to change. jQuery event listeners are often in different files than the files containing the markup of the elements they’re targeting, making it all too easy to hide the source of animations or style changes.

However, a React component controls its behavior, so you can predict exactly what it’s meant to do. There are no surprises because there is no indirection. It’s also easier to tear down event listeners in React, resulting in better performance.

The first component I worked on with the Polaris team was the data table component, and it helped me realize what makes React such a powerful library. React’s component approach made it easy to create a stateful data table component and a stateless functional cell subcomponent. Its built-in lifecycle methods also provided more control over when to re-render the data table's cell heights.

Here are the basic steps we took to build the Polaris data table component in React.

The Challenge

Building a good data table is a common design challenge most of us have had to solve at least once. By nature, a table has an inflexible grid shape with a nearly infinite potential to grow both vertically and horizontally, but it still needs to be flexible to work well on all screen sizes and orientations. The data table needs to fulfill a few requirements at once: it must be responsive, readable, contextual, and accessible.

Must Be Responsive

For a data table to fit all screen sizes and orientations, it needs to accommodate the potential for several columns of data that surpass the horizontal edges of the screen. Typically, responsive designs either stack or collapse elements at narrow widths, but these solutions break the grid structure of a data table, so it requires a different design solution.

Responsive Design Stacking


Responsive Design Collapsing

Must Be Readable

A typical use case for a data table is presenting product data to a merchant who wants to see which of their products earned the most income. The purpose of the data table is to organize the information in a way that makes it easy for the merchant, in Shopify’s case, to compare and analyze— so proper alignment is important. A flexible data table solution can account for long strings of data without creating misalignment or compromising readability.

Must Be Contextual

A good experience for the user is a well-designed data table that provides context around the information, preventing the user from getting confused by seemingly random cell values. This means keeping headings visible at all times so that whichever data a user is seeing, it still has meaning.

Must Be Accessible

Finally, to accommodate users with screen readers a data table needs to have proper semantic markup and attributes.

Building a Data Table

Here’s how to create a stripped down version of the data table we built for Polaris using React (note: This post requires polaris-react. Polaris uses TypeScript, and for this example, I’ve used JavaScript). I’ve left out some features like a totals row, a footer, and sortable columns for the sake of simplicity.

Start With a Basic React Data Table

First, create a basic data table component that receives as props an array of headings and an array of rows. Map over these two arrays to extract cell content then break <Cell /> up into its subcomponent and pass content to it.


Basic Data Table Component

You can see the first problem in the image. With this many columns, the width of the table exceeds the screen width and scrolls the entire document horizontally, which isn’t ideal.

Basic Data Table Component Scrolling

One way to handle a wide table is to collapse the columns and make them expandable, but this solution only works with a limited number of columns. Beyond a certain number, the collapsed width of each column still exceeds the total screen width, especially in portrait orientation. The columns are also awkward to expand and collapse, which is a poor experience for users. To solve this, restrict the width of the table.

Making it Responsive: Add Max-width

Wrap the entire table in a div element with max-width: 100vw and give the table itself width: 100%.


Unfortunately, this doesn’t work properly at very narrow screen widths when the cell content contains long words. The longest word forces the cell width to expand and pushes the table width beyond the screen’s right edge.

Basic Data Table Component - Max Width

Sure, you can solve this with word-break: break-all, but that violates the design requirements to keep the data readable.


Basic Data Table Component - word-break: break-all


So, the next thing to do is force only the table to scroll instead of the entire document.

Making it Responsive and Readable: Create a Scroll Container

Wrap the table in a div element with overflow-x: auto to cause a scrolling behavior for the overflow content.


Scroll all the way right to the last column, and you see the next problem. The data is difficult to understand without the context of the first column, which are the product names in this example.

Basic Data Table Component - Missing First Column Context


With several rows of data to compare, it’s difficult to remember which row corresponds to which product and repeatedly scrolling left and right is a terrible experience for the user. We chose to keep the first column visible at all times by fixing it in place and preventing it from scrolling along with the other columns as a solution.

Adding Context: Create a Fixed First Column

Give each cell in the first column an explicit width, then position them with position: absolute and left: 0. Then add margin-left: 145px to the remaining columns’ cells (the value must be equal to the width of the first column cells).

Add className=”Cell-fixed” to the first cell of each row. The component maps through each row (and not each column) so, for simplicity, we pass a boolean prop called fixed to the cell component. It’s set to true if the current item is first in the array being mapped over. The cell component then adds the class name Cell-fixed to the cell it renders if fixed is true.


Basic Data Table Component - Fixed Column


Using an absolute position on each cell gives us a fixed first column, but creates another problem.

Basic Data Table Component- Fixed Column Issue


Typically, the DOM renders each cell height to match the height of the tallest cell in the same row, but this behavior breaks when the cells are positioned absolutely, so cell heights need to be adjusted manually.

Fixing a Bug: Adjust Cell Heights

Create a state variable called cellHeights.


Set a ref on the table element that calls a function called setTable.


Then write a function called getTallestCellHeights() that targets the table ref and creates an array of all of its <tr> elements, using getElementsByTagName.

Absolute positioning converts the fixed column to a block and breaks the natural behavior of the table, so the cell heights no longer adjust according to the height of the other cells in their row. To fix this, pull the clientHeight value from both the fixed cell and the remaining cells for each row in the array. Write a function that uses Math.max to find the highest number (the tallest height) of each cell in each row and return an array of those values.


Create a function called handleCellHeightResize() that calls getTallestCellHeights() to set the state of heights from the returned array.


The table needs to render first for the DOM to have clientHeight values to fetch, so place the call to handleCellHeightResize() in the componentDidMount() lifecycle method and re-render the component.


When mapping over the headings and rows arrays use the same index to target the correct value in the heights array to retrieve a height value for each <Cell /> and pass it as height prop. Because the heights array contains all heights and there are two separate calls to <Cell /> (one for headings and one for the table body) you need to increment the row index by 1 in renderRow() to skip the value for the headings cells.


We’re close now, and there’s one final bug to solve. The handleCellHeightResize() is called after the component is mounted and is never called again unless the page is refreshed. This means the height values for each cell remain the same even if the window is resized.


Set up an event listener and call the function any time the window is resized, so the cell heights readjust. In this example, I’ve used the event listener component already in Polaris.


Making it Accessible

Two important attributes make a data table accessible. Add a caption that a screen reader will read and a scope tag for each cell. For more details, the a11y project has an article about how to create accessible data tables.


A Responsive, Accessible Data Table Component


And there you have it, a responsive, accessible data table component in React that can be used to compare and analyze a data set. Check out the full version of the Polaris React data table component in the Polaris component library that includes a full set of features like truncation, a totals row, sortable columns, and navigation.

We're always on the lookout for talent and we’d love to hear from you. Visit our Engineering career page to find out about our open positions.

Continue reading

Lost in Translations: Bringing the World to Shopify

Lost in Translations: Bringing the World to Shopify

At Shopify, the leading multi-channel commerce platform that powers over 600,000 businesses in approximately 175 countries, we aim at making commerce better for everyone, everywhere. Since Shopify’s early days, it’s been possible to provide customers with a localized translated experience, but merchants had to understand English to use the platform. Fortunately, things have started to change. For the past few months, my team and I focused on international expansion bringing new shipping patterns, new payment paradigms, compliance with local laws and much more to explore. However, the biggest challenge is preparing the platform for our translation efforts.


I speak French. Growing up, I learned that things have genders. A pencil is masculine, but a feather is feminine. A wall is a he, but a chair is a she. Even countries have genders, too — le Canada, but la France. It’s a construct of the language native speakers learned to deal with. It’s so natural, one can usually guess the gender of unknown or new things without even knowing what they are.

Did you know that in English, zero dictates the plural form? We’d say zero cars, car being plural. But in French, zero is always singular, as in, zéro voiture. Singular, no s. Why? I don’t know but each language has their quirks. Sometimes it might be obvious, like genders, or more subtle like a special pluralization rule.

Shopify employs hundreds of developers working on millions of lines of code. For the past twelve years, we collectively hardcoded thousands and thousands of English strings scattered across all our products oblivious to our future international growth. It would be great if we could simply replace words from one language with another, but unfortunately, differences like gender and pluralizations force us to rethink established patterns.

We had to educate ourselves, build new tools, and refactor entire parts of our codebase. We made mistakes, tried different things, and failed many times. But now, six months after we started, Shopify is available in a variety of languages. What you’ll find below is a small collection of thoughts and patterns that have helped us succeed.

Stop the Bleeding

The first step, like with any significant refactoring effort, is to stop the bleeding. At Shopify, we deploy hundreds of hardcoded English words daily. If we were to translate everything that exists today, we’d have to do it again tomorrow and again the day after because we’re always deploying new hardcoded words. As brilliantly explained by my colleague Simon Hørup Eskildsen, it’s unrealistic to think you can align everyone with an email or to fix everything with a single pull request.

Fortunately, Shopify relies on automated tooling (cops, linters, and tests) to communicate best practices and correct violations. It’s the perfect medium to tell developers about new patterns and guide them with contextual insights as they learn about new practices. We built cops and linters to detect a variety of violations:

  • Hardcoded strings in HTML files
  • Hardcoded strings in specific method arguments
  • Hardcoded date and time formats

How we built the cops and linters could be a post on its own, but the concept is what matters here: we knew a pattern to avoid, so we built tools to inform and correct. These tools gave developers a strong feedback loop, prevented the addition of new violations, and gave an estimate of the size of the task we had in front of us.

Automate the Mundane

Shopify has, relatively speaking, quite a big codebase. Due to our cops and linters, we build all new features with translation in mind. However, all the hard-coded content that existed before our intervention still had to be extracted and moved to dictionaries. So we did what any engineer would do; we built tools.

Linters made identifying violations easy. We ran them against every single file of our application and found a significant number of items in need of translation. After identification, we opted for the simplest approach; create a file named after the current module, move the actual content in there, and reference it through a key created from a combination of file path and the content itself. Slowly but surely, all the content was moved to dictionaries. The results weren’t perfect. There was duplicated content and the reference names weren’t always intuitive, but despite this, we extracted most of the basic and mundane stuff, like static content and documentation. What was left were edge cases like complex interpolations — I like to call them, fun challenges.

Pseudolocalization to the Rescue

Identifying the extracted content from everything else immediately became a challenging issue. Yes, some sentences were now in dictionaries, but the product looked exactly the same as before. We needed to distinguish between hardcoded and extracted content, all while keeping the product in a usable state so that translators, content writers, and product managers could stay informed about our progress. Enter pseudolocalization.

Pseudolocalization (or pseudo-localization, or pseudo-translation) is a software testing method used for examining internationalization aspects of software. Instead of translating the text of the software into a foreign language, as in the process of localization, an altered version of the original language replaces the textual elements of an application.

We created a new backend built on top of Rails I18n, the default Rails framework for internationalization, that hijacked all translation calls and swapped resulting characters with an altered yet similar alternative: a became α, b became ḅ, and so on.

Word lengths differ from one language to another. On average, German words are 30% longer and has the potential to seriously mess up a UI built without this knowledge. In French, a simple word like “Save” translates to “Sauvegarder”, which is almost 200% longer. Our pseudotranslation module intercepted all translation calls, so we took the opportunity to double all vowels in an attempt to mimic languages with longer words. The end result was a remarkable achievement in readability. We easily distinguished between content and performed visual testing on the UI against longer words.

Pseudotranslation in Action on Shopify
ASCII is Dead, Long Live UTF8

Character sets also prove to be a fun challenge. Shopify runs on MySQL. Unfortunately, MySQL’s default utf8 isn’t really UTF-8. It only stores up to three bytes per code point, which means no support for hentaigana, emoji, and other characters outside of the Basic Multilingual Plane. This means that unless explicitly told otherwise, most of our tables didn’t support emoticons characters, and thus needed migration.

On the application side, Rails isn’t perfect neither. Popular methods such as parameterize and ordinalize don’t come with international support built-in.

Identifying and fixing all of these broken behaviors wasn’t an easy task, and we’re still finding occurrences here and there. There is no secret sauce or real generic approach. Some bugs were fixed right away, others were simply deprecated, and some were only rolled out to new customers.

If anything, one trick to try is to introduce UTF8 characters in your fixtures and other data seeds. The more exposed you are to other character sets, the more likely you are to stumble on broken behavior.

Translation Platform

Preparing content for translation is one thing, but getting it actually translated is another. Now that everything was in dictionaries, we had to find a way for developers and product managers to request new translations and to talk to translators in a lean, simple, and automated way.

Managing translations isn’t part of our core expertise and other companies do this more elegantly than we ever could. Translators and other linguists rely on specialized tools that empower them with glossaries, memories, automated suggestions, and so on.

So, on one side of this equation, we have Github and our developers, and on the other are translators and their translation management system. Could GitHub’s API, coupled with our translation management system API help bridge the gap between developers and translators? We bet that it could.

Leveraging APIs from both sides, we built an internal tool called “Translation Platform”. It’s a simple and efficient way for developers and translators to collaborate in a streamlined and automated manner. The concept is quite simple; each repository defines their configuration file that indicates where to find the language files, what’s the source language, and what are the targeted languages. A basic example would look as follows:

Once the configuration file in place, the Translation Platform starts listening to Github’s webhooks and automatically detects if a change impacts one of the repository’s language file. If it does, it uses the translation management system API to issue a new translation request, one per targeted language. From a translator standpoint, the tool works similarly. It listens to the translation management system webhooks, detects when translations are ready and approved, then automatically creates a new commit or a new pull request with the newly translated content.

Shopify's Translation Platform

Translation Platform made gathering translations a seamless process, similar to running tests on our continuous integration environment. It gives us visibility of the entire flow while allowing us to gather logs, metrics, and data we can later use to provide SLAs and guarantees on translation requests. The simplicity of the Translation Platform was key to successfully introducing our new translation processes across the company.

Future Challenges

Localization challenges don’t stop with words. Every single UX element needs examination through an international lens. For example, shipping and payment are two concepts that vary significantly from one market to another. The iconography that accompanies them must acknowledge these differences and cultural gaps that may exist. A mailbox doesn’t look the same in Japan as it does in France. A credit card isn’t used as much in India as it is in North America.

Maps and geography represent another intriguing challenge. Centering a world map over Japan instead of the UK can go a long way with our Japanese merchants. The team needs to take special care of regions like Taiwan and Macau, which can lead to important conflicts if not labeled correctly, especially when what is considered “correct” changes depending on whom we ask.

Number formatting, addresses, and phone numbers are all things that change from one region or language to another. If something requires formatting for display purposes, the format will change with the country or the language.

We’re only at the beginning of our journey. The internationalization and globalization of a platform isn’t a small task but an ongoing effort. The same way our security experts never sleep, we expect to always be around, informing our peers about language specificities, market subtleties, and local requirements.


My name is Christian and I lead the engineering team responsible for internationalization and localization at Shopify. If these types of challenges are appealing to you, feel free to reach out to me on twitter or through our career page.

Continue reading

Shaping the Future of Payments in the Browser

Shaping the Future of Payments in the Browser

Part 1: Setting up Our Experiment with the Payment Request API

By Anna Gyergyai and Krystian Czesak

At Shopify, the leading multi-channel commerce platform that powers over 600,000 businesses in approximately 175 countries, we aim at making commerce better for everyone. This sometimes means investing in new technologies and giving back what we learned to the community, especially if it’s a technology we think will drastically change the status quo. To that end, we joined the World Wide Web Consortium's (W3C) Web Payments Working Group in 2016 to take part in shaping the future of native browser payments. Since then, we’ve engaged in opinionated discussions and participated in a few hack-a-thons (Interledger Payment App as an example) as a result of this collaborative and innovative working environment.

The W3C aims to develop protocols and guidelines that ensure the long-term growth of the Web. The Web Payments Working Group’s goal is to make payments easier and more secure on the Web. The first specification they introduced was Payment Request: a javascript API that replaces traditional checkout forms and vastly simplifies the checkout experience for users. The first iteration of this specification was recently finalized and integrated into a few browsers, most notably Chrome.

Despite being in Candidate Recommendation, Payment Request’s adoption by platforms and developers alike is still in the early stages. We found this to be a perfect opportunity to test it out and explore this new technology. The benefits of such an initiative are threefold. We gather data that helps the W3C and browser vendors grow this technology, continue to contribute to the working group, and encourage participation through further experimentation.

Defining the Project

To present detailed findings to the community, we first needed a properly formulated hypothesis. We wanted to have at least one qualitative and one quantitative success metric, and we came up with the following:

We believe that Payment Request is market ready for all users of our platform (of currently supported browsers). We’ll know this to be true when we see that the checkout completion rate for select merchants remains unchanged or gets better, and the purchase experience is better and faster.

This was our main driving success metric. We define checkout completion rate (CCR) as the number of people that completed a purchase vs the total number of people that demonstrated an intent to purchase. An intent to purchase is indicated by buyers who clicked the “checkout” button on the cart page. In addition, we monitored time to completion of the purchase and drop-off rates.

For our qualitative metric, we spent time comparing Payment Request’s checkout experience with Shopify’s existing purchase experience. This metric was mostly driven by user experience research and was less of a data-driven comparison. We’ll cover this in a follow-up post.

We set off to launch an A/B experiment with a group of select merchants that showed interest in the potential this technology had to offer. We built this experiment outside of our core platform because a few key benefits allowed us to:

  • Iterate fast and in isolation
  • Leverage our own platform’s existing APIs
  • Release the app to our app marketplace for everyone to use, if valuable

Payment Request API Terminology

The Payment Request API has interesting value propositions: it surfaces more than one payment method, it’s agnostic of the payment method used, and it can indicate back upstream if the buyer is able to proceed with a purchase or not. This last feature is referenced as the canMakePayment() method call, which returns a boolean value indicating that the browser supports any of the desired payment methods indicated by the merchant.

Most browsers that implement Payment Request allow processing credit card payments through it (this payment method is referenced as basic-card in the specification). At the time of writing, basic-card was the only payment method widely implemented in browsers, and as a result, we ran our experiment with credit card transactions in mind only.

In the case of basic-card, canMakePayment() would return true if the end user already had a credit card provisioned. As an example on Chrome, the method returning true would mean that the user had already a credit card on file in their browser either through one of Chrome’s services, autofill or from having already gone once through the Payment Request experience.

Payment Request demo on Chrome Android

Finally, the UI presented to the buyer during their purchase journey through Payment Request is called the payment sheet. Its implementation depends on the browser vendor, which means that the experience might differ from one browser to another. As seen in the demo above, it usually contains the buyer’s contact information, shipping address and payment method. Once the shipping address is selected, the buyer is allowed to select their shipping method (if applicable).

Defining our A/B Experiment

Our A/B experiment ran on select merchants and tested buyer behaviour. The conditions of the experiment are as follows:

Merchant Qualification

Merchant Qualification

Since most Payment Request implementations in browsers only support the basic-card payment method, we were limited to merchants who accept direct credit card payments as their primary method of payment. With this limitation, one of the primary merchant qualifications was the use of a credit card based payment processor.

Audience Eligibility

Our experiment audience is buyers. A buyer is eligible to be part of the experiment if their browser supports Payment Request. At the time of writing, Payment Request is available with the latest Chrome (on all devices), Microsoft Edge on desktop and Samsung Browser (available on Samsung mobile devices). We were only able to gather experiment data on Chrome. We experienced minimal browser traffic through Samsung Browser, and Microsoft Edge's Payment Request implementation only supports North American credit cards.

Experiment Segmentation

From the qualified buyers, when they clicked the “checkout” button on the cart page, 50% of them are placed in a control group and the other 50% in an experiment group. The control group are buyers that won’t see the payment sheet and continue through our regular checkout. The buyers that go through the Payment Request purchase experience and see the payment sheet are the experiment group.

Payment Request Platform Integration

In order to build our experiment in an isolated manner, we leveraged our current app ecosystem. The experiment ran in a simple ruby app that uses our existing rails engine for Shopify Apps. We used our existing infrastructure to quickly deploy to Google Cloud (more on our move to the cloud here). In conjunction with our existing ShipIt deployment tool, we were able to setup a pipeline in a matter of minutes, making deployment a breeze.

After setting up our continuous delivery, we then shifted our focus towards the app lifecycle, which can be better explained in 2 phases: merchant facing app installation and the buyer’s storefront experience.

App Installation

The installation process is pretty straightforward: once the merchant gives permission to run the experiment on their storefront, we then install our app in their backend. Upon installation, our app injects a script tag on the merchant’s storefront. This javascript file contains our experiment logic and would run for every buyer visiting that merchant’s shop.

Storefront Experience

The buyer’s storefront experience is split into two processes: binding the experiment logic and surfacing the right purchase experience.

Storefront Experience - Binding the Experiment LogicBinding the experiment logic

Every time a buyer visits the cart page, our front-end logic first determines if the user is eligible for our experiment. If so, the javascript code pings our app backend, which in turn gathers the shop’s information through our REST Admin API. This ping determines if the shop still has a credit card based processor and if the merchant supports discount codes or gift cards. This information determines the shop’s eligibility for the experiment and displays the proper alternative flow if gift cards or discount codes are accepted. When both the buyer and the merchant are eligible for the experiment, we override the “checkout” button on the cart page. We usually discourage this practice, as it can cause the checkout experience to be adversely affected. For our purposes, we allowed it for the duration of the experiment only.

Surfacing the Purchase ExperienceSurfacing the purchase experience

Upon clicking the Checkout button, buyers in our control group would get redirected to Shopify’s existing web checkout. Buyers in our experiment group would enter the Payment Request experimental flow via the Payment sheet, and the javascript would interact with Shopify’s Checkout API to complete a payment.

Alternative Payment Flows

Since the majority of merchants on the Shopify platform accept discount codes and gift cards as part of their purchase flow, it was important to not negatively impact the merchants’ business during this experiment due to the Payment Request API not supporting discount code entry.

Shopify only supports this feature on the regular checkout flow, and implementing this feature on the cart page prior to checkout would involve a non-trivial effort. Therefore, we needed to provide an ability for buyers to opt out of the experiment if they wanted to provide a discount code. We included a link under the checkout button that read: “Discount or gift card?”. Clicking this link would redirect the buyer to our normal checkout flow, where they could use those items, and they would never see the payment sheet.

Finally, if the buyer cancelled the payment sheet purchase flow or an exception occurred, we’d show a link under the checkout button that reads: “Continue with regular checkout”.

What’s Next

The Payment Request API can provide a better purchase experience by eliminating checkout forms. Shopify is extremely interested in this technology and ran an experiment to see if Payment Request was market ready. Now that we've talked about how the experiment was set up, we’re excited to share experiment data points and lessons in the second part of Shaping the Future of Payments in the Browser. It will include breakdowns in time to completion times, user flow learnings in buyer interactions and Payment Request’s overall effect on the purchase experience (both quantitative and qualitative).

Part 2: The Results of Our Experiment with Payment Request API

In Part 1, we dove into how we ran an experiment in order to test the readiness of Payment Request. The goal was to invest in this new technology and share what we learned back to the W3C and browser vendors, in order to improve web payments as a whole. Regardless of the conclusion of the experiment on our platform, we continue to invest in the current and future web payments specifications.

As a reminder, our hypothesis was as follows:

We believe that Payment Request is market ready for all users on our platform (of currently supported browsers). We’ll know this to be true when we see that the checkout completion rate for select merchants remains unchanged or gets better, and the purchase experience is better and faster.

We define checkout completion rate (CCR) as the number of people that completed a purchase vs the total number of people that demonstrated an intent to purchase. An intent to purchase is indicated by buyers who clicked the “checkout” button on the cart page.

In this post, we investigate and analyze the data gathered during the experiment, including checkout completion rates, checkout completion times, and drop-off rates. This data provides insight on future Payment Request features, UX guidelines, and buyer behaviour.

Data Insights

We ran our experiment for over 2 months with 30 merchants participating. At its peak, there were around 15,000 payment sheet opens per week. The sample size allowed us to have high confidence in our data and our standard error is ±1%.

Time to Completion

Time to Completion

Form Factor

canMakePayment()

10th percentile Median time 90th percentile
Desktop true 0:54 2:16 6:23
Desktop false 1:33 3:13 7:57
Mobile true 0:56 2:35 6:29
Mobile false 1:35 3:22 8:08

Time to completion by device form factor

The time to completion is defined as the time between when the buyer clicks the “checkout” button until their purchase is completed (i.e. they’re on the order status page). The value of canMakePayment() determines if the buyer has a credit card provisioned or not. As an example on Chrome, the method returning true would mean that the buyer had already a credit card on file in their browser; either through one of Chrome’s services, autofill, or from having already gone once through the Payment Request experience.

The median time for buyers with canMakePayment() = false is 3:17 whereas the median time for buyers with canMakePayment() = true is 2:25. This is promising, as both medians are faster than our standard checkout. We can also take a look at the 10th percentile with canMakePayment() = true and see that the checkout completion times are under a minute.

Checkout Completion Rates

As mentioned previously, we define checkout completion rate (CCR) as the number of people that completed a purchase vs the total number of people that demonstrated an intent to purchase. Comparing the control group to the experiment group, we saw a average 7% drop of CCR (with a standard error of ±1%), regardless of canMakePayment().

It is important to put this 7% into perspective. The Payment Request API is still in its infancy: the purchase experience it’s leveraging (through the payment sheet) is something buyers are still getting accustomed to. A CCR drop in the context of our experiment is to be expected, as buyers on our platform are familiar with a very specific and tailored process.

Our experiment did not adversely affect the merchants overall CCR, being that it only ran on a very small subset of buyer traffic. Looking at all eligible merchants, the experiment represented roughly 5% of their traffic, as seen in the following graph:

Overall experiment traffic relative to normal site traffic

We started by slowly ramping up the experiment to select eligible merchants. This explains the low traffic percentage at the beginning of the graph above.

User Flow Analysis

The graph below documents the buyer’s journey through the payment sheet by listing all possible events, in the order they occurred during the purchase session. An event is a user interaction like the user clicking the checkout button or selecting a shipping method. All the possible events can be seen on the right side of the graph below. Not shown on the graph, is that 10% of buyers prefer clicking the provided “Discount or gift card?” link rather than on the “checkout” button, before entering into the experiment.

The ideal user flow for the experiment is:

  1. The buyer clicks the “checkout” button
  2. The payment sheet opens
  3. The buyer selects a shipping address
  4. The buyer selects a shipping method
  5. The buyer clicks “pay”
  6. The payment is successful

The number at the top of the bars indicate the percentage of events that occurred at that step relative to step 1. For example, by step 6, a total of 43% of events were emitted compared to step 1.

Payment sheet event breakdown by order of occurrence

Here are some ways the user flows break down:

  • [Step #1 to Step #2] Not all buyers who click the button will see the payment sheet. This is due to the various conflicting Javascript on the merchant’s storefront, leading to exceptions
  • [Step #3] Upon seeing the payment sheet, 60% of buyers will drop out without interacting with their shipping contact information or provided shipping methods
  • [Step #4] Once they exited the sheet, 35% of buyers prefer clicking on one of the other links provided. 84% of these will click the “Discount or gift card?” link while the rest will click on the “Continue with regular checkout” link. A small percentage of buyers will retry the payment sheet.
  • [Step #5] 32% of buyers will initiate a payment in the payment sheet by clicking the “Pay” call to action
  • [Step #6] At this point, 28% of buyers are able to complete their checkout. The rest will have to retry a payment because of a processing error such as an invalid credit card, insufficient funds, etc...

Of the buyers that don’t go to through the payment sheet, only 30% of them will retry one or two times to go through Payment Request again and 7% of buyers will retry two or more times.

Furthermore, we don't know why 60% of buyers drop out of the payment sheet, as the Payment Request API doesn’t provide event listeners on all sheet interactions. However, we think that the payment sheet being fairly foreign to buyers might be part of the cause. This 60% drop out rate certainly accounts for the 7% CCR drop we mentioned earlier. This is not to say that the purchase experience is subpar; rather, that it will take time for buyers to get accustomed to. As this new specification gains traction and adoption broadens, we think that the number of buyers that drop out will significantly decrease. Our merchant feedback seems to support our hypothesis:

“I found the pop-up really surprising and confusing because it doesn't go with the rest of our website.”

“[...] it comes up when you are still on the cart page even though you expect to be taken to checkout. It's just not what you are used to seeing as a standard checkout process [...]”

“My initial thoughts on it is that the UI/UX is harshly different than the rest of our site and shopify [...]”

Merchants were definitively apprehensive of Payment Request, but were quite excited by the prospect of a streamlined purchase experience that could leverage the buyers information securely stored in the browser. This is best reflected in the nuanced feedback we received after our experiment ended:

"I just wanted to check in and see if there was any update with this. We’d really love to try out the new checkout again."

“[...] I love the test, it’s just a pretty drastic change from what online shoppers are used to in terms of checkout process.”

Finally, to better understand merchant feedback, we performed user experience research on the different payment sheet UIs implemented by browser vendors. We’ll share specific research insights with the concerned browser vendors, but the lessons listed below can be applied to all payment sheets and are recurring throughout implementations.

We found that in order to create more familiarity with the buyer as they navigate from the storefront to the payment sheet, it’s useful to surface the merchant’s name or logo as part of it. Furthermore, it’s important to keep “call to actions” with negative connotations (i.e. cancel or abort) in the same area in every payment sheet screen. This helps to set the proper expectations for the buyer. An example is having the “Pay” call to action in the bottom right of the very first screen, then having a “Cancel” call to action in the bottom right of the next screen.

As for the user experience, it’s preferred not to surface grayed out fields unless they are preselected. An example is surfacing a grayed out shipping address to the buyer on the very first screen of the payment sheet, without it being preselected. The buyer might think that they don’t have to select a shipping address as it’s already presented to them. This leads to confusion for the buyer and relates well to merchant feedback we’ve received:

“When this pops up, it's really unclear how to proceed so much so that it was jarring to see "Pay" as the CTA button [...]”

Finally, to prevent unnecessary back and forth between screens, surface validation errors as soon as possible in the flow (ideally in the form, near the fields).

Experiment Conclusion

Reiterating our initial hypothesis:

We believe that Payment Request is market ready for all users on our platform (of currently supported browsers). We will know this to be true when we see that the checkout completion rate for select merchants remains unchanged or gets better, and the purchase experience is better and faster.

Event though merchants were interested in the prospect of Payment Request, we don’t believe that Payment Request is a good fit for them yet. We pride ourselves on offering a highly optimized checkout across all browsers. We constantly tweak it by running extensive UX research, testing it against multiple devices, and regularly offering new features and interesting value propositions for merchants and buyers alike. These include Google Autocomplete for Shopify, Shopify Pay or Dynamic Checkout, which allow us to streamline the purchase experience.

As buyer recognition of the feature grows and browsers tweak their UI to improve the payment sheet, we believe that the aforementioned 7% Checkout Conversion Rate drop and the 60% drop of buyers at the payment sheet will greatly diminish. Paired with the very promising time to completion medians, we are excited to see how the specification will grow in the upcoming months.

What’s next

Payment Request has a bright future ahead of it as both the W3C and browser vendors show interest in pushing this technology forward. The next major milestone for Payment Request is to accept third party payment methods through the new Payment Handler API, which will definitely help adoption of this technology. It was, up until recently, only available behind a feature flag in Chrome but Google has officially rolled it out as part of v68. We’ve already started experimenting with this next specification and are quite excited by its possibilities. You can find several demos we recorded for the W3C here: Shopify Web Payments Demos. We chose Affirm and iDeal as payment methods for the exploration, and the results are promising.

Shopify’s excited to be part the Web Payments Working Group and thrilled to hear your comments. We invite you to explore the specification by implementing it on your own website. Then join the discussion over at the Web Payments Slack group or over at W3C’s wiki page, where you’ll find resources to comment, discuss and help us in developing this new standard.

We do believe Payment Request has great potential and will shift the status quo in web payments. We’re excited to see the upcoming changes to Payment Request. Shopify is very keen on the technology and remains active in W3C discussions regarding web payments.


Continue reading

Solving the N+1 Problem for GraphQL through Batching

Solving the N+1 Problem for GraphQL through Batching

Authors: Leanne Shapton, Dylan Thacker-Smith, & Scott Walkinshaw

When Shopify merchants build their businesses on our platform, they trust that we’ll provide them with a seamless experience. A huge part of that is creating scalable back-end solutions that allow us to manage the millions of requests reaching our servers each day.

When a storefront app makes a request to our servers, they’re interacting with the Storefront API. Historically, REST is the language of choice when designing APIs, but Shopify uses GraphQL.

GraphQL is an increasingly popular query language in the developer community, because it avoids the classic over-fetching problem associated with REST. In REST, the endpoint determines the type and amount of data returned. GraphQL, however, permits highly specific client-side queries that return only the data requested.

Over-fetching occurs when the server returns more data than needed. REST is especially prone to it, due to its endpoint design. Conversely, if a particular endpoint does not yield enough information (under-fetching), clients need to make additional queries to reach nested data. Both over-fetching and under-fetching waste valuable computing power and bandwidth.

In this REST example, the client requests all ‘authors’, and receives a response, including fields for name, id, number of publications, and country. The client may not have originally wanted all that information; the server has over-fetched the data.

REST Query and Response

Conversely, in this GraphQL version, the client makes a query specifically for all authors’ names, and receives that only that information in the response.

GraphQL Query

GraphQL Response

GraphQL queries are made to a single endpoint, as opposed to multiple endpoints in REST. Because of this, clients need to know how to structure their requests to reach the data, rather than simply targeting endpoints. GraphQL back-end developers share this information by creating schemas. Schemas are like maps; they describe all the data and their relationships within a server.

A schema for the above example might look as follows.

The schema defines the type ‘author’, for which two fields of information are available; name and id. The schema indicates that for each author, there’s a non-nullable string value for the ‘name’ field, and a unique, non-nullable identifier for the ‘id’ field. For more information, visit the schema section on the official GraphQL website.

How does GraphQL return data to those fields? It uses resolvers. A resolver is a field-specific function that hunts for the requested data in the server. The server processes the query and the resolvers return data for each field, until it has fetched all the data in the query. Data is returned in the same format and order as the query, in a JSON file.

GraphQL’s major benefits are its straightforwardness and ease of use. Its solved our biggest problems by reducing the bandwidth used and latency while retrieving data for our apps.

As great as GraphQL is, it’s prone to encountering an issue, known as the n+1 problem. The n+1 problem arises because GraphQL executes a separate resolver function for every field, whereas REST has one resolver per endpoint. These additional resolvers mean that GraphQL runs the risk of making additional round trips to the database than are necessary for requests.

The n+1 problem means that the server executes multiple unnecessary round trips to datastores for nested data. In the above case, the server makes 1 round trip to a datastore to fetch the authors, then makes N round trips to a datastore to fetch the address for N authors. For example, if there were fifty authors, then it would make fifty-one round trips for all the data. It should be able to fetch all the addresses together in a single round trip, so only two round trips to datastores in total, regardless of the number of authors. The computing expenditure of these extra round trips are massive when applied to large requests, like asking for fifty different colours of fifty t-shirts.

The n+1 problem is further exacerbated in GraphQL, because neither clients nor servers can predict how expensive a request is until after it’s executed. In REST, costs are predictable because there’s one trip per endpoint requested. In GraphQL, there’s only one endpoint, and it’s not indicative of the potential size of incoming requests. At Shopify, where thousands of merchants interact with the Storefront API each day, we needed a solution that allowed us to minimize the cost of each request.

Facebook previously introduced a solution to the N+1 issue by creating DataLoader, a library that batches requests specifically for JavaScript. Dylan Thacker-Smith, a developer at Shopify, used DataLoader as inspiration and built the GraphQL Batch Ruby library specifically for the GraphQL Ruby library. This library reduces the overall number of datastore queries required when fulfilling requests with the GraphQL Ruby library. Instead of the server expecting each field resolver to return a value, the library allows the resolver to request data and return a promise for that data. For GraphQL, a promise represents the eventual, rather than immediate, resolution of a field. Therefore, instead of resolver functions executing immediately, the server waits before returning the data.

GraphQL Batch allows applications to define batch loaders that specify how to group and load similar data. The field resolvers can use one of the loaders to load data, which is grouped with similar loads, and returns a promise for the result. The GraphQL request executes by first trying to resolve all the fields, which may be resolved with promises. GraphQL Batch iterates through the grouped loads, uses their corresponding batch loader to load all the promises together, and replaces the promises with the loaded result. When an object field loads, fields nested on those objects resolve using their field resolvers (which may themselves use batch loaders), and then they’re grouped with similar loads that haven't executed. The benefits for Shopify are huge, as it massively reduces the amount of computing power required to process the same requests.

GraphQL Batch is now considered general best-practice for all GraphQL work at Shopify. We believe great tools should be shared with peers. The GraphQL Batch library is simple, but solves a major complaint within the GraphQL Ruby community. We believe the tool is flexible and has the potential to solve problems beyond just Shopify’s scope. As such, we chose to make GraphQL Batch open-source.

Many Shopify developers are already active individual GraphQL contributors, but Shopify is still constantly exploring ways to interact more meaningfully with the vibrant GraphQL developer community. Sharing the source code for GraphQL Batch is just a first step. As GraphQL adoption increases, we look forward to sharing our learnings and collaborating externally to build tools that improve the GraphQL developing experience.

Learn More About GraphQL at Shopify

Continue reading

Integrating with Amazon: How We Bridged Two Different Commerce Domain Models

Integrating with Amazon: How We Bridged Two Different Commerce Domain Models

Over the past decade, the internet and mobile devices became the dominant computing platforms. In parallel, the family of software architecture styles that support distributed computing are the ways we build systems to tie these platforms together. Styles fall in and out of favor as technologies evolve and as we, the community of software developers, gain experience building ever more deeply connected systems.

If you’re building an app to integrate two or more systems, you’ll need to bridge between two different domain models, communication protocols, and/or messaging styles. This is the situation that our team found itself in as we were building an application to integrate with Amazon’s online marketplace. This post talks about some of our experiences integrating two well-established but very different commerce platforms.

Shopify is a multi-channel commerce platform enabling merchants to sell online, in stores, via social channels (Facebook, Messenger and Pinterest), and on marketplaces like Amazon from within a single app. Our goals for the Amazon channel were to enable merchants to use Shopify to:

  • Publish products from Shopify to Amazon
  • Automatically sync orders that were placed on Amazon back to Shopify
  • Manage synced orders by pushing updates such as fulfillments and refunds back to Amazon

At Shopify, we deal with enormous scale as the number of merchants on our platform grows. In the beginning, to limit the scale that our Amazon app would face, we set several design constraints including:

  • Ensure the data is in sync to enable merchants to meet Amazon’s SLAs
  • Limit the growth of the data our app stores by not saving order data

In theory, the number of orders our app processes is unbounded and increases with usage. By not storing order data, we believed that we could limit the rate of growth of our database, deferring the need to build complex scaling solutions such as database sharding.

That was our plan, but we discovered during implementation that the differences between the Amazon and Shopify systems required our app to do more work and store more data. Here’s how it played out.

Integrating Domain Woes

In an ideal world, where both systems use a similar messaging style (such as REST with webhooks for event notification) the syncing of an order placed on Amazon to the Shopify system might look something like this:

Integrating with Amazon: How we bridged two different commerce domain models

Each system notifies our app, via a webhook, of a sale or fulfillment. Our app transforms the data into the format required by Amazon or Shopify and creates a new resource on that system by using an HTTP POST request.

Reality wasn’t this clean. While Shopify and Amazon have mature APIs, each has a different approach to the design of these APIs. The following chart lists the major differences:

Shopify API
Amazon’s Marketplace Web Server (MWS) API
  • uses representational state transfer (REST)
  • uses remote procedure call (RPC) messaging style
  • synchronous data write requests
  • asynchronous data write requests
  • uses webhooks for event notification
  • uses polling for event discovery, including completion of asynchronous write operations.

To accommodate, the actual sequence of operations our app makes is:

  1. Request new orders from Amazon
  2. Request order items for new orders
  3. Create an order on Shopify
  4. Acknowledge receipt of the order to Amazon
  5. Confirm that the acknowledgement was successfully processed

When the merchant subsequently fulfills the order on Shopify by the merchant, we receive a webhook notification and post the fulfillment to Amazon. The entire flow looks like this:

Integrating with Amazon: How we bridged two different commerce domain models

When our app started to receive an odd error from Amazon when posting fulfilment requests we knew the design wasn’t totally figured out. It turned out that our app received the fulfillment webhook from Shopify before the order acknowledgement was sent to Amazon. Therefore when we attempted to send the fulfillment to Amazon, it failed. 

Shopify has a rich ecosystem of third-party apps for merchants’ shops. Many of these apps help automate fulfillment by watching for new orders and automatically initiating a shipment. We had to be careful because one of these apps could trigger a fulfilment request before our app sends the order acknowledgement back to Amazon.

Shopify uses a synchronous messaging protocol requiring two messages for order creation and fulfillment. Amazon’s messaging protocol is a mix of synchronous (retrieving the order and order items) and asynchronous messages (acknowledging and then fulfilling the order), which requires four messages. All six of these messages need to be sent and processed in the correct sequence. This is a message ordering problem: we can’t send the fulfillment request to Amazon until the acknowledgement request has been sent and successfully processed even if we get a fulfillment notification from Shopify. We solved the message ordering problem by holding the fulfillment notification from Shopify until the order acknowledgement is processed by Amazon.

Another issue cropped up when we started processing refunds. The commerce domain model implemented by Amazon requires refunds to be associated with an item sold while Shopify allows for more flexibility. Neither model is wrong, they simply reflect the different choices made by the respective teams when they chose the commerce use-cases to support.

To illustrate, consider a simplified representation of an order received from Amazon.

This order contains two items, a jersey and a cap. The item and shipping prices for each are just below the item title. When creating the order in Shopify, we send this data with the same level of detail, transformed to JSON from the XML received from Amazon.

Shopify is flexible and allows the merchant to submit the refund either quickly by entering a refund amount, or with more a detailed method specifying the individual items and prices. If the merchant takes the quicker approach, Shopify sends the following data to our app when the refund is created:

Notice that we didn’t get an item-by-item breakdown of the item or shipping prices from Shopify. This causes a problem because we’re required to send Amazon values for price, shipping costs, and taxes for each item. We solved this by retaining the original order detail retrieved from Amazon and using this to fill in missing data when sending the refund details back.

Lessons Learned

Our choices violated the design constraint that we initially set to not persist order data. Deciding to persist orders and all the detail retrieved from Amazon in our app’s database enabled us to solve our problems integrating the different domain models. Looking back, here are a few things we learned:

  • It’s never wrong to go back and re-visit assumptions, decisions, or constraints put in place early in a project. You’ll learn something more about your problem with every step you take towards shipping a feature. This is how we work at Shopify, and this project highlighted why this flexibility is important
  • Understand the patterns and architectural style of the systems with which you’re integrating. When you don’t fully account for these patterns, it can cause implementation difficulties later on. Keep an eye open for this
  • Common integration problems include message ordering and differences in message granularity. A persistence mechanism can be used to overcome these. In our case, we needed the durability of an on-disk database

By revisiting assumptions, being flexible, and taking into account the patterns and architectural style of Amazon, the team successfully integrated these two very different commerce domains in a way that benefits our merchants and makes their lives easier.

Continue reading

How 17 Lines of Code Improved Shopify.com Loading by 50%

How 17 Lines of Code Improved Shopify.com Loading by 50%

3 minute read

Big improvements don't have to be hard nor take a long time to implement. It took, for example, only 17 lines of code to decrease the time to display text on Shopify.com by 50%. That saved visitors 1.2 seconds: each second matters given that 40% of users expect a website to load within two seconds and those same users will abandon a site if it takes longer than three.  

Continue reading

How We're Thinking About Commerce and VR With Our First VR App, Thread Studio

How We're Thinking About Commerce and VR With Our First VR App, Thread Studio

3 minute read

Hey everyone! I’m Daniel and I lead our VR efforts at Shopify.

When I talk to people about VR and commerce, the first idea that usually pops into their heads is about all the possibilities of walking around a virtual shopping mall. While that could be an enjoyable experience for some, I find it’s a very limiting view of how virtual reality can actually improve retail.

If VR gave you the superpowers to do anything, create anything, and go anywhere you want, would you really want to go shopping in a regular mall?

More than a virtual mall

It’s easy to take a new medium and try to shoehorn in what already exists and is familiar. What’s hard is figuring out what content makes the medium truly shine and worthwhile to use. VR offers an amazing storytelling platform for brands. For the first time, brands can put people in the stories that their products tell.

If you’re selling scuba gear, why not show what it’d look like underwater with jellyfish passing by? Or a tent on a windy, chilly cliff, reflecting the light of a scrappy fire? It sure would beat being in a fluorescent-lit camping store. In VR, you could explore inside a tent before you buy it, or change the environment around you at a press of a button.

Continue reading

How Our UX Team's Approaching Accessibility

How Our UX Team's Approaching Accessibility

Last updated: September 9, 2016

2 minute read

At Shopify, our mission is to make commerce better for everyone. When we say better, we’re talking about caring deeply about making quality products. To us, a quality web product means a few things: certainly beautiful design, engaging copy, and a fantastic user experience, but just as important are inclusivity and the principles of universal design.

“Everyone” is a pretty big group. It includes our merchants, their customers, our developer partners, our employees, and the greater tech community at large, where we love to lead by example. “Everyone” also includes:

We take our mission to heart, so it’s important that Shopify products are useable and useful to all our users. This is something we’ve been thinking about and working on for a few years, but it’s an ongoing, difficult challenge. Luckily, we love tackling challenging problems and we’re constantly chipping away at this one. We’ve learned a lot from the community and think it’s important to contribute back, so — in celebration of Global Accessibility Awareness Day — we’re thrilled to announce a series of posts on accessibility.


Continue reading

Announcing go-lua

Announcing go-lua

Today, we’re excited to release go-lua as an Open Source project. Go-lua is an implementation of the Lua programming language written purely in Go. We use go-lua as the core execution engine of our load generation tool. This post outlines its creation, provides examples, and describes some challenges encountered along the way.

Continue reading

Building Year in Review 2014 with SVG and Rails

Building Year in Review 2014 with SVG and Rails

As we have for the past 3 years, Shopify released a Year in Review to highlight some of the exciting growth and change we’ve observed over the past year. Designers James and Veronica had ambitious ideas for this year’s review, including strong, bold typographic treatments and interactive data visualizations. We’ve gotten some great feedback on the final product, as well as some curious developers wondering how we pulled it off, so we’re going to review the development process for Year in Review and talk about some of the technologies we leveraged to make it all happen.

Continue reading

Rebuilding the Shopify Admin: Deleting 28,000 lines of JavaScript to Improve Dev Productivity

Rebuilding the Shopify Admin: Deleting 28,000 lines of JavaScript to Improve Dev Productivity

6 minute read

This September, we quietly launched a new version of the Shopify admin. Unlike the launch of the previous major iteration of our admin, this version did not include a major overhaul of the visual design, and for the most part, would have gone largely unnoticed by the user.

Why would we rebuild our admin without providing any noticeable differences to our users? At Shopify, we strongly believe that any decision should be able to be questioned at any time. In late 2012, we started to question whether our framework was still working for us. This post will discuss the problems in the previous version of our admin, and how we decided that it was time to switch frameworks.

Continue reading

IdentityCache: Improving Performance one Cached Model at a Time

IdentityCache: Improving Performance one Cached Model at a Time

A month ago Shopify was at BigRubyConf where we mentioned an internal library we use for caching ActiveRecord models called IdentityCache. We're pleased to say that the library has been extracted out of the Shopify code base and has been open sourced!
 
At Shopify, our core application has been database performance bound for much of our platform’s history. That means that the most straightforward way of making Shopify more performant and resilient is to move work out of the database layer. 
 
For many applications, achieving a very high cache ratio is a matter of storing full cached response bodies, and versioning them based on the associated records in the database, serving always the more current version and relying on the cache’s LRU algorithm for expiration. 
 
That technique, called a “generational page cache”, is well proven and very reliable.  However, part of Shopify’s value proposition is that store owners can heavily customize the look and feel of their shops. We in fact offer a full fledged templating language
 
As a side effect, full page static caching is not as effective as it would be in most other web platforms, because we do not have a deterministic way of knowing what database rows we’ll need to fetch on every page render. 
 
The key metric driving the creation of IdentityCache was our master database’s queries per (second/minute) and thus the goal was to reduce read operations reaching the database as much as possible. IdentityCache does this by moving the workload to Memcached instead.
 
The inability of a full page cache to take load away from the database becomes even more evident during write heavy - and thus page cache expiring - events like Cyber Monday, and flash sales. On top of that, the traffic on our web app servers typically doubles each year, and we invested heavily in building out IdentityCache to help absorb this growth.  For instance, in 2012 during the last pre-IdentityCache sales peak, we saw 130.000 requests per minute generating 21.000 queries per second in comparison with the latest flash sale on April 2013 generated 203.000 requests with only 14.500 queries per second.  

What Exactly is IdentityCache?

IdentityCache is a read through cache for ActiveRecord models. When reading records from the cache, IdentityCache will try to fetch the requested object from memcached. If the cache entry doesn't exist, IdentityCache will load the object from the database and store it in memcache, then the cached copy will be available for subsequent reads and avoid any more trips to the database. This behaviour is key during events that expire the cache often.
 
Expiration is explicit and does not rely on Memcached's LRU. It is automatic, objects are expired from the cache by issuing memcached delete command as they change in the database via after_commit hooks. This is important because given a row in the database we can always calculate its cache key based on the current table schema and the row’s id. There is no need for the user to ever call delete themselves. It was a conscious decision to take expiration away from day-to-day developer concerns.
 
This has been a huge help as the characteristics of our application and Rails have changed. One great example of this is how Ruby on Rails changed what actions would fire after_commit hooks. For instance, in Rails 3.2, touch will not fire an after_commit. Instead of having to add expires, and think about all the possible ramifications every time, we added the after_touch hook into IdentityCache itself.
 
Aside from the default key, built from the schema and the row id, IdentityCache uses developer defined indexes to access your models. Those indexes simply consist of keys that can be created deterministically from other row fields and the current schema. Declaring an index will also add a helper method to fetch your cached models using said index.
 
IdentityCache is opt-in, meaning developers need to explicitly specify what should be indexed and explicitly ask for data from the cache. It is important that developers don’t have to guess whether calling a method will bring a cached entry or not. 
 
We think this is a good thing. Having caching hook in automatically is nice in its simplest form.  However, IdentityCache wasn't built for simple applications, it has been built for large, complicated applications where you want, and need to know what's going on.

Down to the Numbers

If that wasn’t good enough, here are some numbers from Shopify itself.
 
 
This is an example of when we introduced IdentityCache to one of the objects that is heavily hit on the shop storefronts. As you can see we cut out thousands of calls to the database when accessing this model. This was huge since the database is one of the heaviest contended components of Shopify.
 
 
This example shows similar results once IdentityCache was introduced. We eliminated what was approaching 50K calls per minute (which was growing steadily) to almost nothing since the subscription was now being embedded with the Shop object. Another huge win from IdentityCache.

Specifying Indexes

Once you include IdentityCache into your model, you automatically get a fetch method added to your model class. Fetch will behave like find plus the read-through cache behaviour.
 
You can also add other indexes to your models so that you can load them using a different key. Here are a few examples:
class Product < ActiveRecord::Base
  include IdentityCache
end

Product.fetch(id)

class Product < ActiveRecord::Base
  include IdentityCache
  cache_index :handle
end

Product.fetch_by_handle(handle)
We’ve tried to make IdentityCache as simple as possible to add to your models. For each cache index you add, you end up with a fetch_* method on the model to fetch those objects from the cache.
 
You can also specify cache indexes that look at multiple fields. The code to do this would be as follows:
class Product < ActiveRecord::Base
  include IdentityCache
  cache_index :shop_id, :id
end

Product.fetch_by_shop_id_and_id(shop_id, id)

Caching Associations

One of the great things about IdentityCache is that you can cache has_one, has_many and belongs_to associations as well as single objects. This really sets IdentityCache apart from similar libraries.
 
This is a simple example of caching associations with IdentityCache:
class Product < ActiveRecord::Base
  include IdentityCache
  has_many :images
  cache_has_many :images
end

@product = Product.fetch(id)
@images = @product.fetch_images
What happens here is the product is fetched from either Memcached or the database if it's a cache miss. We then look for the images in the cache or database if we get another miss. This also works for both has_one and belongs_to associations with the cache_has_one and cache_belongs_to IdentityCache, respectively.
 
What if we always want to load the images though, do we always need to make the two requests to the cache? 

Embedding Associations

With IdentityCache we can also embed the associations with the parent object so that when you load the parent the associations are also cached and loaded on a cache hit. This avoids needing to make the multiple Memcached calls to load all the cached data. To enable this you simple need to add the ':embed => true' options. Here's a little example:
class Product < ActiveRecord::Base
  include IdentityCache
  has_many :images
  cache_has_many :images, :embed => true
end

@product = Product.fetch(id)
@images = @product.fetch_images
The main difference with this example versus the previous is that the '@product.fetch_images' call won't hit Memcached a second time; the data is already loaded when we fetch the product from Memcached.
 
The tradeoffs of using embed are: first your entries in memcached will be larger, as they’ll have to store data for the model and its embedded associations, second the whole cache entry will expire on changes to any of the models cached.
 
There are a number of other options and different ways you can use IdentityCache which are highlighted on the github page https://github.com/Shopify/identity_cache, I highly encourage anyone interested to take a look at those examples for more details. Please check it out for yourself and let us know what you think!

Continue reading

RESTful thinking considered harmful - followup

RESTful thinking considered harmful - followup

My previous post RESTful thinking considered harmful caused quite a bit of discussion yesterday. Unfortunately, many people seem to have missed the point I was trying to make. This is likely my own fault for focusing too much on the implementation, instead of the thinking process of developers that I was actually trying to discuss. For this reason, I would like to clarify some points.

  • My post was not intended as an arguments against REST. I don't claim to be a REST expert, and I don't really care about REST semantics.
  • I am also not claiming that it is impossible to get the design right using REST principles in Rails.

So what was the point I was trying to make?

  • Rails actively encourages the REST = CRUD design pattern, and all tutorials, screencasts, and documentation out there focuses on designing RESTful applications this way.
  • However, REST requires developers to realize that stuff like "publishing a blog post" is a resource, which is far from intuitive. This causes many new Rails developers to abuse the update action.
  • Abusing update makes your application lose valuable data. This is irrevocable damage.
  • Getting REST wrong may make your API less intuitive to use, but this can always be fixed in v2.
  • Getting a working application that properly supports your process should be your end goal, having it adhere to REST principles is just a means to get there.
  • All the focus on RESTful design and discussion about REST semantics makes new developers think this is actually more important and messes with them getting their priorities straight.

In the end, having a properly working application that doesn't lose data is more important than getting a proper RESTful API. Preferably, you want to have both, but you should always start with the former.

Improving the status quo

In the end, what I want to achieve is educating developers, not changing the way Rails implements REST. Rails conventions, generators, screencasts, and tutorials are all part of how we educate new Rails developers.

  • Rails should ship with a state machine implementation, and a generator to create a model based on it. Thinking "publishing a blog post" is a transaction in a state machine is a lot more intuitive.
  • Tutorials, screencasts, and documentation should focus on using it to design your application. This would lead to to better designed application with less bugs and security issues.
  • You can always wrap your state machine in a RESTful API if you wish. But this should always come as step 2.

Hopefully this clarifies a bit better what I was trying to bring across.

Continue reading

RESTful thinking considered harmful

RESTful thinking considered harmful

It has been interesting and at times amusing to watch the last couple of intense debates in the Rails community. Of particular interest to me are the two topics that relate to RESTful design that ended up on the Rails blog itself: using the PATCH HTTP method for updates and protecting attribute mass-assignment in the controller vs. in the model.

REST and CRUD

These discussions are interesting because they are both about the update part of the CRUD model. PATCH deals with updates directly, and most problems with mass-assignment occur with updates, not with creation of resources.

In the Rails world, RESTful design and the CRUD interface are closely intertwined: the best illustration for this is that the resource generator generates a controller with all the CRUD actions in place (read is renamed to show, and delete is renamed to destroy). Also, there is the DHH RailsConf '06 keynote linking CRUD to RESTful design.

Why do we link those two concepts? Certainly not because this link was included in the original Roy Fielding dissertation on the RESTful paradigm. It is probably related to the fact that the CRUD actions match so nicely on the SQL statements in relational databases that most web applications are built on (SELECT, INSERT, UPDATE and DELETE) on the one hand, and on the HTTP methods that are used to access the web application on the other hand. So CRUD seems a logical link between the two.

But do the CRUD actions match nicely on the HTTP methods? DELETE is obvious, and the link between GET and read is also straightforward. Linking POST and create already takes a bit more imagination, but the link between PUT and update is not that clear at all. This is why PATCH was added to the HTTP spec and where the whole PUT/PATCH debate came from.

Updates are not created equal

In the relational world of the database, UPDATE is just an operator that is part of set theory. In the world of publishing hypermedia resources that is HTTP, PUT is just a way to replace a resource on a given URL; PATCH was added later to patch up an existing resource in an application-specific way.

But was it an update in the web application world? It turns out that it is not so clear cut. Most web application are built to support processes: it is an OLTP system. A clear example of an OLTP system supporting a process is an ecommerce application. In an OLTP system, there is two kinds of data: master data of the objects that play a role within the context of your application (e.g. customer and product) and process-describing data, the raison d'être of your application (e.g., an order in the ecommerce example).

For master data, the semantics of an update are clear: the customer has a new address, or a products description gets rewritten [1]. For process-related data it is not so clear cut: the process isn't so much updated, the state of the process is changed due to an event: a transaction. An example would be the customer paying the order.

In this case, a database UPDATE is used to make the data reflect the new reality due to this transaction. The usage of an UPDATE statement actually is an implementation detail, and you can easily do that otherwise. For instance, the event of paying for an order could just as well be stored as a new record INSERTed into the order_payments table. Even better would be to implement the process as a state machine, two concepts that are closely linked, and to store the transactions so you can later analyze the process.

Transactional design in a RESTful world

RESTful thinking for processes therefore causes more harm than it does good. The RESTful thinker may design both the payment of an order and the shipping of an order both as updates, using the HTTP PATCH method:

    PATCH /orders/42 # with { order: { paid: true  } }
    PATCH /orders/42 # with { order: { shipped: true } }

Isn't that a nice DRY design? Only one controller action is needed, just one code path to handle both cases!

But should your application in the first place be true to RESTful design principles, or true to the principles of the process it supports? I think the latter, so giving the different transactions different URIs is better:

    POST /orders/42/pay
    POST /orders/42/ship

This is not only clearer, it also allows you to authorize and validate those transactions separately. Both transactions affect the data differently, and potentially the person that is allowed to administer the payment of the order may not be the same as the person shipping it.

Some notes on implementation and security

When implementing a process, every possible transaction should have a corresponding method in the process model. This method can specify exactly what data is going to be updated, and can easily make sure that no other will be updated unintentionally.

In turn, the controller should call this method on the model. Using update_attributes from your controller directly should be avoided: it is too easy to forget appropriate protection for mass-assignment, especially if multiple transactions in the process update different fields of the model. This also sheds some light in the protecting from mass-assignment debate: protection is not so much part of the controller or the model, but should be part of the transaction.

Again, using a state machine to model the process makes following this following these principles almost a given, making your code more secure and bug free.

Improving Rails

Finally, can we improve Rails to reflect these ideas and make it more secure? Here are my proposals:

  • Do not generate an update action that relies on calling update_attributes when running the resource generator. This way it won't be there if it doesn't need to be reducing the possibility of a security problem.
  • Ship with a state machine implementation by default, and a generator for a state machine-backed process model. Be opinionated!

These changes would point Rails developers into the right direction when designing their application, resulting in better, more secure applications.


[1] You may even want to model changes to master data as transactions, to make your system fully auditable and to make it easy to return to a previous value, e.g. to roll back a malicious update to the ssh_key field in the users table.

A big thanks to Camilo Lopez, Jesse Storimer, John Duff and Aaron Olson for reading and commenting on drafts of this article.


Update: apparently many people missed to point I was trying to make. Please read the followup post in which I try to clarify my point.

Continue reading

Webhook Best Practices

Webhook Best Practices

Webhooks are brilliant when you’re running an app that needs up-to-date information from a third party. They’re simple to set up and really easy to consume.

Through working with our third-party developer community here at Shopify, we’ve identified some common problems and caveats that need to be considered when using webhooks. Best practices, if you will.

When Should I Be Using Webhooks?

Let’s start with the basics. The obvious case for webhooks is when you need to act on specific events. In Shopify, this includes actions like an order being placed, a product price changing, etc. If you would otherwise have to poll for data, you should be using webhooks.

Another common use-case we’ve seen is when you’re dealing with data that isn’t easily searchable though the API you’re dealing with. Shopify offers several filters on our index requests, but there’s a fair amount of secondary or implied data that isn’t directly covered by these. Re-requesting the entire product catalog of a store whenever you want to search by SKU or grabbing the entire order history when you need to find all shipping addresses in a particular city is highly inefficient. Fortunately some forward planning and webhooks can help.

Let’s use searching for product SKUs on Shopify as an example:

The first thing you should do is grab a copy of the store’s product catalog using the standard REST interface. This may take several successive requests if there’s a large number of products. You then persist this using your favourite local storage solution.

Then you can register a webhook on the product/updated event that captures changes and updates your local copy accordingly. Bam, now you have a fully searchable up-to-date product catalog that you can transform or filter any way you please.

How Should I Handle Webhook Requests?

There’s no official spec for webhooks, so the way they’re served and managed is up to the originating service. At Shopify we’ve identified two key issues:

  • Ensuring delivery/Detecting failure
  • Protecting our system

To this end, we’ve implemented a 10-second timeout period and a retry period for subscriptions. We wait 10 seconds for a response to each request, and if there isn’t one or we get an error, we retry the connection several times over the next 48 hours.

If you’re receiving a Shopify webhook, the most important thing to do is respond quickly. There have been several historical occurrences of apps that do some lengthy processing when they receive a webhook that triggers the timeout. This has led to situations where webhooks were removed from functioning apps. Oops!

To make sure that apps don’t accidentally run over the timeout limit, we now recommend that apps defer processing until after the response has been sent. In Rails, Delayed Jobs are perfect for this.

What Do I Do if Everything Blows Up?

This one is a key component of good software design in general, but I think it’s worth mentioning here as the scope is beyond the usual recommendations about data validation and handling failures gracefully.

Imagine the worst case scenario: Your hosting centre exploded and your app has been offline for more than 48 hours. Ouch. It’s back on its feet now, but you’ve missed a pile of data that was sent to you in the meantime. Not only that, but Shopify has cancelled your webhooks because you weren’t responding for an extended period of time.

How do you catch up? Let’s tackle the problems in order of importance.

Getting your webhook subscriptions back should be straightforward as your app already the code that registered them in the first place. If you know for sure that they’re gone you can just re-run that and you’ll be good to go. One thing I’d suggest is adding a quick check that fetches all the existing webhooks and only registers the ones that you need.

Importing the missing data is trickier. The best way to get it back is to build a harness that fetches data from the time period you were down for and feeds it into the webhook processing code one object at a time. The only caveat is that you’ll need the processing code to be sufficiently decoupled from the request handlers that you can call it separately.

Webhooks Sound Magic, Where Can I Learn More?

We have a comprehensive wiki page on webhooks as well as technical documentation on how to manage webhooks in your app.

There’s also a good chunk of helpful threads on our Developer Mailing List.

Continue reading

Defining Churn Rate (no really, this actually requires an entire blog post)

Defining Churn Rate (no really, this actually requires an entire blog post)

If you go to three different analysts looking for a definition of "churn rate," they will all agree that it's an important metric and that the definition is self evident. Then they will go ahead and give you three different definitions. And as they share their definitions with each other they all have the same response: why is everyone else making this so com

Continue reading

Application Proxies: The New Hotness

Application Proxies: The New Hotness

I’m pleased to announce a brand new feature that we recently added to the Shopify API: Application Proxies. These will allow you do develop all kinds of crazy things that weren’t possible before, and we’re really excited about it. Let me explain.

What’s an App Proxy?

An App Proxy is simply a page within a Shopify shop that loads its content from another location of your choosing. Applications can tell certain shop pages that they should fetch and display data from another location outside of Shopify.

The really cool thing about the implementation we’ve put together is that if you return data with the application/liquid content-type we’ll run it through Shopify’s template rendering engine before pushing it out to the user. This allows you to create dynamic native pages without having to do anything crazy with iframes. I’ll explain this in more detail later.

How Do I Set This Up?

We have a great App Proxy tutorial over on our API docs that takes you through the steps, but I’ll summarize them here too.

The first thing you need to do is set up the path that should be proxied and where it should be proxied to. This is done from your app’s configuration screen on the Partners dashboard.

Once you’ve done that, you’ll need to work out what data you’re going to return when the specified URL is hit. You can return anything you want but for now we’re going to show some very simple stats to get the ball rolling.

All my examples assume that you’re using the shopify_app gem as a starting point, but the topics I cover translate directly to all languages.

Before we do anything else we need a controller to handle the calls. I generated a ProxyController class and mapped /proxy to hit its index method. I also created a template to render the response.

Here’s the controller:

class ProxyController < ApplicationController
  def index
  end
end

And here’s the template:

<h1>Hello App Proxy World</h1>

Really easy so far. Now we can start our rails app and visit the proxied page in a browser. It should look something like this:

Not much to see here just yet. In fact, it looks nothing like our shop. Let’s do something about that.

What we want is for shopify to render the page just like it were any other native data using the Liquid engine. We tell Shopify to do this by setting the content-type header on our response to application/liquid. At the same time we’re going to tell rails not to use its own layouts when rendering the page.

Add this line to the index method in ProxyController

render :layout => false, :content_type => 'application/liquid'

Now save and reload the page. Tada! Here’s what you’ll see:

Good, eh?

Next Steps

Static text is all well and good, but its not very interesting. What we really want here are some stats. I’ve chosen to display the shop’s takings as well as a link to the most popular product for the last week.

Now that we’re trying to access shop data we need to figure out which shop is sending us the request in the first place. Fortunately the url of the shop is one of the GET parameters on the request, so we can grab that and use it to configure our environment to make API calls. Details on how to do this are documented here, so go set that up and then come back when you’re done. I’ll wait.

Back? Excellent. Let’s put some info into our response. here’s what your ProxyController should look like now:

class ProxyController < ApplicationController

  def index
    ShopifyAPI::Base.site = Shop.find_by_name(params[:shop]).api_url

    @orders = ShopifyAPI::Order.find(:all, :params => {:created_at_min => 1.week.ago})
    @total = 0

    @product_sale_counts =Hash.new()

    @orders.each do |order|
      order.line_items.each do |line_item|
        if @product_sale_counts[line_item.product_id]
          @product_sale_counts[line_item.product_id] = @product_sale_counts[line_item.product_id] + line_item.quantity
        else
          @product_sale_counts[line_item.product_id] = line_item.quantity
        end
      end 
      @total += order.total_price.to_i
    end

    top_seller_stats = @product_sale_counts.max_by{|k,v| v}
    @product = ShopifyAPI::Product.find(top_seller_stats.first)

    @top_seller_count = top_seller_stats.last

    render :layout => false, :content_type => 'application/liquid'
  end
end

And here’s the template:

<h1>This Week's Earnings</h1>
<p><%= number_to_currency(@total)%> from <%= @orders.count%> orders</p>
<h1>Top Seller: <%= link_to(@product.title, url_for_product(@product)) %></h1>
<p>This product sold <%= @top_seller_count %> units</p>

Here's the finished product. The CSS could use some work, but all our info is there and matches the theme perfectly:

A Word On Security

So far so good, but right now there’s no security on our proxy. Anyone sending a request to that url with a ‘shop’ parameter will get data back. Oops! Let’s fix that.

Just like our webhooks, we sign all our proxy requests. There are details in the API docs on exactly how this is done, but for simplicity’s sake just add this private function to your ProxyController and add it as a before_filter:

def verify_request_source
  url_parameters = {
    "shop" => params[:shop],
    "path_prefix" => params[:path_prefix],
    "timestamp" => params[:timestamp]
  }

  sorted_params = url_parameters.collect{ |k, v| "#{k}=#{Array(v).join(',')}" }.sort.join

  calculated_signature = OpenSSL::HMAC.hexdigest(OpenSSL::Digest::Digest.new('sha256'),
  ShopifyAppProxyExample::Application.config.shopify.secret, sorted_params)

  raise 'Invalid signature' if params[:signature] != calculated_signature
end

Great! Now you can be sure that Shopify is the one sending you this data and not some dirty impostor.

There you have it. Application Proxies are a great way to introduce dynamic third-party content into a native shop page. There's a lot more that you can do with them, far too much to cover in a single blog post.

If you're interested I encourage you to set up a quick app and give them a try. You can also discuss potential ideas with other developers on our dev mailing list.

Continue reading

Three Months of CoffeeScript

Three Months of CoffeeScript

Guest Post by Kamil Tusznio!

Kamil’s a developer at Shopify and has been working in our developer room just off the main “bullpen” that I like to refer to as “The Batcave”. That’s where the team working on the Batman.js framework have been working their magic. Kamil asked if he could post an article on the blog about his experiences with CoffeeScript and I was only too happy to oblige.

CoffeeScript

Since joining the Shopify team in early August, I have been working on Batman.js, a single-page app micro-framework written purely in CoffeeScript. I won't go into too much detail about what CoffeeScript is, because I want to focus on what it allows me to do.

Batman.js has received some flack for its use of CoffeeScript, and more than one tweet has asked why we didn't call the framework Batman.coffee. I feel the criticism is misguided, because CoffeeScript allows you to more quickly write correct code, while still adhering to the many best practices for writing JavaScript.

An Example

A simple example is iteration over an object. The JavaScript would go something like this:

var obj = {
  a: 1, 
  b: 2, 
  c: 3
};

for (var key in obj) {
  if (obj.hasOwnProperty(key)) { // only look at direct properties
    var value = obj[key];
    // do stuff...
  }
}

Meanwhile, the CoffeeScript looks like this:

obj =
  a: 1
  b: 2
  c: 3

for own key, value of obj
  # do stuff...

Notice the absence of var, hasOwnProperty, and needing to assign value. And best of all, no semi-colons! Some argue that this adds a layer of indirection to the code, which it does, but I'm writing less code, resulting in fewer opportunities to make mistakes. To me, that is a big win.

Debugging

Another criticism levelled against CoffeeScript is that debugging becomes harder. You're writing .coffee files that compile down to .js files. Most of the time, you won't bother to look at the .js files. You'll just ship them out, and you won't see them until a bug report comes in, at which point you'll be stumped by the compiled JavaScript running in the browser, because you've never looked at it.

Wait, what? What happened to testing your code? CoffeeScript is no excuse for not testing, and to test, you run the .js files in your browser, which just about forces you to examine the compiled JavaScript.

(Note that it's possible to embed text/coffeescript scripts in modern browsers, but this is not advisable for production environments since the browser is then responsible for compilation, which slows down your page. So ship the .js.)

And how unreadable is that compiled JavaScript? Let's take a look. Here's the compiled version of the CoffeeScript example from above:

var key, obj, value;
var __hasProp = Object.prototype.hasOwnProperty;
obj = {
  a: 1,
  b: 2,
  c: 3
};
for (key in obj) {
  if (!__hasProp.call(obj, key)) continue;
  value = obj[key];
}

Admittedly, this is a simple example. But, after having worked with some pretty complex CoffeeScript, I can honestly say that once you become familiar (which doesn't take long), there aren't any real surprises. Notice also the added optimizations you get for free: local variables are collected under one var statement, and hasOwnProperty is called via the prototype.

For more complex examples of CoffeeScript, look no further than the Batman source.

Workflow

I'm always worried when I come across tools that add a level of indirection to my workflow, but CoffeeScript has not been bad in this respect. The only added step to getting code shipped out is running the coffee command to watch for changes in my .coffee files:

coffee --watch --compile src/ --output lib/

We keep both the .coffee and .js files under git, so nothing gets lost. And since you still have .js files kicking around, any setup you have to minify your JavaScript shouldn't need to change.

TL;DR

After three months of writing CoffeeScript, I can hands-down say that it's a huge productivity booster. It helps you write more elegant and succinct code that is less susceptible to JavaScript gotchas.

Further Reading

[ This article also appears in Global Nerdy. ]

Continue reading

Most Memory Leaks are Good

Most Memory Leaks are Good

TL;DR

Catastrophe! Your app is leaking memory. When it runs in production it crashes and starts raising Errno::ENOMEM exceptions. So you babysit it and restart it consistently so that your app keeps responding.

As hard as you try you don’t see any memory leaks. You use the available tools, but you can’t find the leak. Understanding your full stack, knowing your tools, and good ol’ debugging will help you find that memory leak.

Memory leaks are good?

Yes! Depending on your definition. A memory leak is any memory that is allocated, but never freed. This is the basis of anything global in your programs. 

In a Ruby program global variables are allocated but will never be freed. Same goes with constants, any constant you define will be allocated and never freed. Without these things we couldn’t be very productive Ruby programmers.

But there’s a bad kind

The bad kind of memory leak involves some memory being allocated and never freed, over and over again. For example, if a constant is appended each time a web request is made to a Rails app, that's a memory leak. Since that constant will never be freed and it’s memory consumption will only grow and grow.

Separating the good and the bad

Unfortunately, there’s no easy way to separate the good memory leaks from the bad ones. The computer can see that you’re allocating memory, but, as always, it doesn’t understand what you’re trying to do, so it doesn’t know which memory leaks are unintentional.

To make matters more muddy, the computer can’t differentiate betweeen a memory leak in Ruby-land and a memory leak in C-land. It’s all just memory.

If you’re using a C extension that’s leaking memory there are tools specific to the C language that can help you find memory leaks (Valgrind). If you have Ruby code that is leaking memory there are tools specific to the Ruby language that can help you (memprof). Unfortunately, if you have a memory leak in your app and have no idea where it’s coming from, selecting a tool can be really tough.

How bad can memory leaks get?

This begins the story of a rampant memory leak we experienced at Shopify at the beginning of this year. Here’s a graph showing the memory usage of one of our app servers during that time.

You can see that memory consumption continues to grow unhindered as time goes on! Those first two spikes which break the 16G mark show that memory consumption climbed above the limit of physical memory on the app server, so we had to rely on the swap. With that large spike the app actually crashed, raising Errno::ENOMEM errors for our users.

After that you can see many smaller spikes. We wrote a script to periodically reboot the app, which releases all of the memory it was using. This was obviously not a sustainable solution. Case in point: the last spike on the graph shows that we had an increase in traffic which resulted in memory usage growing beyond the limits of physical memory again.

So, while all this was going on we were searching high and low to find this memory leak.

Where to begin?

The golden rule is to make the leak reproducible. Like any bug, once you can reproduce it you can surely fix it. For us, that meant a couple of things:

  1. When testing, reproduce your production environment as closely as possible. Run your app in production mode on localhost, set up the same stack that you have on production. Ensure that you are running the same exact versions of the software that is running on production.

  2. Be aware of any issues happening on production. Are there any known issues with the production environment? Losing connections to the database? Firewall routing traffic properly? Be aware of any weird stuff that’s happening and how it may be affecting your problem.

Memprof

Now that we’ve laid out the basics at a high level, we’ll dive into a tool that can help you find memory leaks.

Memprof is a memory profiling tool built by ice799 and tmm1. Memprof does some crazy stuff like rewriting the current Ruby binary at runtime to hot patch features like object allocation tracking. Memprof can do stuff like tell you how many objects are currently alive in the Ruby VM, where they were allocated, what their internal state is, etc.

VM Dump

The first thing that we did when we knew there was a problem was to reach into the toolbox and try out memprof. This was my first experience with the tool. My only exposure to the tool had been a presentation by @tmm1 that detailed some heavy duty profiling by dumping every live object in the Ruby VM in JSON format and using MongoDB to perform analysis.

Without any other leads we decided to try this method. After hitting our staging server with some fake traffi we used memprof to dump the VM to a JSON file. An important note is that we did not reproduce the memory leak on our staging server, we just took a look at the dump file anyway.

Our dump of the VM came out at about 450MB of JSON. We loaded it into MongoDB and did some analysis. We were surprised by what we found. There were well over 2 million live objects in the VM, and it was very difficult to tell at a glance which should be there and which should not.

As mentioned earlier there are some objects that you want to ‘leak’, especially true when it comes to Rails. For instance, Rails uses ActiveSupport::Callbacks in many key places, such as ActiveRecord callbacks or ActionController filters. We had tons of Proc objects created by ActiveSupport::Callbacks in our VM, but these were all things that needed to stick around in order for Shopify to function properly.

This was too much information, with not enough context, for us to do anything meaningful with.

Memprof stats

More useful, in terms of context, is having a look at Memprof.stats and the middleware that ships with Memprof. Using these you can get an idea of what is being allocated during the course of a single web request, and ultimately how that changes over time. It’s all about noticing a pattern of live objects growing over time without stopping.

memprof.com

The other useful tool we used was memprof.com. It allows you to upload a JSON VM dump (via the memprof gem) and analyse it using a slick web interface that picks up on patterns in the data and shows relevant reports. It has since been taken offline and open sourced by tmm1 at https://github.com/tmm1/memprof.com.

Unable to reproduce our memory leak on development or staging we decided to run memprof on one of our production app servers. We were only able to put it in rotation for a few minutes because it increased response time by 1000% due to the modifications made by memprof. The memory leak that we were experiencing would typically take a few hours to show itself, so we weren’t sure if a few minutes of data would be enough to notice the pattern we were looking for.

We uploaded the JSON dump to memprof.com and started using the web UI to look for our problem. Different people on the team got involved and, as I mentioned earlier, this data can be confusing. After seeing the huge amount of Proc object from ActiveSupport::Callbacks some claimed that “ActiveSupport::Callbacks is obviously leaking objects on every request”. Unfortunately it wasn’t that simple and we weren’t able to find any patterns using memprof.com.

Good ol’ debuggin: Hunches & Teamwork

Unable to make progress using these approaches we were back to square one. I began testing locally again and, through spying on Activity Monitor, thought that I noticed a pattern emerging. So I double-checked that I had all the same software stack running that our production environment has, and then the pattern disappeared.

It was odd, but I had a hunch that it had something to do with a bad connection to memcached. I shared my hunch with @wisqnet and he started doing some testing of his own. We left our chat window open as we were testing and shared all of our findings.

This was immensely helpful so that we could both begin tracing patterns between each others results. Eventually we tracked down a pattern. If we consistently hit a URL we could see the memory usage climb and never stop. We eventually boiled it down to a single of code:

loop { Rails.cache.write(rand(10**10).to_s, rand(10**10).to_s) }

If we ran that code in a console and then shut down the memcached instance it was using, memory usage immediately spiked.

Now What?

Now that it was reproducible we were able to experiment with fixing it. We tracked the issue down to our memcached client library. We immediately switched libraries and the problem disappeared in production. We let the library author know about the issue and he had it fixed in hours. We switched back to our original library and all was well!

Finally

It turned out that the memory leak was happening in a C extension, so the Ruby tools would not have been able to find the problem.

Three pieces of advice to anyone looking for a memory leak:

  1. Make it reproducible!
  2. Trust your hunches, even if they don’t make sense.
  3. Work with somebody else. Bouncing your theories off of someone else is the most helpful thing you can do.

Continue reading

How Batman can Help you Build Apps

How Batman can Help you Build Apps

Batman.js is Shopify’s new open source CoffeeScript framework, and I’m absolutely elated to introduce it to the world after spending so much time on it. Find Batman on GitHub here.

Batman emerges into a world populated with extraordinary frameworks being used to great effect. With the incredible stuff being pushed out in projects like Sproutcore 2.0 and Backbone.js, how is a developer to know what to use when? There’s only so much time to play with cool new stuff, so I’d like to give a quick tour of what makes Batman different and why you might want to use it instead of the other amazing frameworks available today.

Batman makes building apps easy

Batman is a framework for building single page applications. It’s not a progressive enhancement or a single purpose DOM or AJAX library. It’s built from the ground up to make building awesome single page apps by implementing all the lame parts of development like cross browser compatibility, data transport, validation, custom events, and a whole lot more. We provide handy helpers for development to generate and serve code, a recommended app structure for helping you organize code and call it when necessary, a full MVC stack, and a bunch of extras, all while remaining less than 18k when gzipped. Batman doesn’t provide only the basics, or the whole kitchen sink, but a fluid API that allows you to write the important code for your app and none of the boilerplate.

A super duper runtime

At the heart of Batman is a runtime layer used for manipulating data from objects and subscribing to events objects may emit. Batman’s runtime is used similarly to SproutCore’s or Backbone’s in that all property access and assignment on Batman objects must be done through someObject.get and someObject.set, instead of using standard dot notation like you might in vanilla JavaScript. Adhering to this property system allows you to:

  • transparently access “deep” properties which may be simple data or computed by a function,
  • inherit said computed properties from objects in the prototype chain,
  • subscribe to events like change or ready on other objects at “deep” keypaths,
  • and most importantly, dependencies can be tracked between said properties, so chained observers can be fired and computations can be cached while guaranteed to be up-to-date.

All this comes free with every Batman object, and they still play nice with vanilla JavaScript objects. Let’s explore some of the things you can do with the runtime. Properties on objects can be observed using Batman.Object::observe:

crimeReport = new Batman.Object
crimeReport.observe 'address', (newValue) ->
  if DangerTracker.isDangerous(newValue)
    crimeReport.get('currentTeam').warnOfDanger()

This kind of stuff is available in Backbone and SproutCore both, however we’ve tried to bring something we missed in those frameworks to Batman: “deep” keypaths. In Batman, any keypath you supply can traverse a chain of objects by separating the keys by a . (dot). For example:

batWatch = Batman
  currentCrimeReport: Batman
    address: Batman
      number: "123"
      street: "Easy St"
      city: "Gotham"

batWatch.get 'currentCrimeReport.address.number' #=> "123"
batWatch.set 'currentCrimeReport.address.number', "461A"
batWatch.get 'currentCrimeReport.address.number' #=> "461A"

This works for observation too:

batWatch.observe 'currentCrimeReport.address.street', (newStreet, oldStreet) ->
  if DistanceCalculator.travelTime(newStreet, oldStreet) > 100000
    BatMobile.bringTo(batWatch.get('currentLocation'))

The craziest part of the whole thing is that these observers will always fire with the value of whatever is at that keypath, even if intermediate parts of the keypath change.

crimeReportA = Batman
  address: Batman
    number: "123"
    street: "Easy St"
    city: "Gotham"

crimeReportB = Batman
  address: Batman
    number: "72"
    street: "Jolly Ln"
    city: "Gotham"

batWatch = new Batman.Object({currentCrimeReport: crimeReportA})

batWatch.get('currentCrimeReport.address.street') #=> "East St"
batWatch.observe 'currentCrimeReport.address.street', (newStreet) ->
  MuggingWatcher.checkStreet(newStreet)

batWatch.set('currentCrimeReport', crimeReportB)
# the "MuggingWatcher" callback above will have been called with "Jolly Ln"

Notice what happened? Even though the middle segment of the keypath changed (a whole new crimeReport object was introduced), the observer fires with the new deep value. This works with arbitrary length keypaths as well as intermingled undefined values.

The second neat part of the runtime is that because all access is done through get and set, we can track dependencies between object properties which need to be computed. Batman calls these functions accessors, and using the CoffeeScript executable class bodies they are really easy to define:

class BatWatch extends Batman.Object
  # Define an accessor for the `currentDestination` key on instances of the BatWatch class.
  @accessor 'currentDestination', ->
    address = @get 'currentCrimeReport.address'
    return "#{address.get('number')} #{address.get('street')}, #{address.get('city')}"

crimeReport = Batman
  address: Batman
    number: "123"
    street "Easy St"
    city: "Gotham"

watch = new BatWatch(currentCrimeReport: crimeReport)

watch.get('currentDestination') #=> "123 Easy St, Gotham"

Importantly, the observers you may attach to these computed properties will fire as soon as you update their dependencies:

watch.observe 'currentDestination', (newDestination) -> console.log newDestination
crimeReport.set('address.number', "124")
# "124 Easy St, Gotham" will have been logged to the console

You can also define the default accessors which the runtime will fall back on if an object doesn’t already have an accessor defined for the key being getted or setted.

jokerSimulator = new Batman.Object
jokerSimulator.accessor (key) -> "#{key.toUpperCase()}, HA HA HA!"

jokerSimulator.get("why so serious") #=> "WHY SO SERIOUS, HA HA HA!"

This feature is useful when you want to present a standard interface to an object, but work with the data in nontrivial ways underneath. For example, Batman.Hash uses this to present an API similar to a standard JavaScript object, while emitting events and allowing objects to be used as keys.

What’s it useful for?

The core of Batman as explained above makes it possible to know when data changes as soon as it happens. This is ideal for something like client side views. They’re no longer static bundles of HTML that get cobbled together as a long string and sent to the client, they are long lived representations of data which need to change as the data does. Batman comes bundled with a view system which leverages the abilities of the property system.

A simplified version of the view for Alfred, Batman’s todo manager example application, lies below:

<h1>Alfred</h1>

<ul id="items">
    <li data-foreach-todo="Todo.all" data-mixin="animation">
        <input type="checkbox" data-bind="todo.isDone" data-event-change="todo.save" />
        <label data-bind="todo.body" data-addclass-done="todo.isDone" data-mixin="editable"></label>
        <a data-event-click="todo.destroy">delete</a>
    </li>
    <li><span data-bind="Todo.all.length"></span> <span data-bind="'item' | pluralize Todo.all.length"></span></li>
</ul>
<form data-formfor-todo="controllers.todos.emptyTodo" data-event-submit="controllers.todos.create">
  <input class="new-item" placeholder="add a todo item" data-bind="todo.body" />
</form>

We sacrifice any sort of transpiler layer (no HAML), and any sort of template layer (no Eco, jade, or mustache). Our views are valid HTML5, rendered by the browser as soon as they have been downloaded. They aren’t JavaScript strings, they are valid DOM trees which Batman traverses and populates with data without any compilation or string manipulation involved. The best part is that Batman “binds” a node’s value by observing the value using the runtime as presented above. When the value changes in JavaScript land, the corresponding node attribute(s) bound to it update automatically, and the user sees the change. Vice versa remains true: when a user types into an input or checks a checkbox, the string or boolean is set on the bound object in JavaScript. The concept of bindings isn’t new, as you may have seen it in things like Cocoa, or in Knockout or Sproutcore in JS land.

We chose to use bindings because we a) don’t want to have to manually check for changes to our data, and b) don’t want to have to re-render a whole template every time one piece of data changes. With mustache or jQuery.tmpl and company, I end up doing both those things surprisingly often. It seems wasteful to re-render every element in a loop and pay the penalty for appending all those nodes, when only one key on one element changes, and we could just update that one node. SproutCore’s ‘SC.TemplateView’ with Yehuda Katz' Handlebars.js do a good job of mitigating this, but we still didn’t want to do all the string ops in the browser, and so we opted for the surgical precision of binding all the data in the view to exactly the properties we want.

What you end up with is a fast render with no initial loading screen, at the expense of the usual level of complex logic in your views. Batman’s view engine provides conditional branching, looping, context, and simple transforms, but thats about it. It forces you to write any complex interaction code in a packaged and reusable Batman.View subclass, and leave the HTML rendering to the thing that does it the best: the browser.

More?

Batman does more than this fancy deep keypath stuff and these weird HTML views-but-not-templates. We have a routing system for linking from quasi-page to quasi-page, complete with named segments and GET variables. We have a Batman.Model layer for retrieving and sending data to and from a server which works out of the box with storage backends like Rails and localStorage. We have other handy mixins for use in your own objects like Batman.StateMachine and Batman.EventEmitter. And, we have a lot more on the way. I strongly encourage you to check out the project website, the source on GitHub, or visit us in #batmanjs on freenode. Any questions, feedback, or patches will be super welcome, and we’re always open to suggestions on how we can make Batman better for you.

Until next time….

Continue reading

Making Apps using Python, Django and App Engine

Making Apps using Python, Django and App Engine

We recently announced the release of our Python adaptor for the Shopify API. Now we would like to inform you that we have got it working well with the popular Django web framework and Google App Engine hosting service. But don't just take my word for it, you can see a live example on App Engine and check out the example's source code on GitHub. The example application isn't limited to Google App Engine, it can run as a regular Django application allowing you to explore other hosting options.

The shopify_app directory in the example contains the reusable Django app code. This directory contains views for handling user login, authentication, and saves the Shopify session upon finalization. Middleware is included which loads session to automatically re-initialize the Python Shopify API for each request. There is also a @shop_login_required decorator for view functions that require login, which will redirect logged out users to the login page. As a result, your view function can be as simple as the following to display basic information about the shop's products and orders.

@shop_login_required
def index(request):
    products = shopify.Product.find(limit=3)
    orders = shopify.Order.find(limit=3, order="created_at DESC")
    return render_to_response('home/index.html', {
        'products': products,
        'orders': orders,
    }, context_instance=RequestContext(request))

Getting Started for Regular Django App

  1. Install the dependancies with this command:
    easy_install Django ShopifyAPI PyYAML pyactiveresource
  2. Download and unzip the zip file for the example application

Getting Started for Google App Engine

  1. Install the App Engine SDK
  2. Download and unzip the example application zip file for App Engine which includes all the dependancies.
  3. Create an application with Google App Engine, and modify the application line in app.yaml with the application ID registered with Google App Engine.

Develop

    1. Create a Shopify app through the Shopify Partner account with the Return URL set to http://localhost:8000/login/finalize, and modify shopify_settings.py with the API-Key and Shared Secret for the app.
    2. Start the server:
      python manage.py runserver
    3. Visit http://localhost:8000 to view the example.
    4. Modify the code in the home directory.

    Deploy

    1. Update the return URL in your Shopify partner account to point to your domain name (e.g. https://APPLICATION-ID.appspot.com/login/finalize)
    2. Upload the application to the server. For Google App Engine, simply run:
      appcfg.py update .

    Further Information

    Update: Extensive examples on using the Shopify Python API have been added to the wiki. 

    Continue reading

    Webhook Testing Made Easy

    Webhook Testing Made Easy

    Webhooks are fantastic. We use them here at Shopify to notify API users of all sorts of important events. Order creation, product modification, and even app uninstallation all cause webhooks to be fired. They're a really neat way to avoid the problem of polling, which is annoying for app developers and API providers alike.

    The trouble with Webhooks is that you need a publicly visible URL to handle them. Unlike client-side redirects, webhooks originate directly from the server. This means that you can't use localhost as an endpoint in your testing environment as the API server would effectively be calling itself. Bummer.

    Fortunately, there are a couple of tools that make working with webhooks during development much easier. Let me introduce you to PostCatcher and LocalTunnel.

    PostCatcher

    PostCatcher is a brand new webapp that was created as an entry for last week's Node Knockout. Shopify's own Steven Soroka and Nick Small are on the judging panel this year, and this app caught their eye.

    The app generates a unique url that you can use as a webhook endpoint and displays any POST requests sent to it for you to examine. As you might expect from a js contest, the ui is extremely slick and renders all the requests in real-time as they come in. This is really useful in the early stages of developing an app as you can see the general shape and structure of any webhooks you need without writing a single line of code. On the flip side, API developers can use it to test their own service in a real-world environment.


    The thing I really like about PostCatcher over similar apps like PostBin is that I can sign in using github and keep track of all the catchers I've created. No more copy/pasting urls to a text file to avloid losing them. Hooray!

    LocalTunnel

    LocalTunnel is a Ruby gem + webapp sponsored by Twilio that allows you to expose a given port on your local machine to the world through a url on their site. Setup is really easy (provided you have ruby and rubygems installed) and once it's installed you just start it from the console with the port you want to forward and share the url it spits out.


    From then on that url will point to your local machine so you can register the address as a webhook endpoint and get any incoming requests piped right to your machine. My previous solution was endless deployments to Heroku every time I made a small change to my code, which was a real pain in the arse. Compared to that, LocalTunnel was a godsend.

    Alternatives

    Whilst PostCatcher and LocalTunnel are currently my top choices for testing webhooks, they're by no means the only party in town. I've already mentioned PostBin, but LocalTunnel also has a contender in LocalNode (another Node KO entry). The latter boasts wider integration (you don't need ruby) as well as permanent url redirects but setup is more complicated as you have to add a static html file to your web server.

    If there are other services, apps, or tricks that you use to test webhooks when developing apps, call them out in the comments! I'd love to hear what I've missed in this space.

    Continue reading

    Developing Shopify Apps, Part 4: Change is Good

    Developing Shopify Apps, Part 4: Change is Good

     So far, in the Developing Shopify Apps series, we've covered:

    • The setup: joining Shopify's Partner Program, creating a new test shop, launching it, adding a private app to it and playing with a couple of quick API calls.
    • Exploring the API: a quick explanation of the API and RESTafarianism, retrieving general information about a shop and dipping a toe into finding out about things like your shop's products, and so on.
    • Even more explaration: REST consoles, getting a complete list of all the products, articles, blogs, customers and so on, retrieving specific items given their ID and creating new items.


    Now these are modifications!

    In this article, we're going to look at another important types of operation: modifying existing items.

    Modifying Customers

    To modify an object, we're going to need an existing one first. I'm going to start with "Peter Griffin", a customer that I created in the previous article in this series. His ID is 51827492, so we can retrieve his record thusly:

    • GET api-key:password@shop-url/admin/customers/51827492.xml for the XML version
    • GET api-key:password@shop-url/admin/customers/51827492.json for the JSON version

    Here's the response in XML:

    <?xml version="1.0" encoding="UTF-8"?>
    <customer>
        <accepts-marketing type="boolean" nil="true" />
        <orders-count type="integer">0</orders-count>
        <id type="integer">51827492</id>
        <note nil="true" />
        <last-name>Griffin</last-name>
        <total-spent type="decimal">0.0</total-spent>
        <first-name>Peter</first-name>
        <email>peter.lowenbrau.griffin@giggity.com</email>
        <tags />
        <addresses type="array">
            <address>
                <city>Quahog</city>
                <company nil="true" />
                <address1>31 Spooner Street</address1>
                <zip>02134</zip>
                <address2 nil="true" />
                <country>United States</country>
                <phone>555-555-1212</phone>
                <last-name>Griffin</last-name>
                <province>Rhode Island</province>
                <first-name>Peter</first-name>
                <name>Peter Griffin</name>
                <province-code>RI</province-code>
                <country-code>US</country-code>
            </address>
        </addresses>
    </customer>

    Let's suppose that Peter has decided to move to California. We'll need to update his address, and to do it programatically, we'll need the following:

    • His customer ID (we've got that).
    • The new information. For this example, it's
      • address1: 800 Schwarzenegger Lane
      • city: Los Angeles
      • state: California
      • zip: 90210
      • phone: 555-888-9898
    • And finally, the method for calling the Shopify API to modify existing items.

    First, there's the format of the URL for modifying Peter's entry. The URL will specify what operation we want to perform (modify) and on which item (a customer whose ID is 51827492).

    • PUT api-key:password@shop-url/admin/customers/51827492.xml for the XML version
    • PUT api-key:password@shop-url/admin/customers/51827492.json for the JSON version

    For this example, we'll use the XML version. If you're using Chrome's REST console, put the XML URL into the Request field (located in the Target section), as shown below:

    Then there's the message body, which will specify which fields we want to update. Here's the message body to update Peter's address to the new Los Angeles-based one shown above, in XML form:

    <?xml version="1.0" encoding="UTF-8"?>
    <customer>
      <addresses type="array">
        <address>
          <address1>800 Schwarzenegger Lane</address1>
          <city>Los Angeles</city>
          <province>CA</province>
          <country>US</country>
          <zip>90210</zip>
          <phone>555-888-9898</phone>
        </address>
      </addresses>
    </customer>

    If you're using Chrome's REST console, put the message body in the RAW Body field (located in the Body section) and make sure Content-Type is set to application/xml:


    Send the request. If you're using Chrome's REST Console, the simplest way to do this is to press the PUT button located at the bottom of the page. You should get a "200 OK" response and the following response body:

    <?xml version="1.0" encoding="UTF-8"?>
    <customer>
      <accepts-marketing type="boolean" nil="true" />
      <orders-count type="integer">0</orders-count>
      <id type="integer">51827492</id>
      <note nil="true" />
      <last-name>Griffin</last-name>
      <total-spent type="decimal">0.0</total-spent>
      <first-name>Peter</first-name>
      <email>peter.lowenbrau.griffin@giggity.com</email>
      <tags />
      <addresses type="array">
        <address>
          <city>Los Angeles</city>
          <company nil="true" />
          <address1>800 Schwarzenegger Lane</address1>
          <zip>90210</zip>
          <address2 nil="true" />
          <country>United States</country>
          <phone>555-888-9898</phone>
          <last-name>Griffin</last-name>
          <province>California</province>
          <first-name>Peter</first-name>
          <name>Peter Griffin</name>
          <province-code>CA</province-code>
          <country-code>US</country-code>
        </address>
      </addresses>
    </customer>

    As you can see, Peter's address has been updated.

    Modifying Products

    Let's try modifying an existing product in our store. Once again, we'll modify an item we created in the previous article: the Stumpy Pepys Toy Drum.

    When we created it, we never specified any tags. We now want to add some tags to this product -- "Spinal Tap" and "rock" -- to make it easier to find. In order to do this, we need:

    • The product ID. It's.
    • The tags, "Spinal Tap" and "rock".
    • And finally, the method for calling the Shopify API to modify existing items.
    Here's the URL format:
      • PUT api-key:password@shop-url/admin/products/48339792.xml for the XML version
      • PUT api-key:password@shop-url/admin/products/48339792.json for the JSON version

    For this example, we'll use the JSON version. If you're using Chrome's REST console, put the XML URL into the Request field (located in the Target section), as shown below:

    Then there's the message body, which will specify which fields we want to update. Here's the message body to add the tags to the drum's entry, in JSON form:

    {
      "product": {
        "tags": "Spinal Tap, rock",
        "id": 48339792
      }
    }

    If you're using Chrome's REST console, put the message body in the RAW Body field (located in the Body section) and make sure Content-Type is set to application/json:

    Send the request. If you're using Chrome's REST Console, the simplest way to do this is to press the PUT button located at the bottom of the page. You should get a "200 OK" response and the following response body:

    {
      "product": {
        "body_html": "This drum is so good...\u003Cstrong\u003Eyou can't beat it!!\u003C/strong\u003E",
        "created_at": "2011-08-03T18:20:17-04:00",
        "handle": "stumpy-pepys-toy-drum-sp-1",
        "product_type": "drum",
        "template_suffix": null,
        "title": "Stumpy Pepys Toy Drum SP-1",
        "updated_at": "2011-08-08T17:57:55-04:00",
        "id": 48339792,
        "tags": "rock, Spinal Tap",
        "images": [],
        "variants": [{
          "price": "0.00",
          "position": 1,
          "created_at": "2011-08-03T18:20:17-04:00",
          "title": "Default",
          "requires_shipping": true,
          "updated_at": "2011-08-03T18:20:17-04:00",
          "inventory_policy": "deny",
          "compare_at_price": null,
          "inventory_quantity": 1,
          "inventory_management": null,
          "taxable": true,
          "id": 113348882,
          "grams": 0,
          "sku": "",
          "option1": "Default",
          "option2": null,
          "fulfillment_service": "manual",
          "option3": null
        }],
        "published_at": "2011-08-03T18:20:17-04:00",
        "vendor": "Spinal Tap",
        "options": [{
            "name": "Title"
        }]
      }
    }

    Modifying Things with the Shopify API: The General Formula

    As you've seen, whether you prefer to talk to the API with XML or JSON, modifying things requires:

    1. An HTTP PUT request to the right URL, which includes the ID of the item you want to modify
    2. The information that you want to add or update, which you format and put into the request body

    ...and that's it!

    Next...

    We've seen getting, adding, and modifying, which leaves...deleting.

    Continue reading

    Developing Shopify Apps, Part 3: More API Exploration

    Developing Shopify Apps, Part 3: More API Exploration

    Writing Shopify AppsWelcome back to another installment of Developing Shopify Apps!

    In case you missed the previous articles in this series, they are:

    • Part 1: The Setup. In this article, we:
      • Joined Shopify's Partner Program
      • Created a new test shop
      • Launched a new test shop
      • Added an app to the test shop
      • Played with a couple of quick API calls through the browser
    • Part 2: Exploring the API. This article covered:
      • Shopify's RESTful API, including a quick explanation of how to use it
      • Retrieving general information about a shop via the admin panel and the API
      • Retrieving information from a shop, such as products, via the API

    Exploring RESTful APIs with a REST Console

    So far, all we've done is retrieve information from a shop. We did this by using the GET verb and applying it to resources exposed by the Shopify API, such as products, blogs, articles and so on. Of all the HTTP verbs, GET is the simplest to use; you can simply request information by using your browser's address bar. Working with the other three HTTP verbs -- POST, PUT and DELETE -- usually takes a little more work.

    One very easy-to-use way to make calls to the Shopify API using all four verbs is a REST client. You have many options, including:

    • cURL: the web developer's Swiss Army knife. This command line utility gets and sends files using URL syntax using a wide array of protocols including HTTP and friends, FTP and similar, LDAPS, TELNET and mail formats including IMAP, POP3 and SMTP. 
    • Desktop REST clients such as Fiddler for Windows or WizTools' RESTClient
    • Browser-based REST clients such as RESTClient for Firefox or REST Console for Chrome

    Lately, I've been using REST Console for Chrome. It's quite handy -- when installed, it's instantly available with one click on its icon, just to the left of Chrome's "Wrench" menu (which is to the right of the address bar):

    And here's what the REST Console looks like -- clean and simple:

    Let's try a simple GET operation: let's get the list of products in the shop. The format for the URL is:


    • GET api-key:password@shop-url/admin/products.xml (for the XML version)
    • GET api-key:password@shop-url/admin/products.json (for the JSON version)
    where api-key is your app's API key and password is your app's password.

    The URL goes into the Request URL field in the Target section. A tap of the GET button at the bottom of the page yields a response, which appears, quite unsurprisingly, in the Response section of the page:

    Of course, you could've done this with the address bar. But it's much nicer with the REST Console. Before we start exploring calls that require POST, PUT and DELETE, let's take a look at other things we can do with the GET verb.

    Get All the Items!

    If you've been following this series of articles, you've probably had a chance to try a couple of GET calls to various resources exposed by the API. Once again, here's the format for the URL that gets you a listing of all the products available in the shop:

    Get All the Products


    • GET api-key:password@shop-url/admin/products.xml (for the XML version)
    • GET api-key:password@shop-url/admin/products.json (for the JSON version)

    Get All the Articles

    If you go to the API documentation and look at the column on the right side of the page, you'll see a list of resources that the Shopify API makes available to you. One of these resources is Article, which gives you access to all the articles in the blogs belonging to the shop (each shop supports one or more blogs; they're a way for shopowners to write about what they're selling or related topics).

    Here's how you get all the articles:

    • GET api-key:password@shop-url/admin/articles.xml (for the XML version)
    • GET api-key:password@shop-url/admin/articles.json (for the JSON version)

    Get All the Blogs

    Just as you can get all the articles, you can get all the blogs that contain them. Here's how you do it:

    • GET api-key:password@shop-url/admin/blogs.xml (for the XML version)
    • GET api-key:password@shop-url/admin/blogs.json (for the JSON version)

    Get All the Customers

    How about a list of all the shop's registered customers? No problem:

    • GET api-key:password@shop-url/admin/customers.xml (for the XML version)
    • GET api-key:password@shop-url/admin/customers.json (for the JSON version)

    Get All the [WHATEVER]

    By now, you've probably seen the pattern. For any resource exposed by the Shopify API, the way to get a complete listing of all items in that resource is this:

    • GET api-key:password@shop-url/admin/plural-resource-name.xml (for the XML version)
    • GET api-key:password@shop-url/admin/plural-resource-name.json (for the JSON version)
    where:
    • api-key is the app's API key
    • password is the app's password
    • plural-resource-name is the plural version of the name of the resource whose items you want: articles, blogs, customers, products, and so on.

    Get a Specific Item, Given its ID

    There will come a time when you want to get the information about just one specific item and not all of them. If you know an item's ID, you can retrieve the info for just that item using this format URL:

    • GET api-key:password@shop-url/admin/plural-resource-name/id.xml (for the XML version)
    • GET api-key:password@shop-url/admin/plural-resource-name/id.json (for the JSON version)
    To get an article with the ID 3671982, we use this URL:
    • GET api-key:password@shop-url/admin/articles/3671982.xml (for the XML version)
    • GET api-key:password@shop-url/admin/articles/3671982.json (for the JSON version)

    If There is Such an Item


    If an article with that ID exists, you get a "200" response header ("OK"):

    Status Code: 200
    Date: Wed, 03 Aug 2011 15:49:44 GMT
    Content-Encoding: gzip
    P3P: CP="NOI DSP COR NID ADMa OPTa OUR NOR"
    Status: 304 Not Modified
    X-UA-Compatible: IE=Edge,chrome=1
    X-Runtime: 0.114750
    Server: nginx/0.8.53
    ETag: "fb7cdcc613b1a45698c6cfad05fc7f7e"
    Vary: Accept-Encoding
    Content-Type: application/xml; charset=utf-8
    Cache-Control: max-age=0, private, must-revalidate

    ...and a response body that should look something like this (if you requested the response in XML):

    <?xml version="1.0" encoding="UTF-8"?>
    <article>
      <body-html><p>This is your blog. You can use it to write about new product launches, experiences, tips or other news you want your customers to read about.</p> <p>We automatically create an <a href="http://en.wikipedia.org/wiki/Atom_feed">Atom Feed</a> for all your blog posts. <br /> This allows your customers to subscribe to new articles using one of many feed readers (e.g. Google Reader, News Gator, Bloglines).</p></body-html>
      <created-at type="datetime">2011-07-22T14:43:22-04:00</created-at>
      <author>Shopify</author>
      <title>First Post</title>
      <updated-at type="datetime">2011-07-22T14:43:25-04:00</updated-at>
      <blog-id type="integer">1127212</blog-id>
      <summary-html nil="true" />
      <id type="integer">3671982</id>
      <user-id type="integer" nil="true" />
      <published-at type="datetime">2011-07-22T14:43:22-04:00</published-at>
      <tags>ratione, repellat, vero</tags>
    </article>

    If No Such Item Exists


    If no article with that ID exists, you get a "404" response header ("Not Found"). Here's what happened when I tried to retrieve an article with the ID 42. I used this URL:

    • api-key:password@shop-url/admin/articles/3671982.xml (for the XML version)
    • api-key:password@shop-url/admin/articles/3671982.json (for the JSON version)

    I got this header back:

    Status Code: 404
    Date: Wed, 03 Aug 2011 16:00:25 GMT
    Content-Encoding: gzip
    Transfer-Encoding: chunked
    Status: 404 Not Found
    Connection: keep-alive
    X-UA-Compatible: IE=Edge,chrome=1
    X-Runtime: 0.039715
    Server: nginx/0.8.53
    Vary: Accept-Encoding
    Content-Type: application/xml; charset=utf-8
    Cache-Control: no-cache<

    ...and since there was nothing to return, the response body was empty.

    Get [WHATEVER], Given its ID

    The same principle applies to any other Shopify API resource.

    Want the info on a customer whose ID is 50548602? The URL would look like this:

    • GET api-key:password@shop-url/admin/customers/50548602.xml (for the XML version)
    • GET api-key:password@shop-url/admin/customers/50548602.json (for the JSON version)

    ...and if such a customer exists, you'll get a response of a "200" header and the customer's information in the body, similar to what you see below (the following is the JSON response):

    {
        "customer": {
            "accepts_marketing": true,
            "orders_count": 0,
            "addresses": [{
                "company": null,
                "city": "Wilkinsonshire",
                "address1": "95692 O'Reilly Plains",
                "name": "Roosevelt Colten",
                "zip": "27131-3440",
                "address2": null,
                "country_code": "US",
                "country": "United States",
                "province_code": "NH",
                "phone": "1-244-845-7291 x258",
                "last_name": "Colten",
                "province": "New Hampshire",
                "first_name": "Roosevelt"
            }],
            "tags": "",
            "id": 50548602,
            "last_name": "Colten",
            "note": null,
            "email": "ivory@example.com",
            "first_name": "Roosevelt",
            "total_spent": "0.00"
        }
    }

    If no such customer existed, you'd get a "404" response header and an empty response body.

    How about info on a product whose ID is 48143272? Here's the URL you'd use:

    • GET api-key:password@shop-url/admin/products/48143272.xml (for the XML version)
    • GET api-key:password@shop-url/admin/products/48143272.json (for the JSON version)

    Once again: if such a product exists, you'll get a "200" response header and a response body that looks something like this (this is the XML version):

    <?xml version="1.0" encoding="UTF-8"?>
    <product>
        <product-type>Snowboard</product-type>
        <handle>burton-custom-freestlye-151</handle>
        <created-at type="datetime">2011-08-02T12:06:42-04:00</created-at>
        <body-html><strong>Good snowboard!</strong></body-html>
        <title>Burton Custom Freestlye 151</title>
        <template-suffix nil="true" />
        <updated-at type="datetime">2011-08-02T12:06:42-04:00</updated-at>
        <id type="integer">48143272</id>
        <vendor>Burton</vendor>
        <published-at type="datetime">2011-08-02T12:06:42-04:00</published-at>
        <tags />
        <variants type="array">
            <variant>
                <price type="decimal">10.0</price>
                <position type="integer">1</position>
                <created-at type="datetime">2011-08-02T12:06:42-04:00</created-at>
                <title>First</title>
                <requires-shipping type="boolean">true</requires-shipping>
                <updated-at type="datetime">2011-08-02T12:06:42-04:00</updated-at>
                <inventory-policy>deny</inventory-policy>
                <compare-at-price type="decimal" nil="true" />
                <inventory-management nil="true" />
                <taxable type="boolean">true</taxable>
                <id type="integer">112957692</id>
                <grams type="integer">0</grams>
                <sku />
                <option1>First</option1>
                <option2 nil="true" />
                <fulfillment-service>manual</fulfillment-service>
                <option3 nil="true" />
                <inventory-quantity type="integer">1</inventory-quantity>
            </variant>
            <variant>
                <price type="decimal">20.0</price>
                <position type="integer">2</position>
                <created-at type="datetime">2011-08-02T12:06:42-04:00</created-at>
                <title>Second</title>
                <requires-shipping type="boolean">true</requires-shipping>
                <updated-at type="datetime">2011-08-02T12:06:42-04:00</updated-at>
                <inventory-policy>deny</inventory-policy>
                <compare-at-price type="decimal" nil="true" />
                <inventory-management nil="true" />
                <taxable type="boolean">true</taxable>
                <id type="integer">112957702</id>
                <grams type="integer">0</grams>
                <sku />
                <option1>Second</option1>
                <option2 nil="true" />
                <fulfillment-service>manual</fulfillment-service>
                <option3 nil="true" />
                <inventory-quantity type="integer">1</inventory-quantity>
            </variant>
        </variants>
        <images type="array" />
        <options type="array">
            <option>
                <name>Title</name>
            </option>
        </options>
    </product>

    You can apply this pattern for retrieving items with specific IDs to other resources in the API.

    Creating a New Item

    Let's quickly look over the HTTP verbs and how they're applied when working with Shopify's RESTful API:

    Verb How it's used
    GET "Read". In the Shopify API, the GET verb is used to get information about shops and related things such as customers, orders, products, blogs and so on.

    GET operations are most often used to get a list of items ("Get me a list of all the products my store carries"), an individual item ("Get me the customer with this particular ID number) or to conduct a search ("Get me a list of the products in my store that come from a particular vendor").
    POST "Create". In the Shopify API, the POST verb is used to create new items: new customers, products and so on.
    PUT "Update". To modify an existing item using the Shopify API, use the PUT verb.
    DELETE "Delete". As you might expect, the DELETE verb is used to delete objects in the Shopify API.

    To create a new item with the Shopify API, use the POST verb and this pattern for the URL:

    • POST api-key:password@shop-url/admin/plural-resource-name.xml (for the XML version)
    • POST api-key:password@shop-url/admin/plural-resource-name.json (for the JSON version)

    Creating a new item also requires providing information about that item. The type of information varies with the item, but it's always in either XML or JSON format, and it's always provided in the request body.

    Let's create a new customer (or more accurately, a new customer record). Here's what we know about the customer:

    • First name: Peter
    • Last name: Griffin
    • Email: peter.lowenbrau.griffin@giggity.com
    • Street address: 31 Spooner Street, Quahog RI 02134
    • Phone: 555-555-1212

    This is enough information to create a new customer record (I'll cover the customer object, as well as all the others, in more detail in future articles). Here's that same information in JSON, in a format that the API expects:

    {
      "customer": {
        "first_name": "Peter",
        "last_name": "Griffin",
        "email": "peter.lowenbrau.griffin@giggity.com",
        "addresses": [{
            "address1": "31 Spooner Street",
            "city": "Quahog",
            "province": "RI",
            "zip": "02134",
            "country": "US",
            "phone": "555-555-1212"
        }]
      }
    }

    Since I've got the customer info in JSON format, I'll use the JSON URL for this API call:

    POST api-key:password@shop-url/admin/customers.json

    Here's how we make the call using Chrome REST Console. The URL goes into the Request URL field of the Target section:

    ...while the details of our new customer go into the RAW Body field of the Body section. Make sure that the Content-Type field has the correct content-type selected; in this case, since we're sending (and receiving) JSON, the content-type should be application/json:

    A press of the POST button at the bottom of the page sends the information to the server, and the results are displayed in the Response section:

    Here's the response header:

    Status Code: 200
    Date: Wed, 03 Aug 2011 20:39:13 GMT
    Content-Encoding: gzip
    Transfer-Encoding: chunked
    P3P: CP="NOI DSP COR NID ADMa OPTa OUR NOR"
    Status: 200 OK
    HTTP_X_SHOPIFY_API_CALL_LIMIT: 1/3000
    Connection: keep-alive
    X-UA-Compatible: IE=Edge,chrome=1
    X-Runtime: 0.198933
    Server: nginx/0.8.53
    ETag: "0409671d7af84b695d5ded4e93c0917c"
    Vary: Accept-Encoding
    Content-Type: application/json; charset=utf-8
    Cache-Control: max-age=0, private, must-revalidate
    HTTP_X_SHOPIFY_SHOP_API_CALL_LIMIT: 1/300

    The "200" status code means that the operation was successful and we have a new customer in the records.

    Here's the body of the response, which is the complete record of the customer we just created, in JSON format:

    {
        "customer": {
            "accepts_marketing": null,
            "orders_count": 0,
            "addresses": [{
                "company": null,
                "city": "Quahog",
                "address1": "31 Spooner Street",
                "name": "Peter Griffin",
                "zip": "02134",
                "address2": null,
                "country_code": "US",
                "country": "United States",
                "province_code": "RI",
                "phone": "555-555-1212",
                "last_name": "Griffin",
                "province": "Rhode Island",
                "first_name": "Peter"
            }],
            "tags": "",
            "id": 51827492,
            "last_name": "Griffin",
            "note": null,
            "email": "peter.lowenbrau.griffin@giggity.com",
            "first_name": "Peter",
            "total_spent": "0.00"
        }
    }

    Let's create another new item. This time, we'll make it a product and we'll do it in XML.

    Let's say this is the information we have about the product:


    • Title: Stumpy Pepys Toy Drum SP-1
    • Vendor: Spinal Tap
    • Product type: Drum
    • Description: This drum is so good...you can't beat it!

    Here's that same information in XML, in a format that the API expects:

    <?xml version="1.0" encoding="UTF-8"?>
    <product>  
      <body-html>This drum is so good...<strong>you can't beat it!!</strong></body-html>  
      <product-type>drum</product-type>  
      <title>Stumpy Pepys Toy Drum SP-1</title>  
      <vendor>Spinal Tap</vendor>
    </product>

    (As I wrote earlier, I'll cover the product object and all its fields in an upcoming article.)

    Since I've got the product info in JSON format, I'll use the XML URL for this API call:

    POST api-key:password@shop-url/admin/customers.json

    Let's make the call using the Chrome REST Console again. The URL goes into the Request URL field of the Target section:

    ...while the details of our new product go into the RAW Body field of the Body section. Make sure that the Content-Type field has the correct content-type selected; in this case, since we're sending (and receiving) XML, the content-type should be application/xml:

    Once again, a press of the POST button at the bottom of the page sends the information to the server, and the results appear in the Response section:

    Here's the response header:

    Status Code: 201
    Date: Wed, 03 Aug 2011 22:20:17 GMT
    Transfer-Encoding: chunked
    Status: 201 Created
    HTTP_X_SHOPIFY_API_CALL_LIMIT: 1/3000
    Connection: keep-alive
    X-UA-Compatible: IE=Edge,chrome=1
    X-Runtime: 0.122462
    Server: nginx/0.8.53
    Content-Type: application/xml; charset=utf-8
    Location: https://nienow-kuhlman-and-gleason1524.myshopify.com/admin/products/48339792
    Cache-Control: no-cache
    HTTP_X_SHOPIFY_SHOP_API_CALL_LIMIT: 1/300

    Don't sweat that the code is 201 and not 200 -- all 2xx code mean success. I'm going to go bug the core team and ask why successfully creating a new customer gives you a 200 (OK) code and successfully creating a new product gives you 201 (created).

    Here's the response body -- it's the complete record of the product we just created, in XML format:

    <?xml version="1.0" encoding="UTF-8"?>
    <product>
        <product-type>drum</product-type>
        <handle>stumpy-pepys-toy-drum-sp-1</handle>
        <created-at type="datetime">2011-08-03T18:20:17-04:00</created-at>
        <body-html>This drum is so good...<strong>you can't beat it!!</strong></body-html>
        <title>Stumpy Pepys Toy Drum SP-1</title>
        <template-suffix nil="true" />
        <updated-at type="datetime">2011-08-03T18:20:17-04:00</updated-at>
        <id type="integer">48339792</id>
        <vendor>Spinal Tap</vendor>
        <published-at type="datetime">2011-08-03T18:20:17-04:00</published-at>
        <tags />
        <variants type="array">
            <variant>
                <price type="decimal">0.0</price>
                <position type="integer">1</position>
                <created-at type="datetime">2011-08-03T18:20:17-04:00</created-at>
                <title>Default</title>
                <requires-shipping type="boolean">true</requires-shipping>
                <updated-at type="datetime">2011-08-03T18:20:17-04:00</updated-at>
                <inventory-policy>deny</inventory-policy>
                <compare-at-price type="decimal" nil="true" />
                <inventory-management nil="true" />
                <taxable type="boolean">true</taxable>
                <id type="integer">113348882</id>
                <grams type="integer">0</grams>
                <sku />
                <option1>Default</option1>
                <option2 nil="true" />
                <fulfillment-service>manual</fulfillment-service>
                <option3 nil="true" />
                <inventory-quantity type="integer">1</inventory-quantity>
            </variant>
        </variants>
        <images type="array" />
        <options type="array">
            <option>
                <name>Title</name>
            </option>
        </options>
    </product>

    Next Time...

    In the next installment, we'll look at modifying and deleting existing objects in your shop.

    Continue reading

    Developing Shopify Apps, Part 2: Exploring the API

    Developing Shopify Apps, Part 2: Exploring the API

    In the previous article in this series, we did the following:

    1. Joined Shopify's Partner Program
    2. Created a new test shop
    3. Launched a new test shop
    4. Added an app to the test shop
    5. Played around with a couple of quick API calls through the browser

    In this article, we'll take a look at some of the calls that you can make to Shopify's API and how they relate to the various parts of your shop. This will give you an idea of what Shopify shops are like as well as show you to control them programmatically.

    My Shop, via the Admin Page

    I've set up a test shop called Joey's World O' Stuff for this series of articles. Feel free to visit it at any time. It lives at this URL:

    https://nienow-kuhlman-and-gleason1524.myshopify.com/

    If you followed along with the last article, you also have a test shop with a similarly URL. Test shop URLs are randomly generated. The shops themselves are meant to be temporary; they're for experimenting with themes, apps and content. We'll work with real shops later in this series, and they'll have URLs that make sense.

    If you were to visit the URL for my test shop at the time of this writing, you'd see something like this:

    The admin panel for any shop can be accessed by adding /admin to the end of its base URL. If you're not logged into your shop, you'll be sent to the login page. If you're already logged in, you'll be sent to the admin panel's home page, which should look something like this:

    I've highlighted the upper right-hand corner of the admin panel home page, where the Preferences menu is. Click on Preferences, then in the menu that pops up, click on General Settings:

    You should now see the General Settings page, which should look like this:

    The fields on the screen capture of this page are a little small, so I'll list them below:

    • Shop name: Joey's World O' Stuff
    • Email: joey@shopify.com
    • Shop address:
      • Street: 31 Spooner Street
      • Zip: 02903
      • City: Quahog
      • Country: United States
      • State: Rhode Island
      • Phone: (555) 555-5555
    • Order ID formatting: #{{number}}
    • Timezone: (GMT-05:00) Eastern Time (US & Canada)
    • Unit system: Imperial system (Pound, inch)
    • Money formatting: ${{amount}}
    • Checkout language: English

    That's the information for my shop as seen through admin panel on the General Settings page. 

    Just as the admin panel lets you manually get and alter information about your shop, the Shopify API lets applications do the same thing, programatically. What we just did via the admin panel, we'll now do using the API. But first, let's talk about the API.

    Detour: A RESTafarian API

    The Shopify API is RESTful, or, as I like to put it, RESTafarian. REST is short for REpresentational State Transfer, and it's an architectural style that also happens to be a simple way to make calls to web services. I don't want to get too bogged down in explaining REST, but I want to make sure that we're all on the same page.

    The Shopify API exposes a set of resources, each of which is some part of a shop. Here's a sample of some of the resources that the API lets you access:

    • Shop: The general settings of your shop, which include things like its name, its owner's name, address, contact info and so on.
    • Products: The set of products available through your shop.
    • Images: The set of images of your store's products.
    • Customers: The set of your shop's customers.
    • Orders: The orders placed by your customers.
    (If you'd like to see the full list of resources, go check out the API Documentation. They're all listed in a column on the right side of the page.)

    To do things with a shop, whether it's to get the name of the shop or the contact email of its owner, get a list of all the products available for sale, or find out which customers are the biggest spenders, you apply verbs to resources like the ones listed above. In the case of RESTful APIs like Shopify's, those verbs are the four verbs of HTTP:

    1. GET: Read the state of a resource and not make any changes to it in the process. When you type an URL into your browser's address bar and press Enter, your browser responds by GETting that page.
    2. POST: Create a new resource (I'm simplifying here quite a bit; POST is the one HTTP verb with a lot of uses). When you fill out and submit a form on a web page, your browser typically uses the POST verb.
    3. PUT: Update an existing resource.
    4. DELETE: Delete an existing resource.

    Here's an example of putting resources and verbs together. Suppose you were writing an app that let a shopowner do bulk changes to the products in his or her store. Your app would need to access the Products resource and then apply the four HTTP verbs in these ways:

    • If you wanted to get information about one or more products in a shop, whether it's the list of all the products in the shop, information about a single product, or a count of all the products in the shop, you'd use the GET verb and apply it to the Products resource.
    • If you wanted to add a product to a shop, you'd use the POST verb and apply it to the Products resource.
    • If you wanted to modify an existing product in a shop, you'd use the PUT verb and apply it to the Products resource.
    • If you wanted to delete a product from a shop, you'd use the DELETE verb and apply it to the Products resource.
    Keep in mind that not all resources respond to all four verbs. Certain resources like Shop aren't programmatically editable, and as a result, it doesn't respond to PUT.

    My Shop, via the API

    Let's get the same information that we got from the admin panel's General Settings page, but using the API this time. In order to do this, we need to know two things:

    1. Which resource to access. In this case, it's pretty obvious: the Shop resource.
    2. Which verb to use. Once again, it's quite clear: GET. (Actually, if you check the API docs, it's very clear; it's the only verb that the Shop resource responds to.) 

    The nice thing about GET calls to web APIs is that you can try them out very easily: just type them into your browser's address bar!

    You specify a resource with its URL (or more accurately, URI). That's what the the "R" in URL and URI stand for: resource. To access a Shopify resource, you need to form its URI using this general format:

    api-key:password@shop-url/admin/resource-name.resource-type

    Where:

    • api-key is the API key for your app (when you create an app, Shopify's back end generates a unique API key for it)
    • password is the password for your app (when you create an app, Shopify's back end generates a password for it)
    • shop-url is the URL for your shop
    • resource-name is the name of the resource
    • resource-type is the type of the resource; this is typically either xml if you'd like the response to be given to your app in XML format or json is you'd like the response to be in JSON.

    You can find the API key and password for your app on the Shopify API page of your shop's admin panel. You can get there via this URL:

    shop-url/admin/api

    where shop-url is your shop's URL. You can also get there by clicking on the Apps menu, which is located near the upper right-hand corner of every page in the admin panel and selecting Manage Apps:

    You'll see a list of sets of credentials, one set for each app. Each one looks like this:

    You can copy the API key and password for your app from this box. Better yet, you can copy the example URL, shown below, and then edit it to create the API call you need:

    The easiest way to get general information about your shop is to:


    1. Copy the example URL
    2. Paste it into your browser's address bar
    3. Edit the URL, changing orders.xml to shop.xml
    4. Press Enter

    You should see a result that looks something like this:

    <shop>
      <name>Joey's World O' Stuff</name>
      <city>Quahog</city>
      <address1>31 Spooner Street</address1>
      <zip>02903</zip>
      <created-at type="datetime">2011-07-22T14:43:21-04:00</created-at>
      <public type="boolean">false</public>
      <country>US</country>
      <domain>nienow-kuhlman-and-gleason1524.myshopify.com</domain>
      <id type="integer">937792</id>
      <phone>(555) 555-5555</phone>
      <source nil="true"/>
      <province>Rhode Island</province>
      <email>joey@shopify.com</email>
      <currency>USD</currency>
      <timezone>(GMT-05:00) Eastern Time (US & Canada)</timezone>
      <shop-owner>development shop</shop-owner>
      <money-format>${{amount}}</money-format>
      <money-with-currency-format>${{amount}} USD</money-with-currency-format>
      <taxes-included type="boolean">false</taxes-included>
      <tax-shipping nil="true"/>
      <plan-name>development</plan-name>
    </shop>

    Note that what you get back is a little more information than what you see on the admin panel's General Settings page; you also get some information that you'd find on other admin panel pages, such as the currency your shop uses and how taxes are applied to your products' and shipping prices.

    You can also get your shop information in JSON by simply changing the last part of the URL from shop.xml to shop.json. You'll see a result like this:

    {"shop":
      {"address1":"31 Spooner Street",
       "city":"Quahog",
       "name":"Joey's World O' Stuff",
       "plan_name":"development",
       "shop_owner":"development shop",
       "created_at":"2011-07-22T14:43:21-04:00",
       "zip":"02903",
       "money_with_currency_format":"${{amount}} USD",
       "money_format":"${{amount}}",
       "country":"US",
       "public":false,
       "taxes_included":false,
       "domain":"nienow-kuhlman-and-gleason1524.myshopify.com",
       "id":937792,
       "timezone":"(GMT-05:00) Eastern Time (US \u0026 Canada)",
       "tax_shipping":null,
       "phone":"(555) 555-5555",
       "currency":"USD",
       "province":"Rhode Island",
       "source":null,
       "email":"joey@shopify.com"}
    }

    (Okay, I formatted this one so it would be easy to read. It was originally one long line; easy for computers to read, but not as easy for humans.)

    Other Things in My Shop, via the API

    If you followed my steps from the previous article in this series, your shop should have a small number of predefined products in your store. You can look at all the shop's products by taking the URL you just used and changing the last part of the URL to products.xml.

    Here's a shortened version of the output I got:

    <products type="array">
      <product>
        <product-type>Shirts</product-type>
        <handle>multi-channelled-executive-knowledge-user</handle>
        <created-at type="datetime">2011-07-22T14:43:24-04:00</created-at>
        <body-html>
          ...really long description here...
        </body-html>
        <title>Multi-channelled executive knowledge user</title>
        <template-suffix nil="true"/>
        <updated-at type="datetime">2011-07-22T14:43:24-04:00</updated-at>
        <id type="integer">47015882</id>
        <vendor>Shopify</vendor>
        <published-at type="datetime">2011-07-22T14:43:24-04:00</published-at>
        <tags>Demo, T-Shirt</tags>
        <variants type="array">
          <variant>
            <price type="decimal">19.0</price>
            <position type="integer">1</position>
            <created-at type="datetime">2011-07-22T14:43:24-04:00</created-at>
            <title>Medium</title>
            <requires-shipping type="boolean">true</requires-shipping>
            <updated-at type="datetime">2011-07-22T14:43:24-04:00</updated-at>
            <inventory-policy>deny</inventory-policy>
            <compare-at-price type="decimal" nil="true"/>
            <inventory-management nil="true"/>
            <taxable type="boolean">true</taxable>
            <id type="integer">110148372</id>
            <grams type="integer">0</grams>
            <sku/>
            <option1>Medium</option1>
            <option2 nil="true"/>
            <fulfillment-service>manual</fulfillment-service>
            <option3 nil="true"/>
            <inventory-quantity type="integer">5</inventory-quantity>
          </variant>
        </variants>
        <images type="array"/>
        <options type="array">
        <option>
        <name>Title</name>
        </option>
        </options>
      </product>
      ...
      (more products here)
      ...
    </products>

    If you want this information in JSON format, all you need to do is change the URL so that it ends with .json instead of .xml.

    Try Out the Other Resources

    There are a number of Shopify API resources that you can try out -- try out some GET calls on these:

    • articles.xml and articles.json
    • assets.xml or assets.json
    • blogs.xml or blocks.json
    • comments.xml or comments.json
    • customers.xml or customers.json

    There are more resources that you can access through GET; the Shopify Wiki lists them all in the right-hand column. Try them out!

    Next: Graduating to a real store, and trying out the POST, PUT and DELETE verbs.

    [ This article also appears in Global Nerdy. ]

    Continue reading

    Prognostication For Fun And Profit: States And Events

    Prognostication For Fun And Profit: States And Events

    Measuring stuff is hard, even when it stands still. When things change over time the situation gets even worse. 

    I'm Ben Doyle, research scientist and data prophet at Shopify. Over the next little while I'm planning to go into some detail about how we're calculating some common ecommerce metrics (like customer count, churn rate, lifetime value, etc.) here at Shopify.  Most of these metrics come down to fancy ways of counting, but the devil is in the details. 
    For Instance...
    You have a table of users and a boolean flag that says whether each of them is a paying customer. Counting your customers is as simple as counting the rows where the flag is set. Or is it? What if you want to plot your growth over time? You can replace the flag with a date range and count how many of these ranges include a date in question. What if your customer definition changes, perhaps due to a change in your business model? You have to go back through your whole history, which might be a problem if your new definition relies on information you have just started collecting. If you are doing exploratory work you might not even know what data you need yet. 
    These problems have solutions but clearly there's work to do. We need to untangle our methods and sort out our definitions. I thought I'd kick things off by clarifying the elements most basic to counting: intervals and points.

    Intervals and Points


    In the diagram above the dark blue lines represent intervals and the light blue circles represent points (the points should really only be a single pixel but are large so we can see them). In general you need intervals to measure points and you need points to measure intervals. So in a) three of the four intervals overlap with the point and in b) three of the four points overlap with the interval.

    States And Events

    In more familiar terms the space we're usually talking about is time, our points are events and our intervals are states. Events can be found in server logs or rows in a transactional database.  So every time a purchase is made or a signup form is completed, an event is created. At minimum the event type and a timestamp will be recorded, though the event will usually be associated with a user or other entity.

    A state history is often the result of a state machine as Willem discussed in a recent post. For example a subscriber can be subscribed to one or many of several subscription packages. Then keeping a history of those packages means having a start and end date for each package, for each subscriber. States must at minimum have a start and end timestamp and a type, though an entity is usually recorded as well.

    Example: Accounting

    Understanding states and events clarifies the distinction between different sorts of counting. For example standard accounting practise is to report both a balance sheet and an income statement.  

    The balance sheet is a snapshot. This means it is an event in time being used to count states. Consider an account that had $100 in the interval between May 1st and June 18th.  It had $100 on an event date of June 1st, which lies within the interval. The state of every account can be assessed on a given date, and a total reported.

    The income statement reports changes over a period of time. It uses an interval to count a collection of events.  So if there was a withdraw event on June 19th of $5 and deposits on the 20th and 21st of $10, the income statement for June would be $10 + $10 - $5 = $15. If these were the only events for June the balance sheet for July 1st should be $115. 

    These are two different and complementary ways to look at the problem of counting, over time. In theory if you add up all of your income statements before a date and time the sum should be the same as your current balance at that date and time. So the results are equivalent. Unfortunately if there are errors or omissions in your data discrepancies will arise between the two methods.

    Metrics


    Perhaps the most basic metric to track is "How many customers did we have on date X?". If you have a software system already set up that consistently tracks the states of your users (e.g. visitor, customer, churned), and the events that can influence them (e.g. signups, payments, cancellations) the answer can be easy. Like in the finance example above you can present a balance sheet for any point in time, counting customer states at a point in time. In status quo situations this will probably be the preferred method.

    It's nice to know that there is an alternative at hand for when things get complicated though. Counting the events that change customer states will give you greater flexibility to adapt to changes. So if you suddenly decide you want to count “happy” customers separately, looking at the events that indicate happiness - as opposed to "customer-ness" is a good place to start.

    For an example of the above you could count the number of events signifying happiness (e.g. logins or site interactions) within 30 days of a particular date. This could serve as a happiness metric for that date. Since you are counting the states directly it's easy to add flourishes like having some events count more than others, having their weights decay over time, or even incorporating events from an entirely different source. This flexibility especially helps if you are trying to build up a metric to serve as a proxy for or to predict another metric. For example you could use the weights on your event types as adjustable parameters in fitting a model. Continuing with the example, our happiness metric could be constructed to predict customer churn. I'll go into more detail about these sorts of analyses in future posts.

    When In Doubt, Start With Events

    If you are running a store it's nice to know how many customers you have, but it's more important to know how many sales you've made. The definition of customer is abstract and can be arbitrary. Do they need to make a purchase? Several purchases? Do coupons or promotions count? When do they cease to be a customer? In contrast, sales events are much harder to argue about, so they make a great basis for metrics. I hope this article has left you with some insight into the seemingly simple act of counting and welcome questions or comments.

    Continue reading

    Developing Shopify Apps, Part 1: The Setup

    Developing Shopify Apps, Part 1: The Setup

    What is a Shopify App?

    Shopify is a pretty capable ecommerce platform on its own, and for a lot of shopowners, it's all they need for their shops. However, there are many cases where shopowners need features and capabilities that don't come "out of the box" with Shopify. That's what apps are for: to add those extra features and capabilities to Shopify.

    Apps make use of the Shopify API, which lets you programatically access a shop's data -- items for sale, orders and so on -- and take most of the actions available to you from a shop's control panel. An app can automate a tedious or complex task for a shopowner, make the customer's experience better, give shopowners better insight into their sales and other data, or integrate Shopify with other applications' data and APIs in useful ways.

    Here are some apps that you can find at the Shopify App Store. These should give you an idea of what's possible:

    • Jilt: This is an app that makes shopowner's lives easier. It helps turn abandoned carts -- they arise when a customer shops on your store, puts items in the cart and then for some reason never completes the purchase -- into orders. It sends an email to customers who've filled carts but never got around to buying their contents after a specified amount of time. It's been shown to recover sales that would otherwise never have been made.
    • Searchify: Here's an app that makes the customer experience more pleasant. It's an autocompleting search box that uses the data in your shop that lets customers see matching products as they type. The idea is that by making your shop easier to search, you'll get more sales.
    • Beetailer: A good example of taking the Shopify API and combining it with other APIs. It lets your customers comment on your shop's products and share opinions about them on social media sites like Facebook and Twitter. You can harness the power of word-of-mouth marketing to get people to come to your store!

    Shopify apps offer benefits not just for shopowners and their customers, but for developers as well. Developers can build custom private apps for individual shopowners, or reach the 16,000 or so Shopify shopowners by selling their apps through the App Store. The App Store is a great way to get access to some very serious app customers: after all, they're looking for and willing to spend money on apps that make their shops more profitable. Better still, since a healthy app ecosystem is good for us as well, we'll be more than happy to help showcase and promote your apps.

    If you've become convinced to write an app, read on, and follow this series of articles. I'll explore all sorts of aspects of Shopify app-writing, from getting started to selling and promoting your apps. Enjoy!

    Step 1: Become a Partner

    Before you can write apps, you have to become a Shopify Partner. Luckily, it's quick and free to do so. Just point your browser at the Shopify Partners login page (https://app.shopify.com/services/partners/auth/login):

    Once you're there, click on the Become a partner button. That will take you to the Become a Shopify Partner form, a single page in which you provide some information, such as your business' name, your URL and if you're into Shopify consulting, app development or theme design as well as some contact info:

    When you submit this form, you're in the club! You're now a Shopify partner and ready to take on the next step: creating a test shop.

    Step 2: Create a New Test Shop

    Test shops are a feature of Shopify that let you try out store themes and apps without exposing them to the general public. They're a great way to familiarize yourself with Shopify's features; they're also good "sandboxes" in which you can safely test app concepts.

    The previous step should have taken you to your Shopify partner account dashboard, which looks like this:

    It's time to create a test shop. Click on the Test Shops tab, located not too far from the top of the page:

    You'll be taken to the My Test Shops page, where you manage your test shops. It looks like this:

    As you've probably already figured out, you can create a new test shop by either:


    • Clicking on the Create a new Test Shop button near the upper left-hand corner of the page
    • Clicking on the big Create your first Test Shop button in the middle of the page. I'm going to click that one...

    You should see this message near the top of the page for a few moments:

    ...after which you should see the My Test Shops page now sporting a test shop in a list.

    Test shops are given a randomly-generated name. When you decide to create a real, non-test, customer-facing shop, you can name it whatever you want from the start.

    In this example, the test shop is Nienow, Kuhlman and Gleason (sounds like a law firm!). Click on its name in the list to open its admin panel.

    Step 3: Launch Your Test Shop

    Here's what the admin panel for a newly-created shop looks like:

    If you're wondering what the URL for your shop is, it's at the upper left-hand corner fo the page, just to the right of the Shopify wordmark. Make a note of this URL; you'll use it often.

    Just below that, you'll see your shop's password:

    (Don't bother trying to use this password to get to my test shop; I've changed it.)

    You're probably looking at that big text and thinking "7 steps? Oh Shopify, why you gotta be like that?"

    Worry not. Just below that grey bar showing the seven steps you need to get a store fully prepped is a link that reads Skip setting up your store and launch it anyway. Click it:

    This will set up your test store with default settings, a default theme and even default inventory. You'll be taken to the admin panel for your shop, which looks like this:

    This is the first thing shopowners see when they log into their shops' admin panels.

    Now, let's add an app!

    Step 4: Add an App

    Click on the Apps tab, located near the upper right-hand corner of the page. A menu will pop up; click on its Manage Apps menu item:

    You'll be taken to the Installed Applications page, shown below:

    For the purposes of this exercise, a private app -- one that works only for this shop -- will do just fine. Click on the click here link that immediately followed the line Are you a developer interested in creating a private application for your shop?:

    You'll get taken to the Shopify API page, which manages the API keys and other credentials for your test shop's apps:

    For each app in a shop, there's a corresponding set of credentials. Let's generate some credentials now -- click the Generate new application button:

    The page will refresh and you'll see a big grey box containing all sorts of credentials:

    Here's a closer look at the credentials:

    You now have credentials that an app can use. Guess what: we're ready to make some API calls!

    A Quick Taste!

    Here's a quick taste of what we'll do in the next installment: play around with the Shopify API. Just make sure you've gone through the steps above first.

    The Shopify API is RESTful. One of the benefits of this is that you can explore parts of it with some simple HTTP GET calls, which you can easily make by typing into your browser's address bar. These calls use the following format:

    api-key:password@your-test-shop-URL/admin/resource.xml
    You could type in the URL yourself, but I find it's far easier to simply copy the Example URL from the lost of credentials for your apps and editing it as required:

    For example, if you want some basic information about your shop, copy the Example URL, paste it into your browser's address bar and change orders.xml to shop.xml. Press Enter; you should see results that look something like this:

     Nienow, Kuhlman and Gleason Boston 185 Rideau Street K1N 5X8 2011-07-22T14:43:21-04:00 false US nienow-kuhlman-and-gleason1524.myshopify.com 937792 555 555 5555  Massachusetts joey@joeydevilla.com USD (GMT-05:00) Eastern Time (US & Canada) development shop ${{amount}} ${{amount}} USD false  development 

    How about the products in your shop? There are some: since we skipped the full setup, your test shop comes pre-populated with some example products. Copy the Example URL, paste it into your browser's address bar and change orders.xml to products.xml. You should get a result that looks something like this:

      Shirts multi-channelled-executive-knowledge-user 2011-07-22T14:43:24-04:00 
    

    So this is a product.

    The text you see here is a Product Description. Every product has a price, a weight, a picture and a description. To edit the description of this product or to create a new product you can go to the Products Tab of the administration menu.

    Once you have mastered the creation and editing of products you will want your products to show up on your Shopify site. There is a two step process to do this.

    First you need to add your products to a Collection. A Collection is an easy way to group products together. If you go to the Collections Tab of the administration menu you can begin creating collections and adding products to them.

    Second you’ll need to create a link from your shop’s navigation menu to your Collections. You can do this by going to the Navigations Tab of the administration menu and clicking on “Add a link”.

    Good luck with your shop!

    Multi-channelled executive knowledge user 2011-07-22T14:43:24-04:00 47015882 Shopify 2011-07-22T14:43:24-04:00 Demo, T-Shirt 19.0 1 2011-07-22T14:43:24-04:00 Medium true 2011-07-22T14:43:24-04:00 deny true 110148372 0 Medium manual 5
    ...

    Check out the API Reference for more API calls you can try. That's what we'll be covering in the next installment, in greater detail. Happy APIing!

    Continue reading

    Why developers should be force-fed state machines

    Why developers should be force-fed state machines

    This post is meant to create more awareness about state machines in the web application developer crowd. If you don’t know what state machines are, please read up on them first. Wikipedia is a good place to start, as always.

    State machines are awesome

    The main reason for using state machines is to help the design process. It is much easier to figure out all the possible edge conditions by drawing out the state machine on paper. This will make sure that your application will have less bugs and less undefined behavior. Also, it clearly defines which parts of the internal state of your object are exposed as external API.

    Moreover, state machines have decades of math and CS research behind them about analyzing them, simplifying them, and much more. Once you realize that in management state machines are called business processes, you'll find a wealth of information and tools at your disposal.

    Recognizing the state machine pattern

    Most web applications contain several examples of state machines, including accounts and subscriptions, invoices, orders, blog posts, and many more. The problem is that you might not necessarily think of them as state machines while designing your application. Therefore, it is good to have some indicators to recognize them early on. The easiest way is to look at your data model:

    • Adding a state or status field to your model is the most obvious sign of a state machine.
    • Boolean fields are usually also a good indication, like published, or paid. Also timestamps that can have a NULL value like published_at and paid_at are a usable sign.
    • Finally, having records that are only valid for a given period in time, like subscriptions with a start and end date.

    When you decide that a state machine is the way to go for your problem at hand, there are many tools available to help you implement it. For Ruby on Rails, we have the excellent gem state_machine which should cover virtually all of your state machine needs.

    Keeping the transition history

    Now that you are using state machines for modelling, the next thing you will want to do is keeping track of all the state transitions over time. When you are starting out, you may be only interested in the current state of an object, but at some point the transition history will be an invaluable source of information. It allows you to answer all kinds of questions, like: “How long on average does it take for an account to upgrade?”, “How long does it take to get a draft blog post published?”, or “Which invoices are waiting for an initial payment the longest?”. In short, it gives you great insight on your users' behavior.

    When your state machine is acyclic (i.e. it is not possible to return to a previous state) the simplest way to keep track of the transitions is to add a timestamp field for every possible state (e.g. confirmed_atpublished_atpaid_at). Simply set these fields to the current time whenever a transition to the given state occurs.

    However, it is often possible to revisit the same state multiple times. In that case, simply adding fields to your model won’t do the trick because you will be overwriting them. Instead, add a log table in which all the state transitions will be logged. Fields that you probably want to include are the timestamp, the old state, the new state, and the event that caused the transition.

    For Ruby and Rails, Jesse Storimer and I have developed the Ruby gem state_machine-audit_trail to track this history for you. It can be used in unison with the state_machine gem.

    Deleting records?

    In some cases, you may be tempted to delete state machine records from your database. However, you should never do this. For accountability and completeness of your history alone, it is a good practice to never delete records. Instead of removing it, add an error state for any reason you would have wanted to delete a record. A spam account? Don’t delete, set to the spam state. A fraudulent order? Don’t delete, set to the fraud state.

    This allows you to keep track of these problems over time, like: how many accounts are spam, or how long it takes on average to see that an order is fraudulent.

    In conclusion

    Hopefully, reading this text has made you more aware of state machines and you will be applying them more often when developing a web application. Disclaimer: like any technique, state machines can be overused. Developer discretion is advised.

    Continue reading

    ActiveMerchant version 1.9 released

    ActiveMerchant version 1.9 released

    A little bit of background history

    As some of you may know, quite a while ago Shopify extracted all of its payment gateway related code into the open source project ActiveMerchant. Since then the project has evolved into one of the most successful Ruby libraries with over 400 “forks” (meaning that other developers customized the code to their needs and added functionality as required).

    Whenever developers think their changes are a contribution to the official project (e.g. by adding support for a new payment gateway) they send out a so called “pull request” and after we review the implementation we usually merge their changes into ActiveMerchant for everyone to use, meaning all Shopify customers and every programmer using the ActiveMerchant library in their code base will benefit from the new updates.

    Exciting news

    We have been digging around a lot lately for interesting changes to the project and decided to pull some of the bigger ones into the official repository. This resulted in the release of version 1.8.0 last month adding two new gateways.

    Since then we found even more interesting contributions that we decided to merge into the official project and we also developed two offsite integrations internally. The result is that ActiveMerchant (and thus Shopify) now supports seven additional payment gateways for merchants from various countries around the world:

    The seventh new gateway is SagePay Form, an offsite alternative to our existing SagePay implementation, in order to give merchants in the United Kingdom and Ireland the option of using 3D Secure for transactions. 3D Secure is required for certain U.K. credit card brands.

    Open Source is awesome-sauce

    That brings the number of supported gateways in ActiveMerchant to an impressive total of 63. This would have not been possible without the help of an international community so huge thanks go out to all the contributors that helped ActiveMerchant spread around the world!

    If you are aware of any gateway implementations that should make it into the official ActiveMerchant gem let us know and we’ll be happy to review them.

    Continue reading

    Start your free 14-day trial of Shopify